Professional articles | Blog | ARCHLine.XP
How to import and export DWG files in ARCHLine.XP?
One of the most common formats in which we get files from our co-designers is DWG or DXF. In this article, you can read about importing and exporting such files.

The term "DWG" refers to both DWG / DXF files.
- Importing DWG files
Importing a DWG drawing is a geometry import, so we get a drawing with precise dimensions that contains points, lines, polylines, arcs, circles, ellipses, notes, hatches, measurements and raster images.
After starting the program, select DWG from the Import commands in the File menu. Then look for the DWG files that are pre-saved on your computer.
- The preview window
In the pop-up dialog, the first option you can set is the preview. By default, the preview is automatically displayed in the dialog for every file that are smaller than 3MB file. If the size of the file you want to import is larger, you can select the option from the drop-down list to still display the preview. There is a third option when we don't want to see the preview in the dialog at all. If the DWG drawing is very large, loading the preview can be a slow process, but the lack of it makes the correct scaling of the drawing difficult, so we need to check the dimensions after import, increasing the possibility of improperly scaled imports.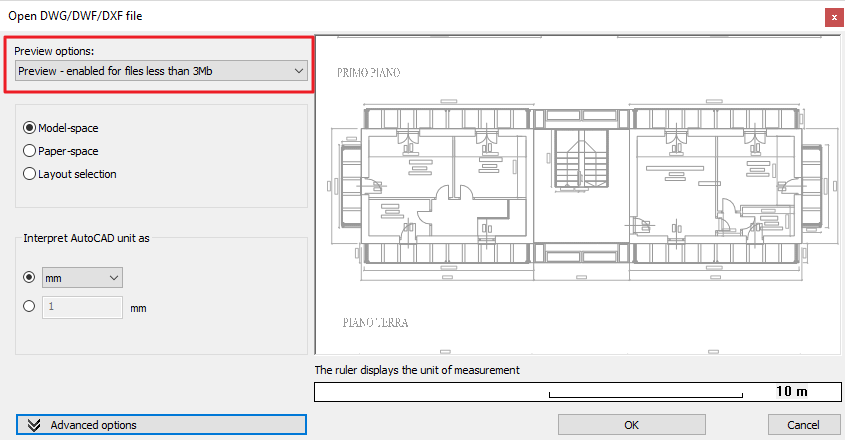
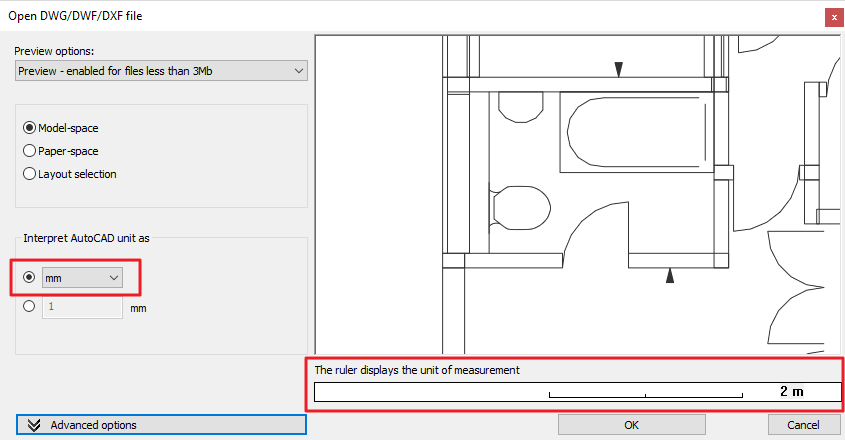
- Scaling
The next step is scaling, or in other words determining the drawing unit. At this point, we need to determine the unit of measurement of the imported DWG drawing. If the file creator has saved the unit of measurement correctly into the file, the program will automatically recognize that unit and scale the preview image. Then there's nothing else to do to than to check if the size is correct. To make this process easier, there is a ruler under the preview window. Based on the unit selected from the drop-down list, the program dynamically displays the measurements. The easiest way to get it right is to look for an item whose size is known or suspected. For example a 900 milimeter door or a 300 milimeter wall thickness. Using the ruler, you can easily decide which unit of measurement is correct. If we do not find it correct, we can choose another one from the drop-down list.
- Additional options and placement
On the Advanced Settings tab, you can set additional import details. For example, you can see the option of ignoring empty layers or displaying circles, lines in 3D. We can set these options in a way that we like.
In the next dialog, if you do not select the place with a new drawing origin option, the drawing will be placed where it was drawn in the original program.
There are DWG files that contain 3D. If your received file has 3D, the program will recognize it and ask in a dialog whether we want to import 3D bodies as well.
However, it is important to know that 3D bodies do not have any material, nor do they have any connection with the 2D.
Therefore, changing 3D bodies will not affect the contents of another window, like a wall that has 2D and 3D views.
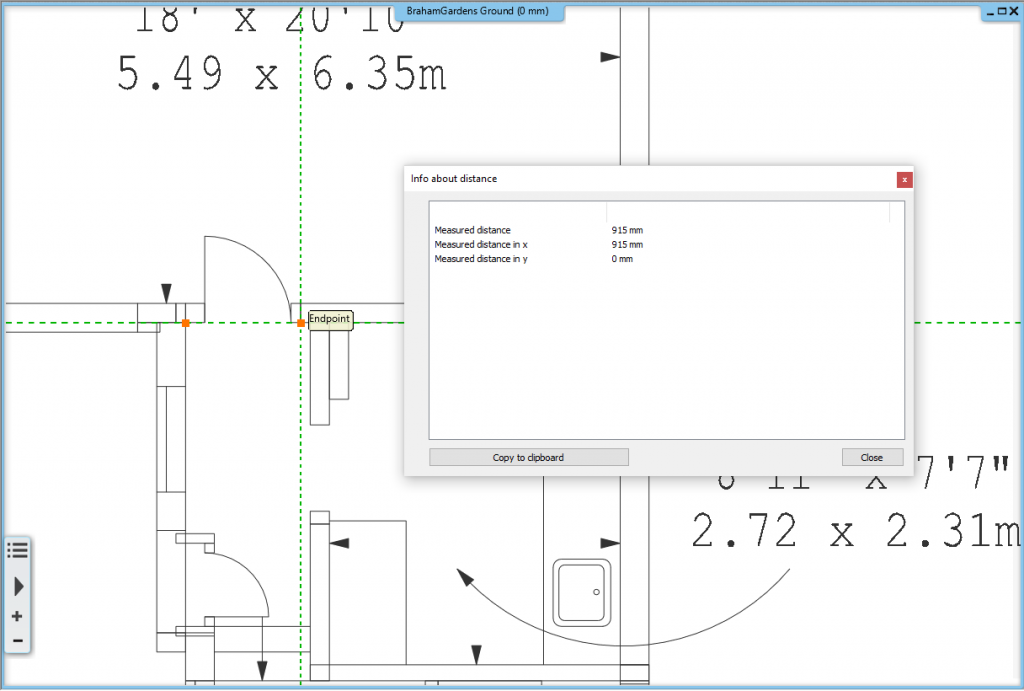
- Checking drawing dimensions
After import, it is always recommended to check the drawing to see if its size is correct. This can be done by measuring one of the typical lengths using the distance tool. The program displays the measured distance, from which it can be decided that the drawing was imported in the correct unit or not. If the size is not within the expected range, the easiest way to correct this is to go back with the UNDO command and then re-import the DWG with the correct unit.
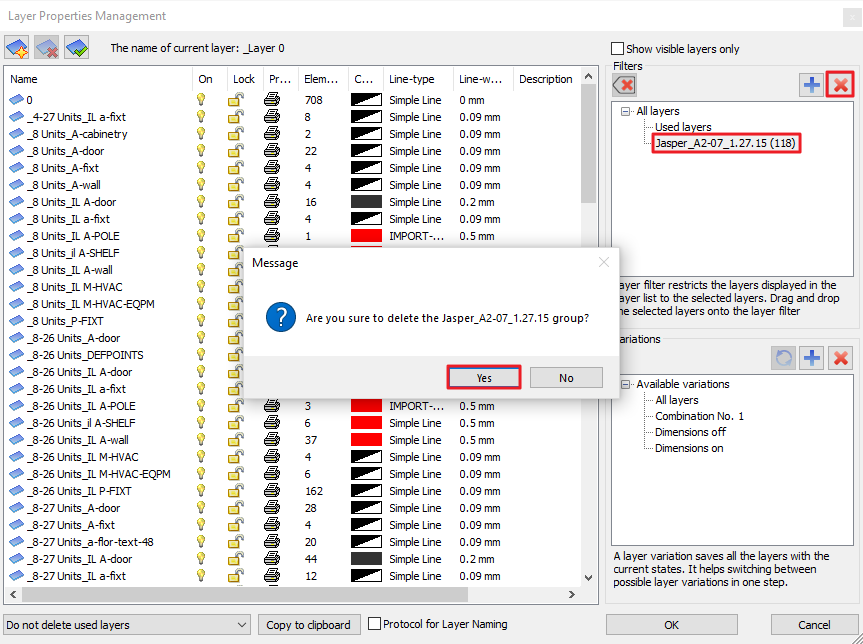
- Where to find the DWG layers
After import, the layers of the DWG drawing are added to the other layers of the project. The layers in the DWG drawing form a new group filter with the name of the DWG drawing. This makes it easier to separate the newly imported layers from existing ones.
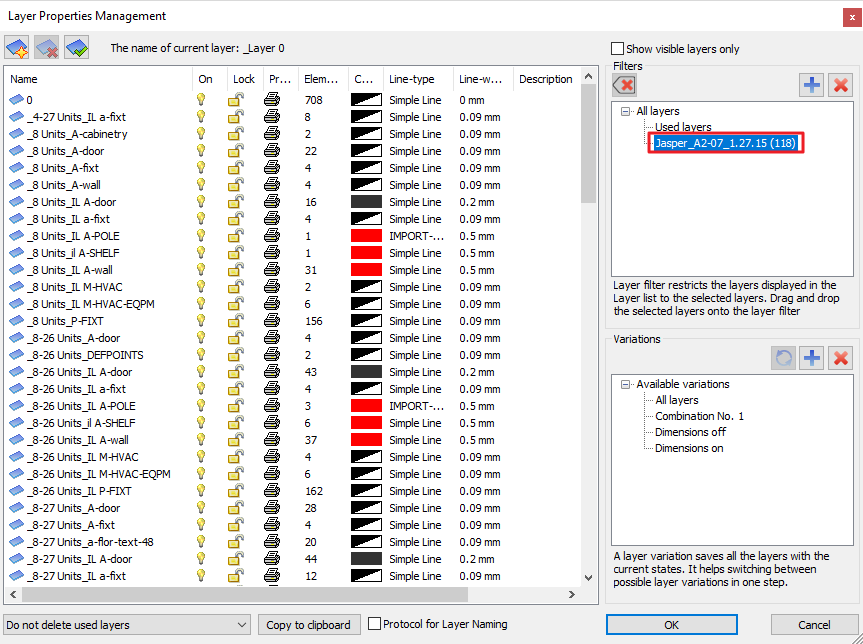
- Removing the DWG drawing
If the DWG import is only temporarily needed for the design, the deletion of the imported items is not sufficient for the complete removal because the DWG layers remain part of the project. To remove it completely, you must select and delete the layers from the layer filters with the name of the DWG drawing. You can read more about layer management HERE.
- Exporting DWG files
To export a DWG file, select DWG from the Export commands in the File menu. The program recognizes that there are more levels in the project and asks you if you want to create a separate DWG file for each level. In the export dialog, you can set the unit of measurement for the export. In the more options dialog, you can choose whether you want to export 3D with the DWG file and if so, which architectural elements. After you have set everything, press OK to export. The DWG file is created on your computer under the location and name that you have specified.
Our article is a quick summary of the import and export of DWG / DXF files. If you are interested in more detail or in processing other file formats watch our free videos on the subject.