Professional articles | Blog | ARCHLine.XP
Everything you need to know about tiling in ARCHLine.XP
ARCHLine.XP's flexible tiling tool has a number of lesser-known features that help you display your ideas in 3D and to make your design even more unique. Let's see what these features are!

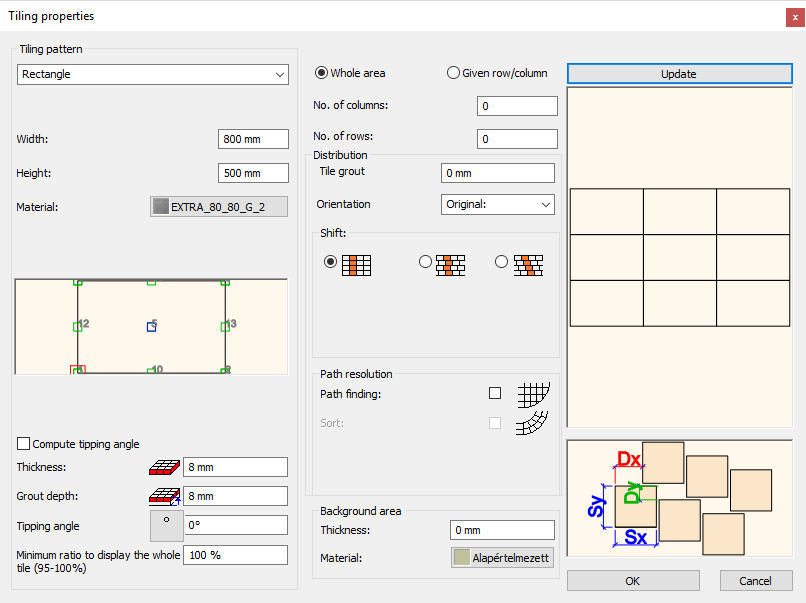
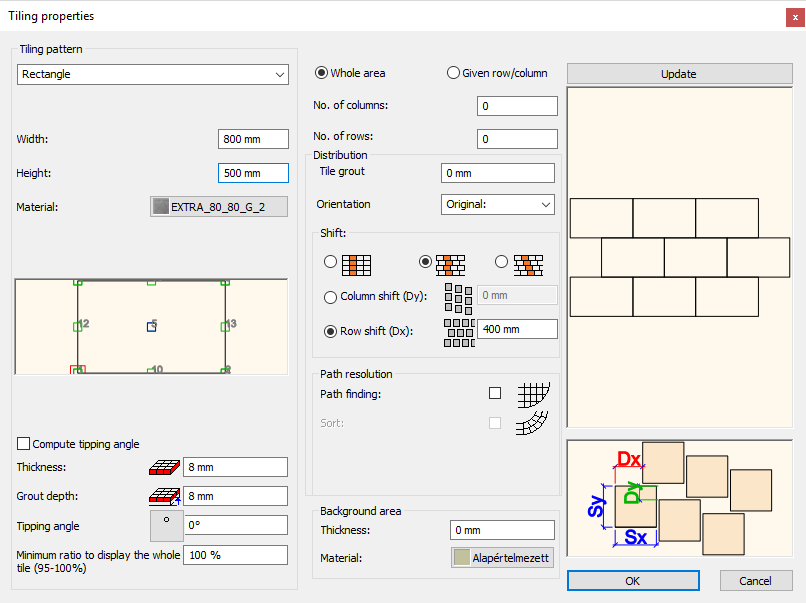
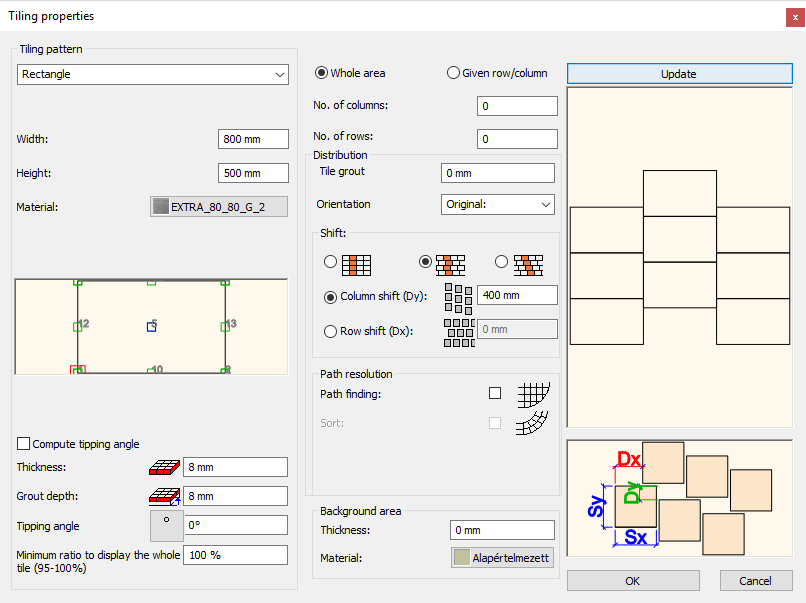
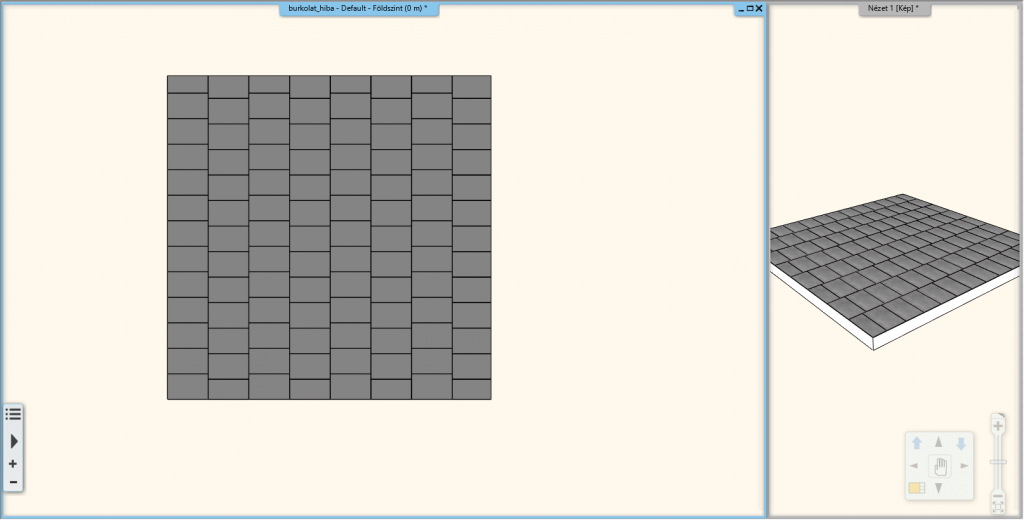
1. Tile shift
In the tiling dialog, you can set a shift between tiles using a switch. For example, we can easily create metro-style tiles. You can choose to shift the row or column, or you can shift both at once.


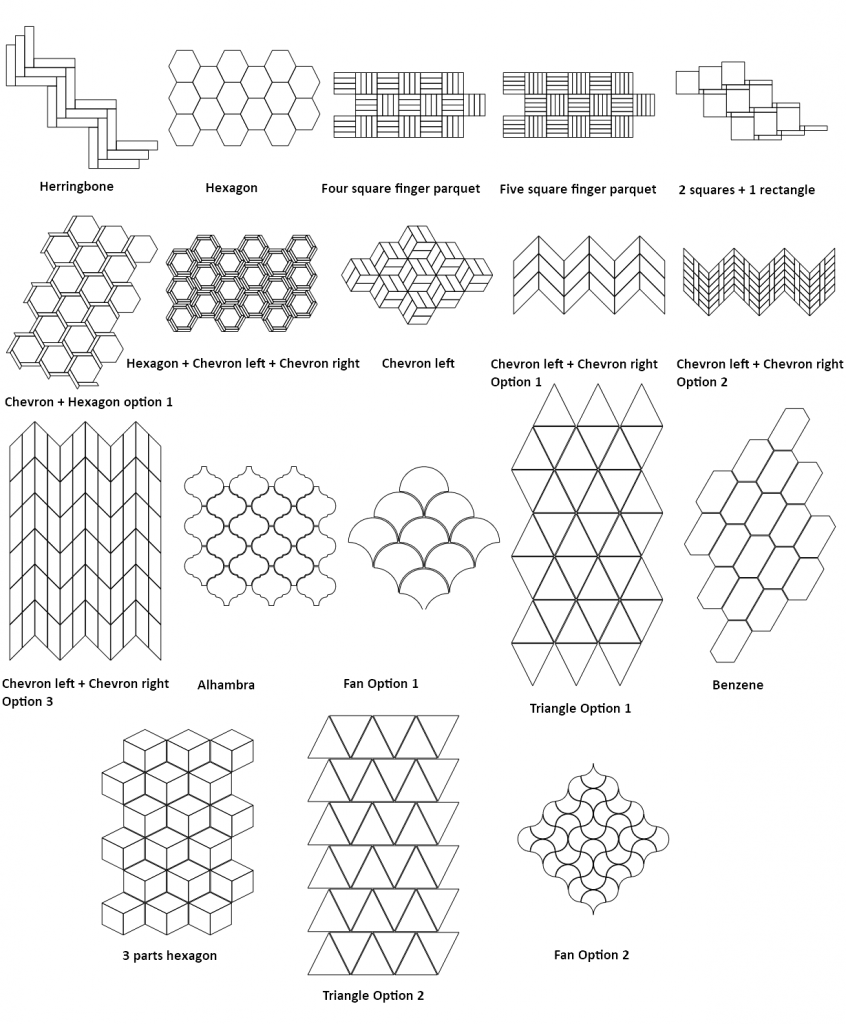
2. Built-in patterns
In ARCHLine.XP, we have the most popular tiling patterns part of the factory library, you can reach them with a single click from the dialog's drop down list. Using these pre-defined patterns is simple and fast. Set the material and the size of the tiles, check the result in the preview window, then close the dialog with the OK button. Determine the starting point of the layout on the surface and place the pattern.
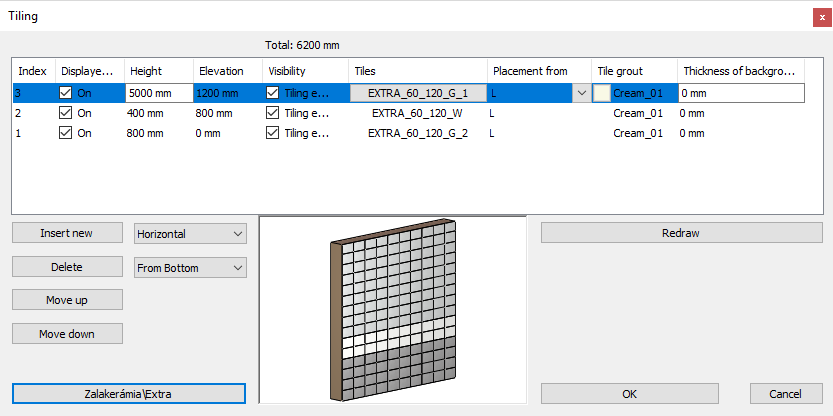
3. Create a tiling style
A tiling pattern consisting of rows or columns of different tiles can be created as a tiling style. You can create a tiling style by using the Tile command in the Properties group of the Interior tab. In the dialog, you can compose a tiling style from rows or columns that can last up to the top of the wall, or end sooner. For each row, we can specify the starting height, which is practically the relative height from the bottom of the wall. Then, knowing the size of the tiles to be placed, we can calculate how high the row should be, in order to have whole, uncut tiles in it. You can also turn off the visibility of the tiles if the situation requires so. Each row can be set with tiles of different sizes and colours, this way we can create thin décor stripes. You can also save the finished style to use in other projects as well.
4. Tiling a given row / column
If you want to create a simple tiling layout, made up by the same tiles, consisting of a few columns and rows, you can activate the Given row / column option in the Tiling dialog. This allows to specify how many rows and columns of tiles we want to place. Close the dialog with the OK button, then specify the starting point of the layout and the program will place the tiling.
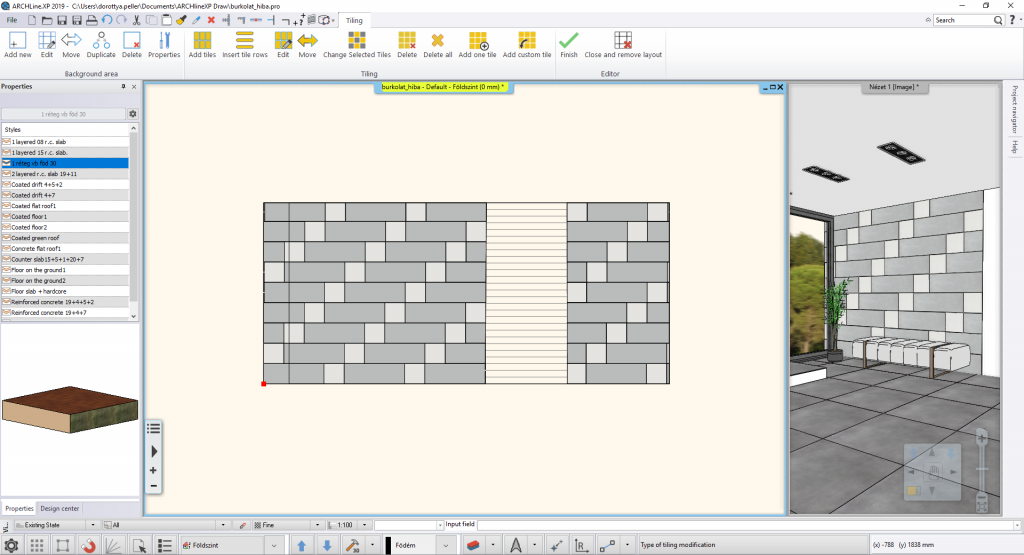
5. Built-in mirror
The mirror can not only be placed as an object, but also as tiling. This is especially useful, if the want to create a mirror, which blends into the wall. To do this, you just have to click with right mouse button on the tiled wall and choose the Tiling on the layout option from the pop-up tiling menu. Use the tools displayed on the Ribbon Bar to draw a new background area on the layout. You can select any base colour for the background area.
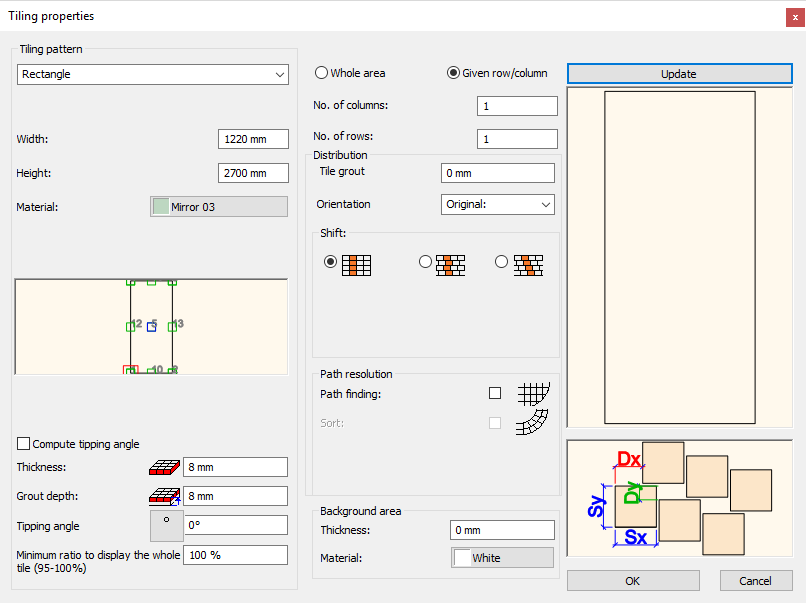
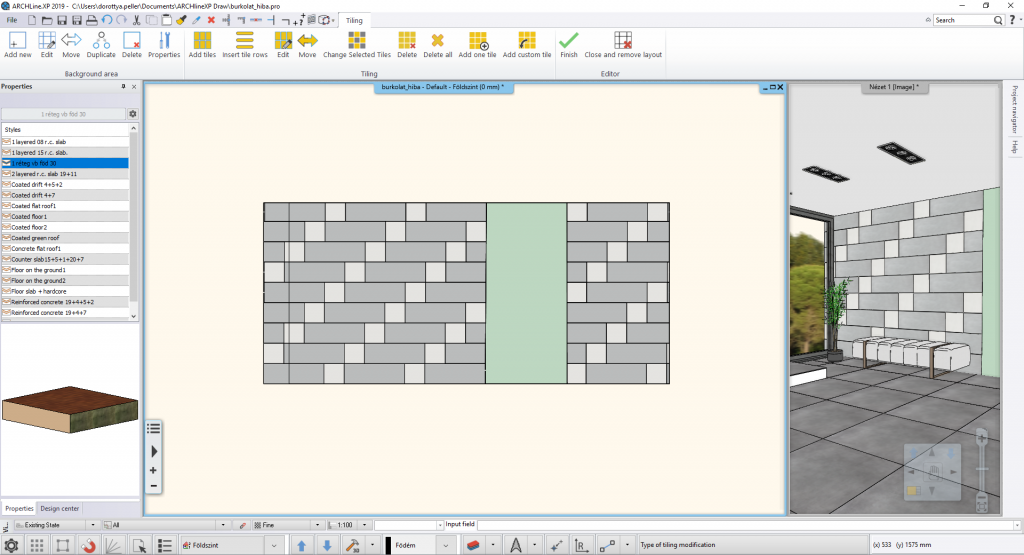
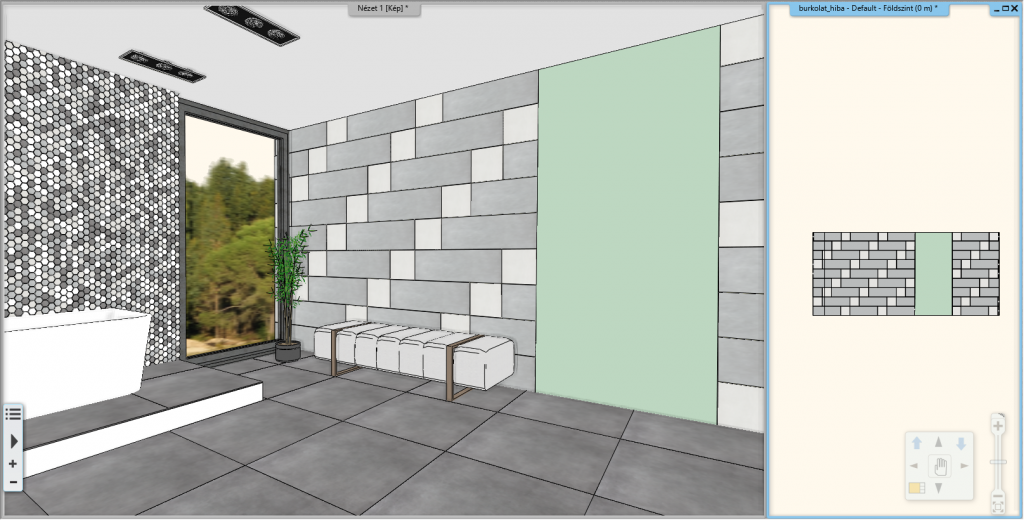
Then place a mirror as a tile with the same size as the background area. To do this, activate the given row / column option in the tiling dialog and set that you want to place 1 row and 1 column. Insert the mirror into the background area, then close the editor mode with the green tick on the Ribbon Bar.
If you want to re-edit the tiling layout in the future, right-click on the layout then select Continue tiling.
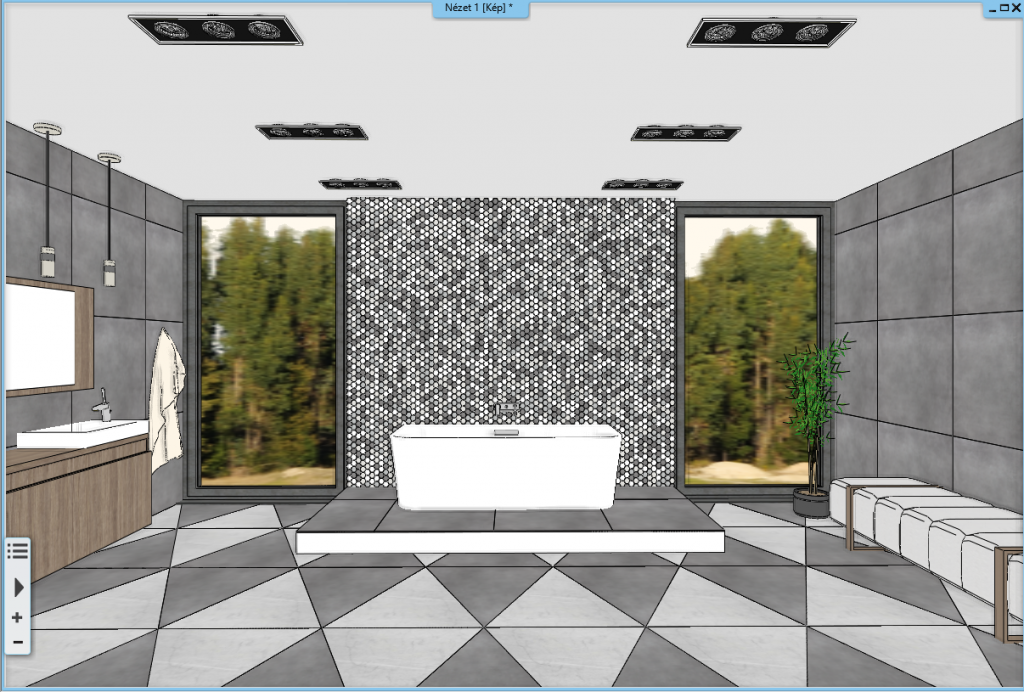
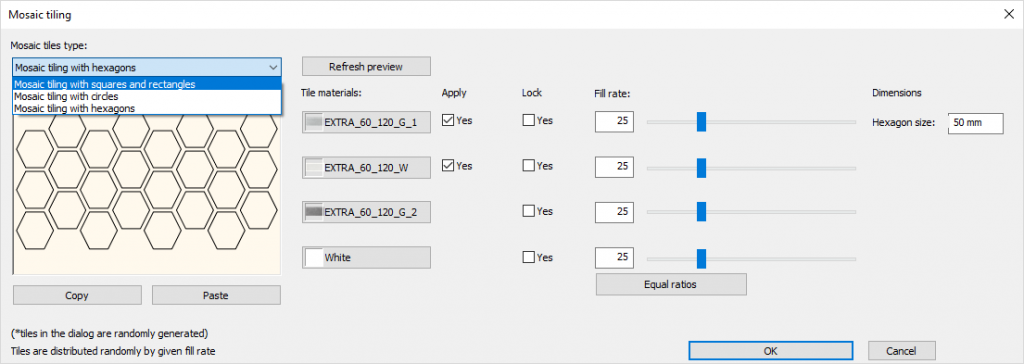
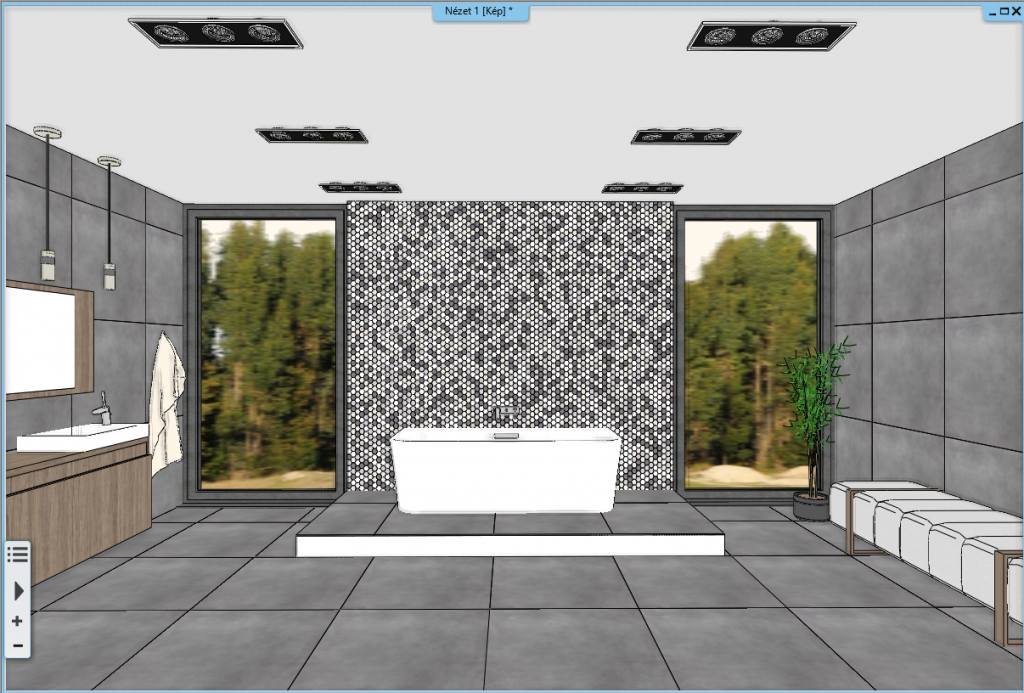
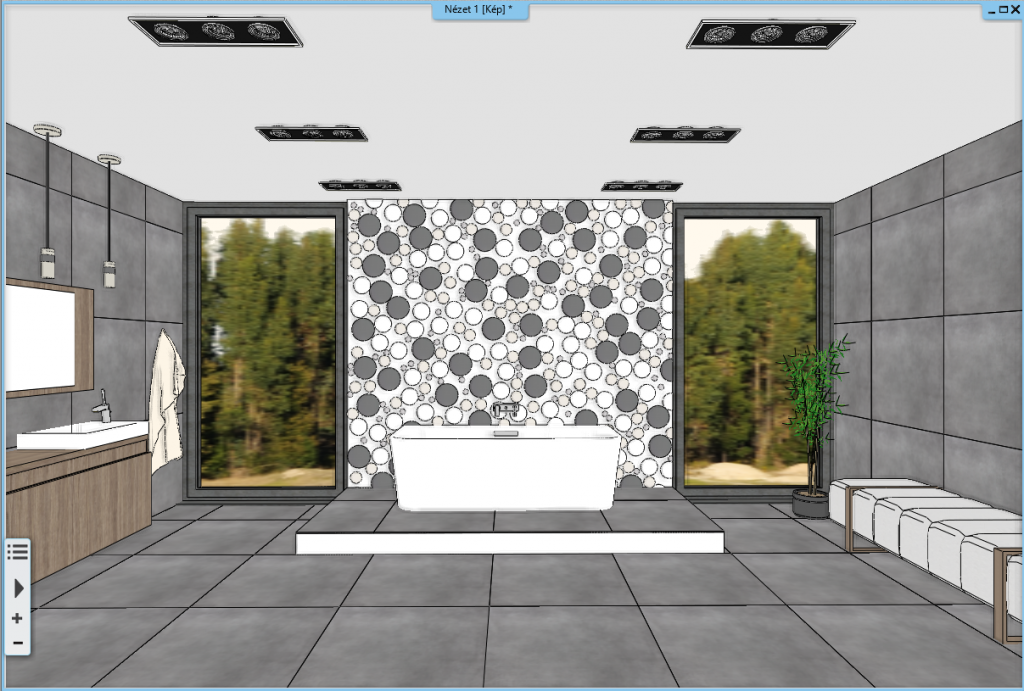
6. Mosaic tiling with rectangles, hexagons and circles
One of the most popular tools of the program is mosaic tiling. It's a lesser known fact that besides the traditional rectangular pattern, we can choose from circular or hexagonal shapes as well. You can select from the three options in the mosaic tiling dialog.
7. Tiling with objects
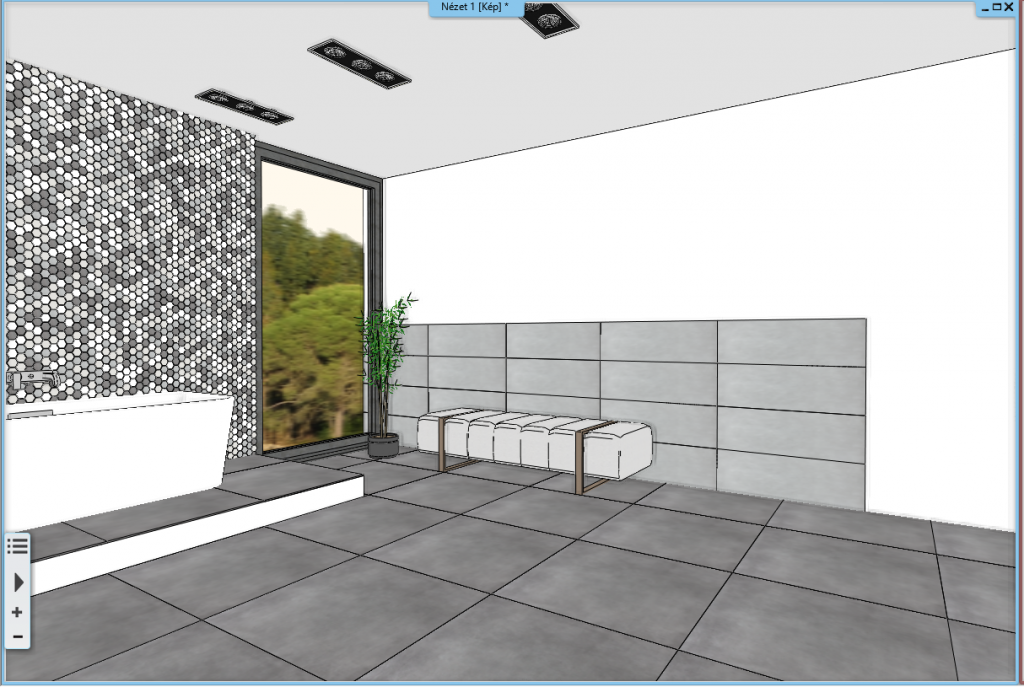
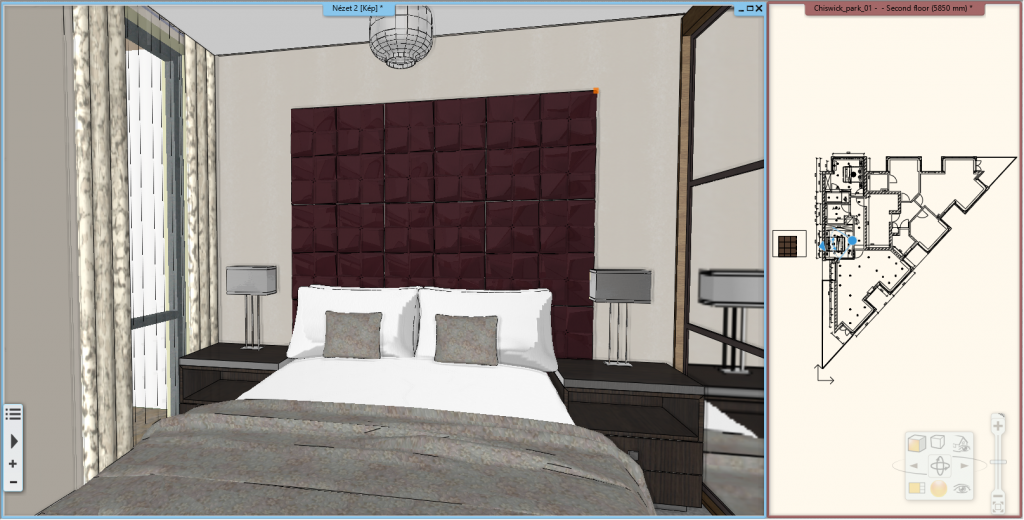
In ARCHLine.XP we can select objects as tiles, too! This feature is particularly helpful when placing various 3D wall panels because they are saved as objects in the library. In order for the tiles to be placed correctly on the surface, the panels must be saved to the library in a horizontal position.
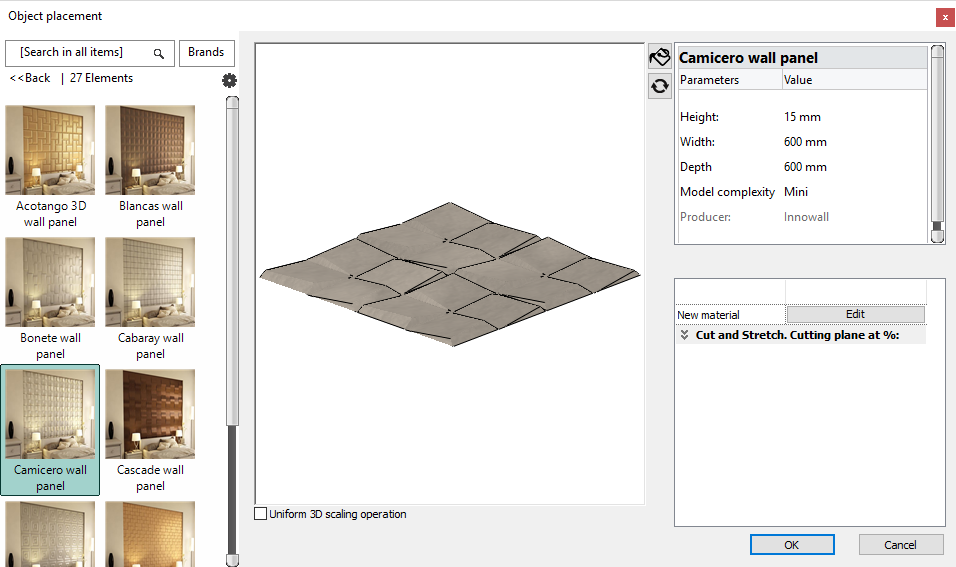
With these panels, we usually want to cover only a part of the wall, so as a first step, add a new background area with the right dimensions. (Based on the information available on the manufacturer's website or from the dimensions of the downloaded panels, we can easily calculate the area needed.) Place the layout on the floor, but in the tiling dialog, choose the Select object option from the drop-down list.

The grout is usually set to 0 in such cases, so we don't have to count with it. You can watch our detailed tutorial video about the subject HERE.
8. Create a new tiling pattern
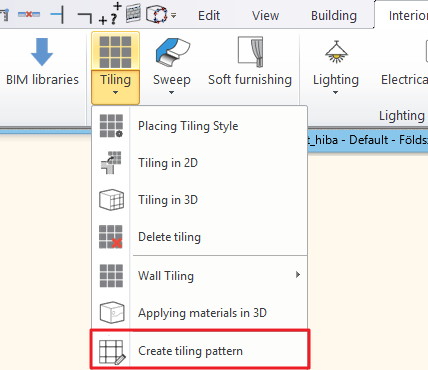
If we want to use a unique tiling pattern, we can draw it in 2D, so only our imagination limits the variations of the tile designs. To be able to use a unique pattern, drawn in the 2D as tiling, we need to create a special group in the library. The tools you need can be found on the Interior tab, in the Tiling group. Here, select the Create Tiling Pattern command.
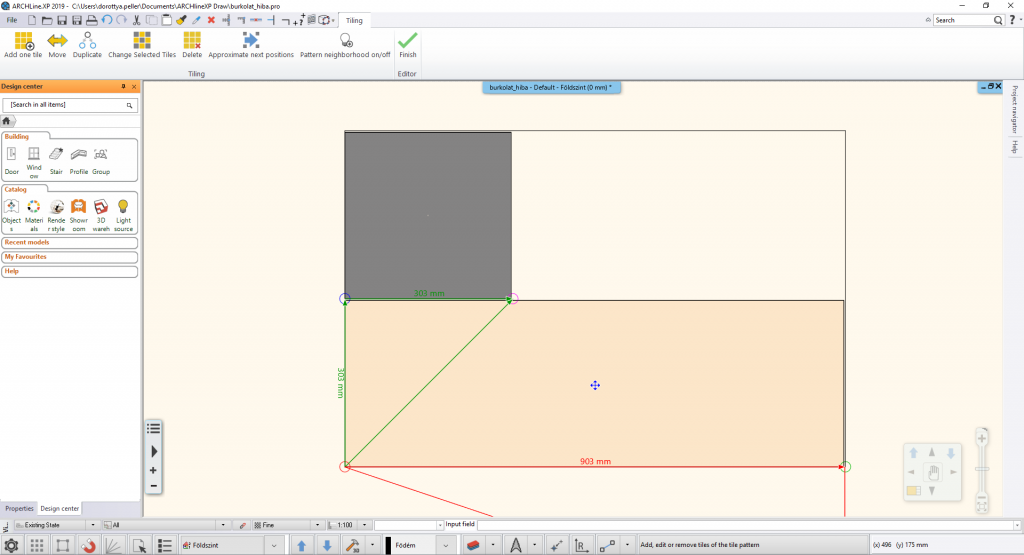
In the first step, define the boundaries of the tiling pattern, and then choose the Add one tile command from the commands that appear on the Ribbon Bar. You can add tiles of any size, shape or colour to your tiling pattern in the already familiar tiling dialog. You can also protrude from the boundaries of the tiling pattern if the repetition requires.

It may be helpful to pre-draw the pattern using the tools on the Drawing tab. It is important to know that when creating a unique tiling pattern, the grout between the tiles should be taken into consideration when drawing the pattern, and the grout between each tiling pattern unit can be added to the extent of the tile shift so that the pattern is uniformly placed on the surface. After placing the tiles, use the green check mark to exit the tiling pattern creator mode. The program will immediately offer a dialog to save the pattern to the Groups.
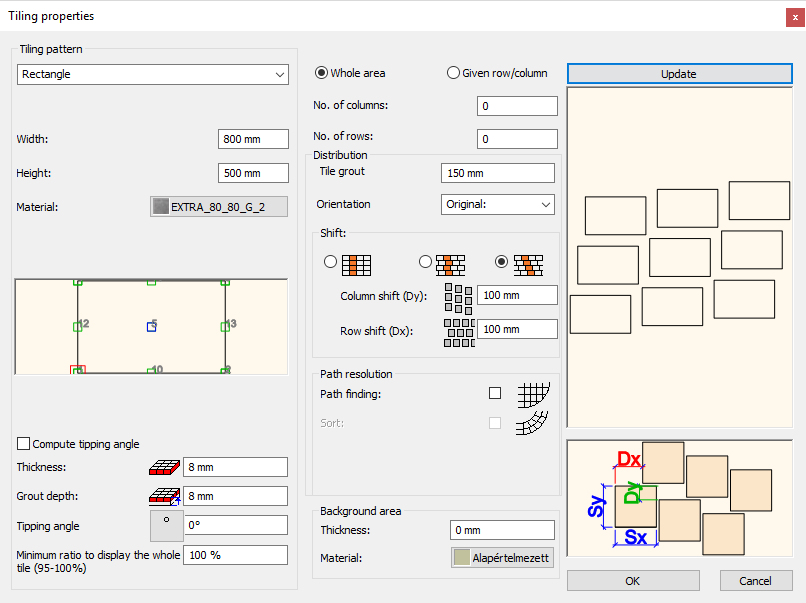
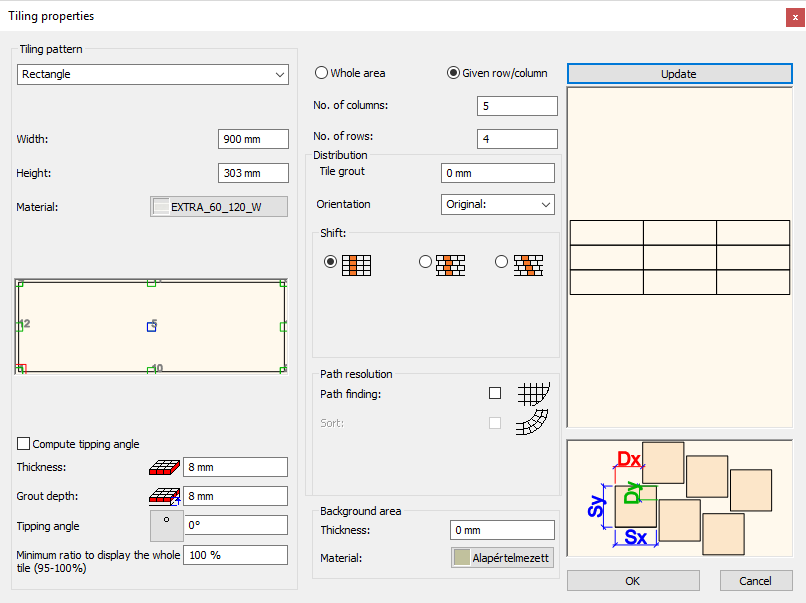
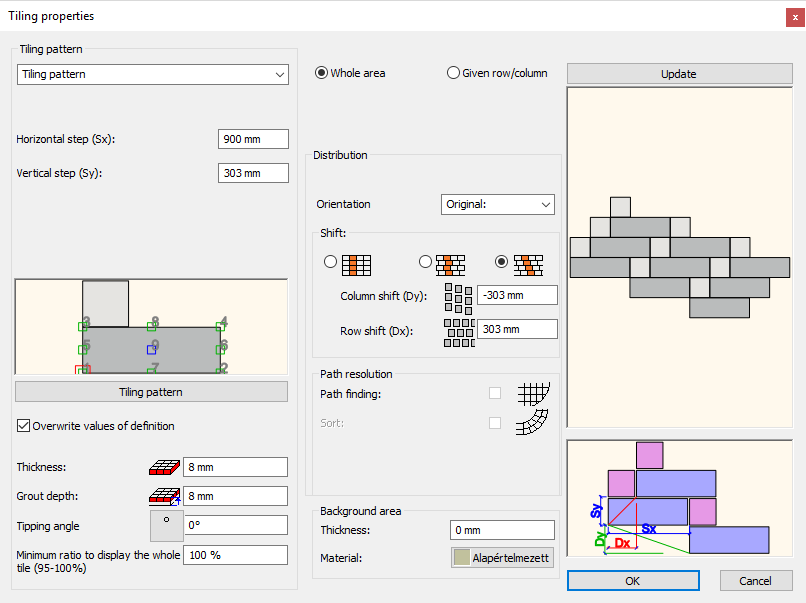
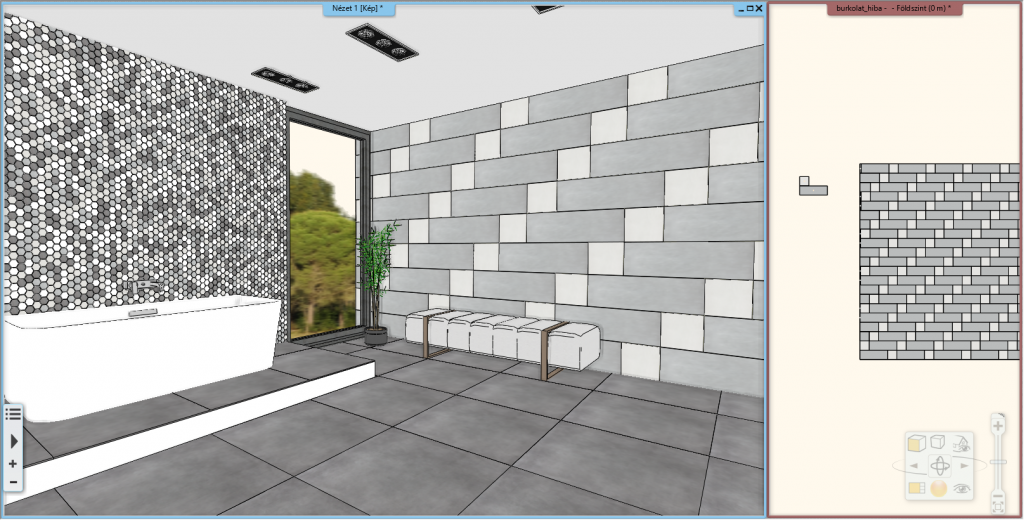
Then, start the tiling command on the appropriate surface, and select the Tiling pattern option in the dialog from the drop-down list. Browse for the pattern you just saved from the library. Activate the row and column shift option to adjust the pattern units. The rows of our pattern in this example should be shifted by 303 millimeters, as the top square tile is 300x300 mm and we add the 3 milimeter grout as well. The columns are shifted downwards by -303 milimeters, as the height of the long, and in this case we add a 3 millimeter grout again. The figure at the right bottom corner of the dialog shows the values, with which the program calculates for shifts.
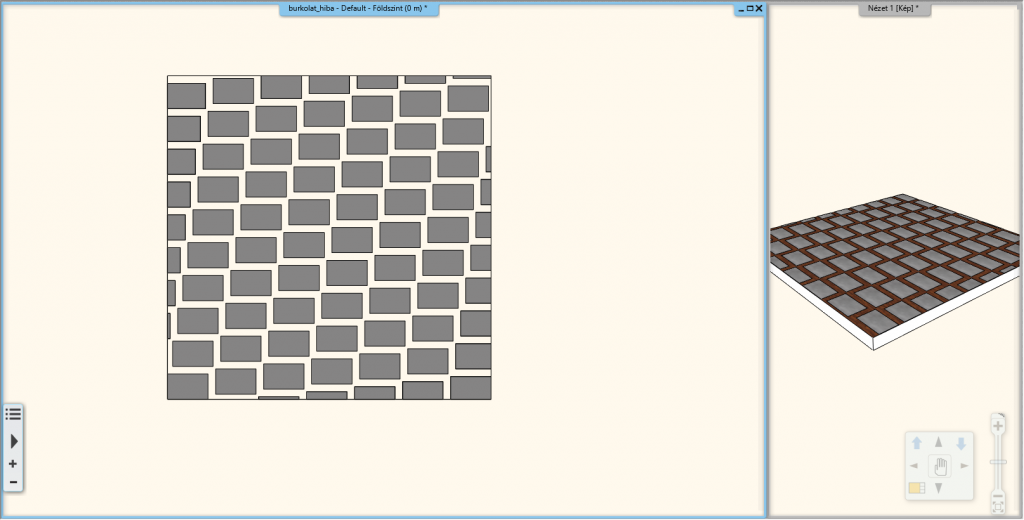
When everything is set correctly, close the dialog, specify the starting point of the tiling and place the pattern on the surface.
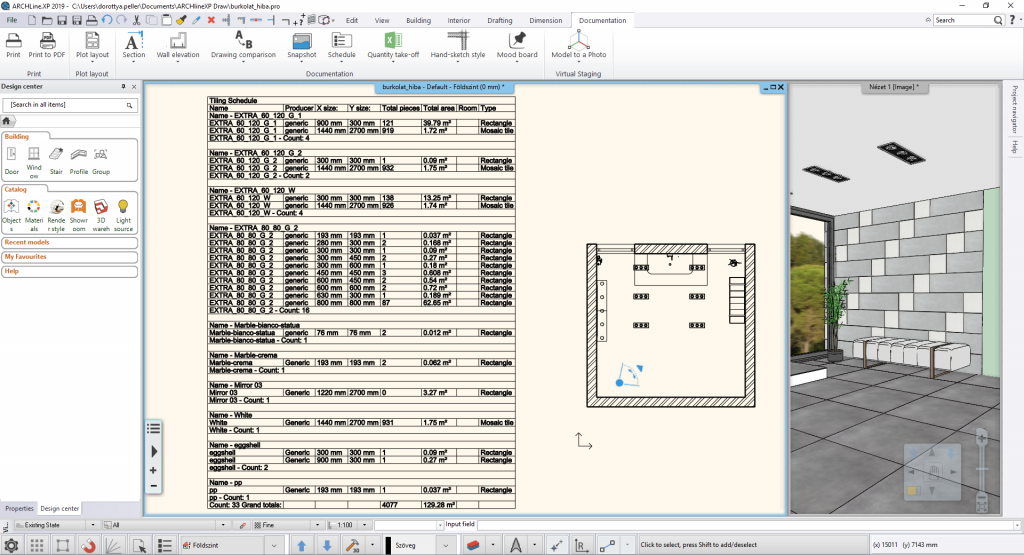
9. Tiling lists
At the end of our work with tiling, we can summarize the tiles used in an Excel table. With a few clicks, the program calculates all the numbers we need. All we have to do is to select the Excel list command from the Quantity take-off group on the Documentation tab. In the dialog, select Tiling.
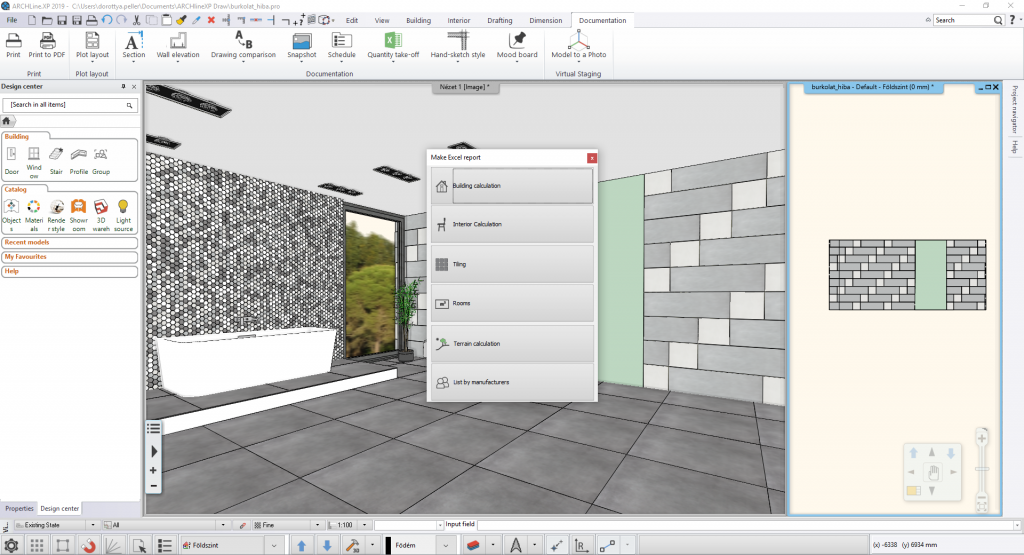
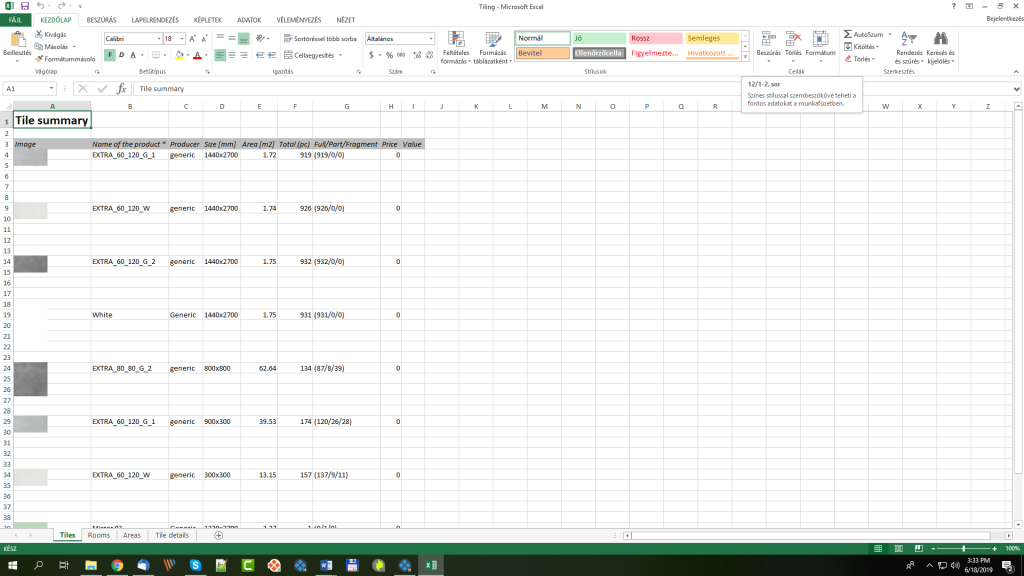
We can filter the list for rooms, different architectural elements, or other surfaces, or even select a particular element. Save your Excel list to your computer, which will open immediately if Office is installed on your computer. There are 4 worksheets in the list, which summarize the whole and fragmented tiles as well, making subsequent tile purchases easier.
The latest feature of ARCHLine.XP 2019 is to create flexible schedules. Using the Schedule tool, you can create unique tables that can be placed in the program, and their contents and row order can be customized. The advantage of these schedules is that they are always up-to-date and follow the changes in the project in real time. Their content always shows the actual, real data, and all changes in the table or in the project take effect back and forth. For more information on how to create and manage schedules, watch our tutorial video HERE.