Case studies
When a Designer’s dream can become reality: ARCHLine.XP + D5 Render
by: Éva Ferenczi
The integration of D5 Render into ARCHLine.XP 2025 is an exciting innovation, as every designer dreams of creating stunning photorealistic visuals. D5 delivers exactly that. It’s not only useful for practicing interior designers and visualization experts, but also for interior design students who are just beginning to explore professional visualization.
As both an educator and designer, I realized right from my first test that this combination enables a faster, more flexible, and visually superior workflow. Let’s take a look at the practical experience!
From the first clicks to the “Wow” moment
Launching D5 Render directly from ARCHLine.XP, I clicked the Start button as soon as the file opened—I was driven by curiosity.
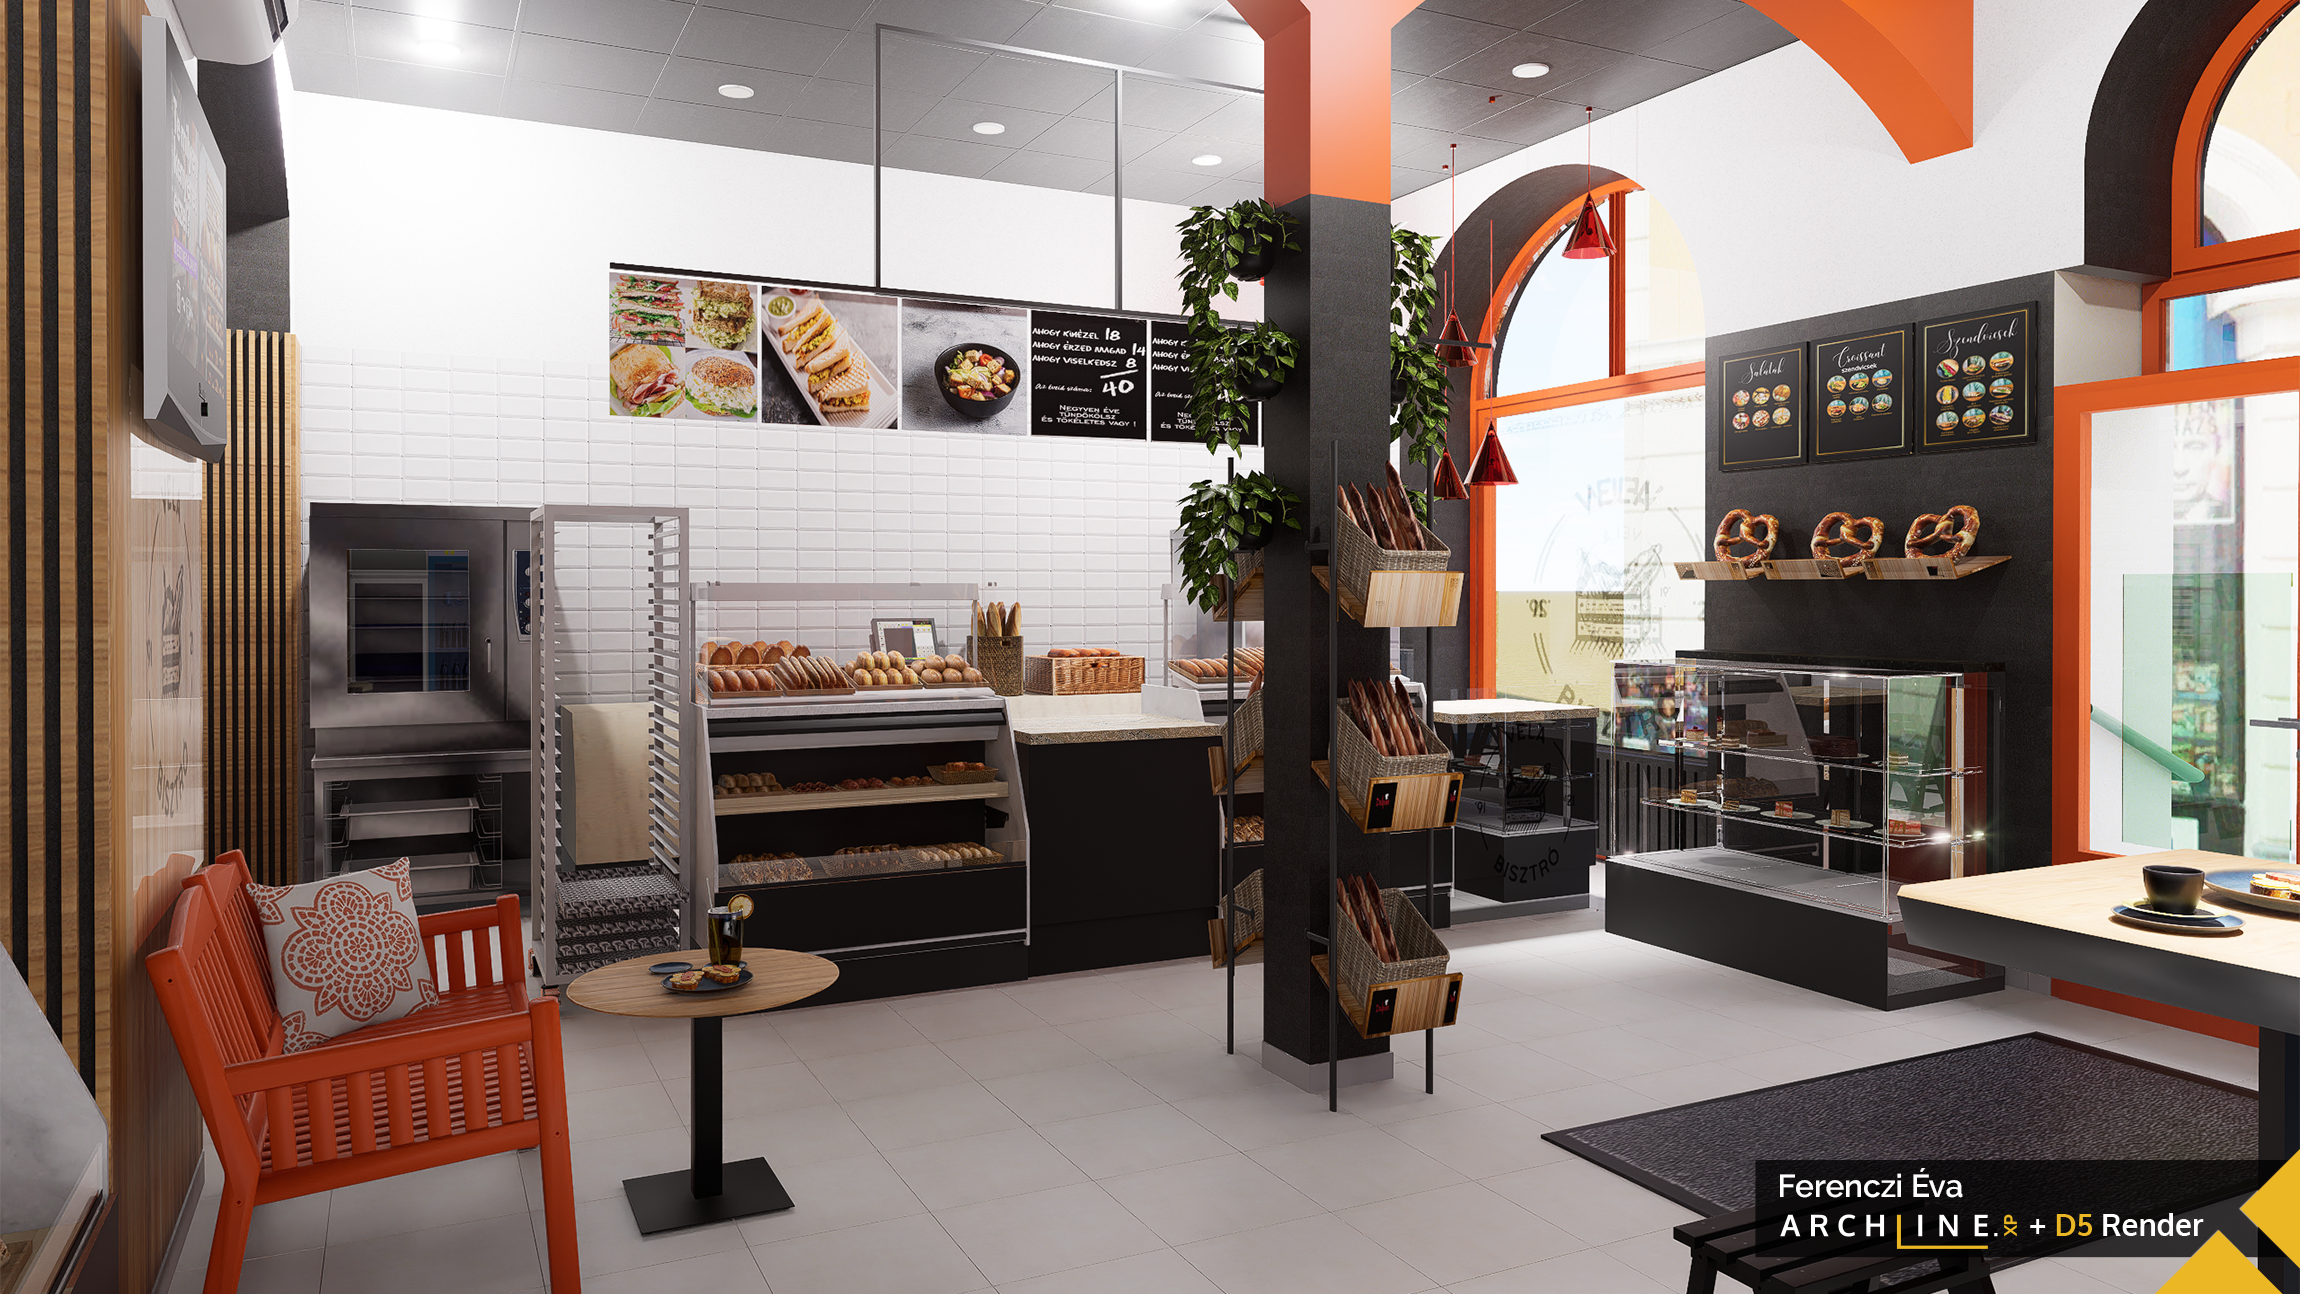
My test project was the interior of a bakery I had presented earlier. The initial render turned out too bright, with some areas overexposed.
The solution?
I deleted all light sources in ARCHLine.XP and placed them entirely in D5. This not only produced a higher-quality image but also cut rendering time in half. An extra advantage is that D5 shows the estimated render time and current progress. In this case, a 2K render finished in 2 minutes and 34 seconds.
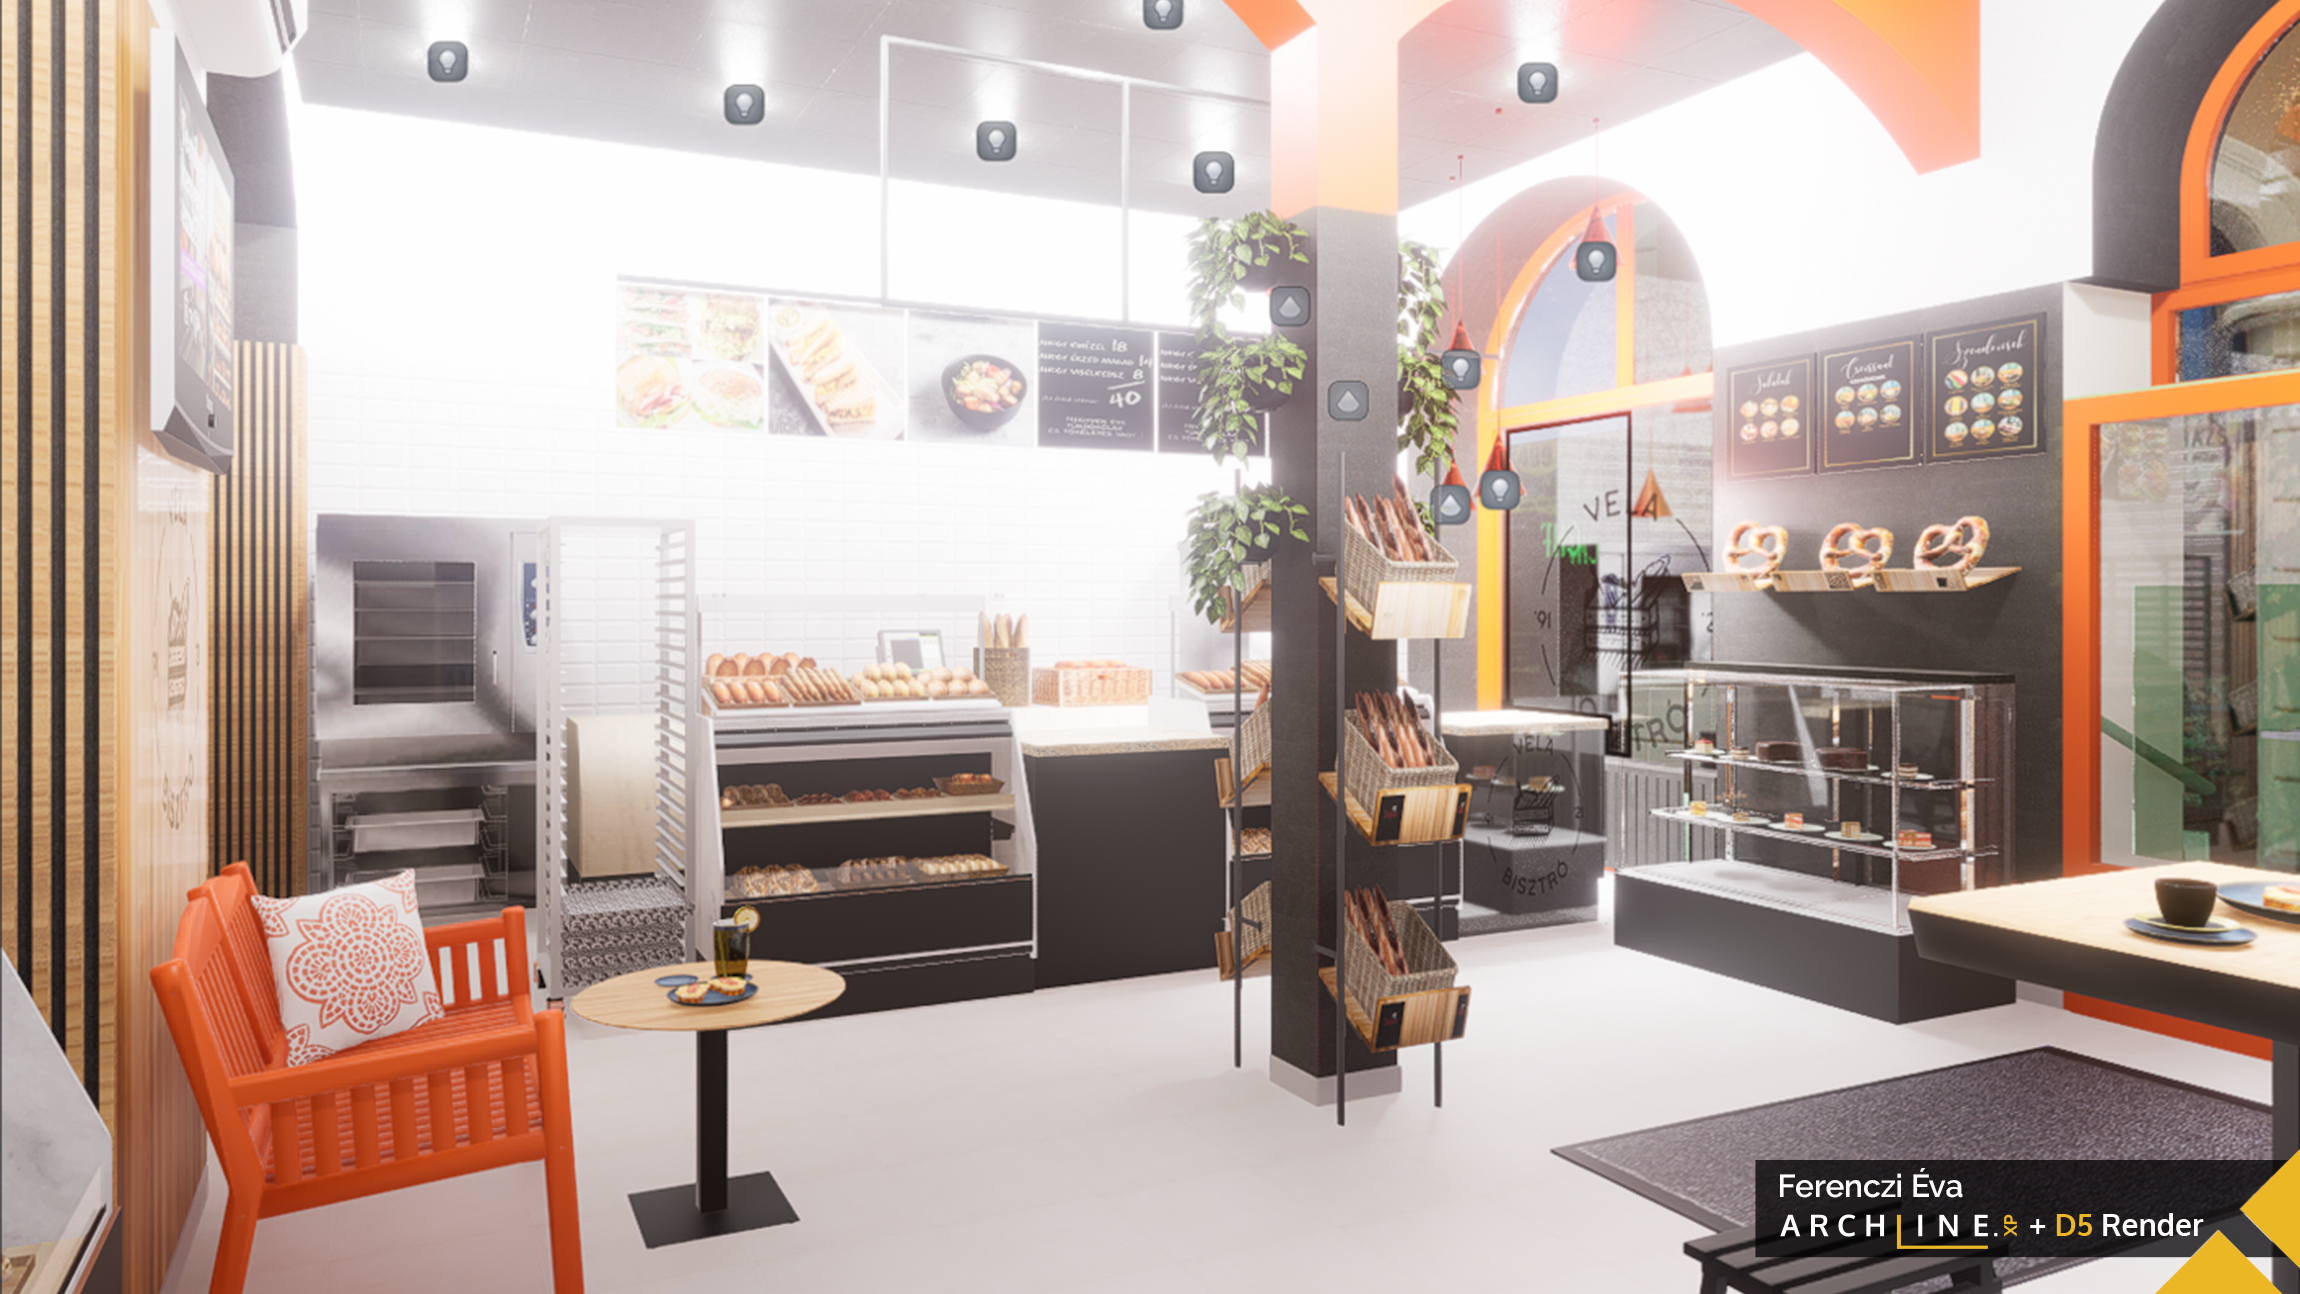
ARCHLine.XP with light sources
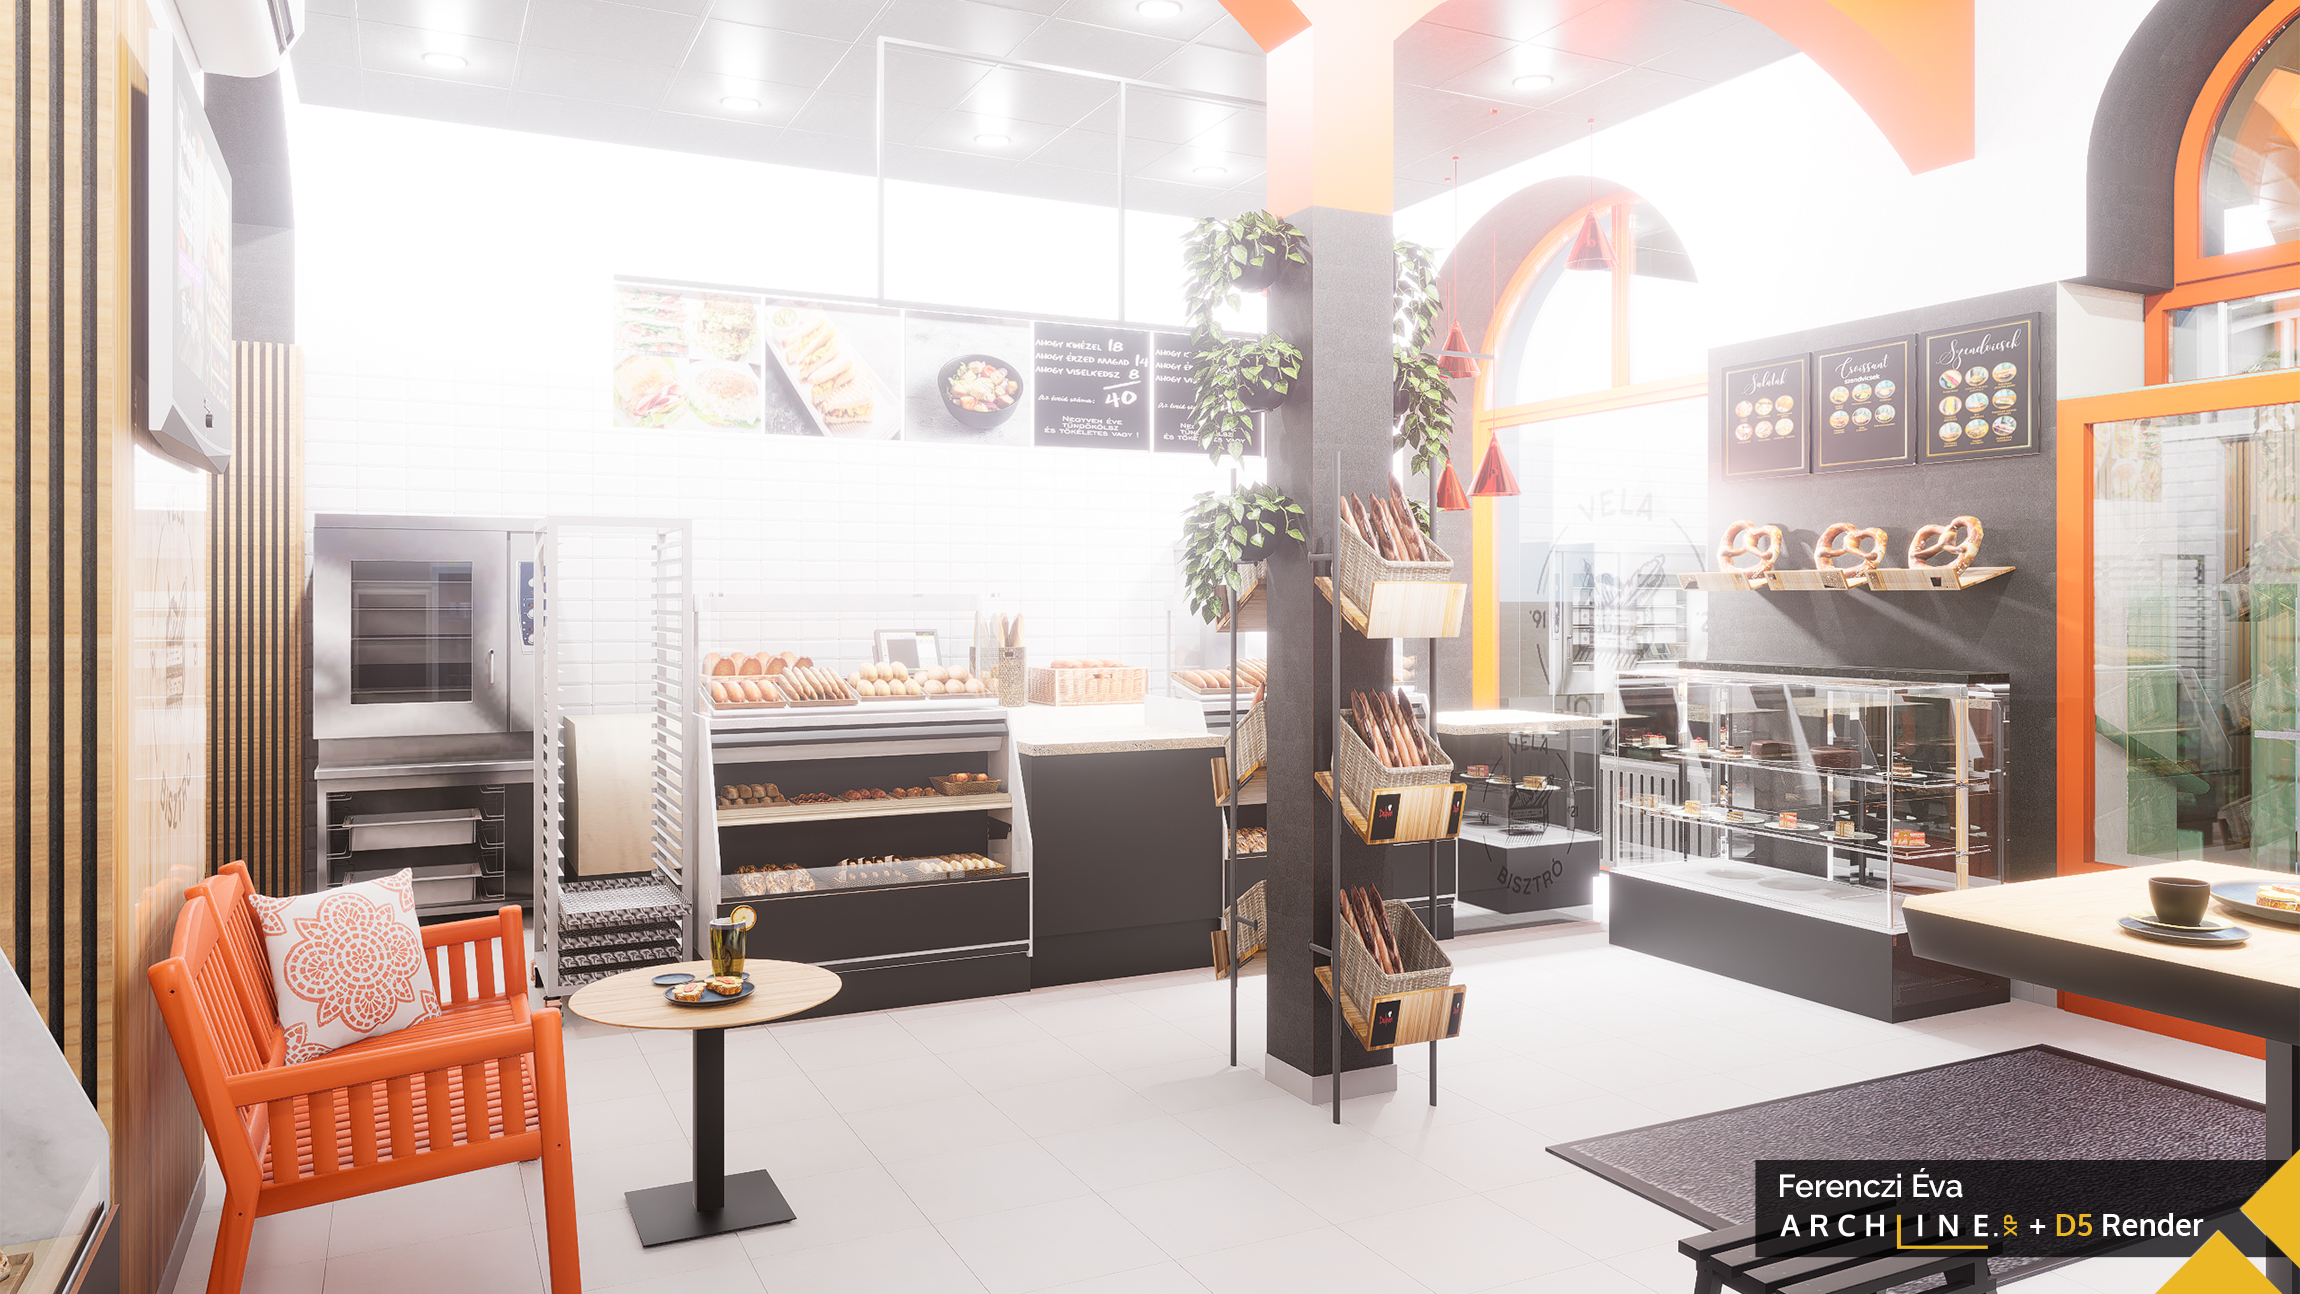
D5 Render
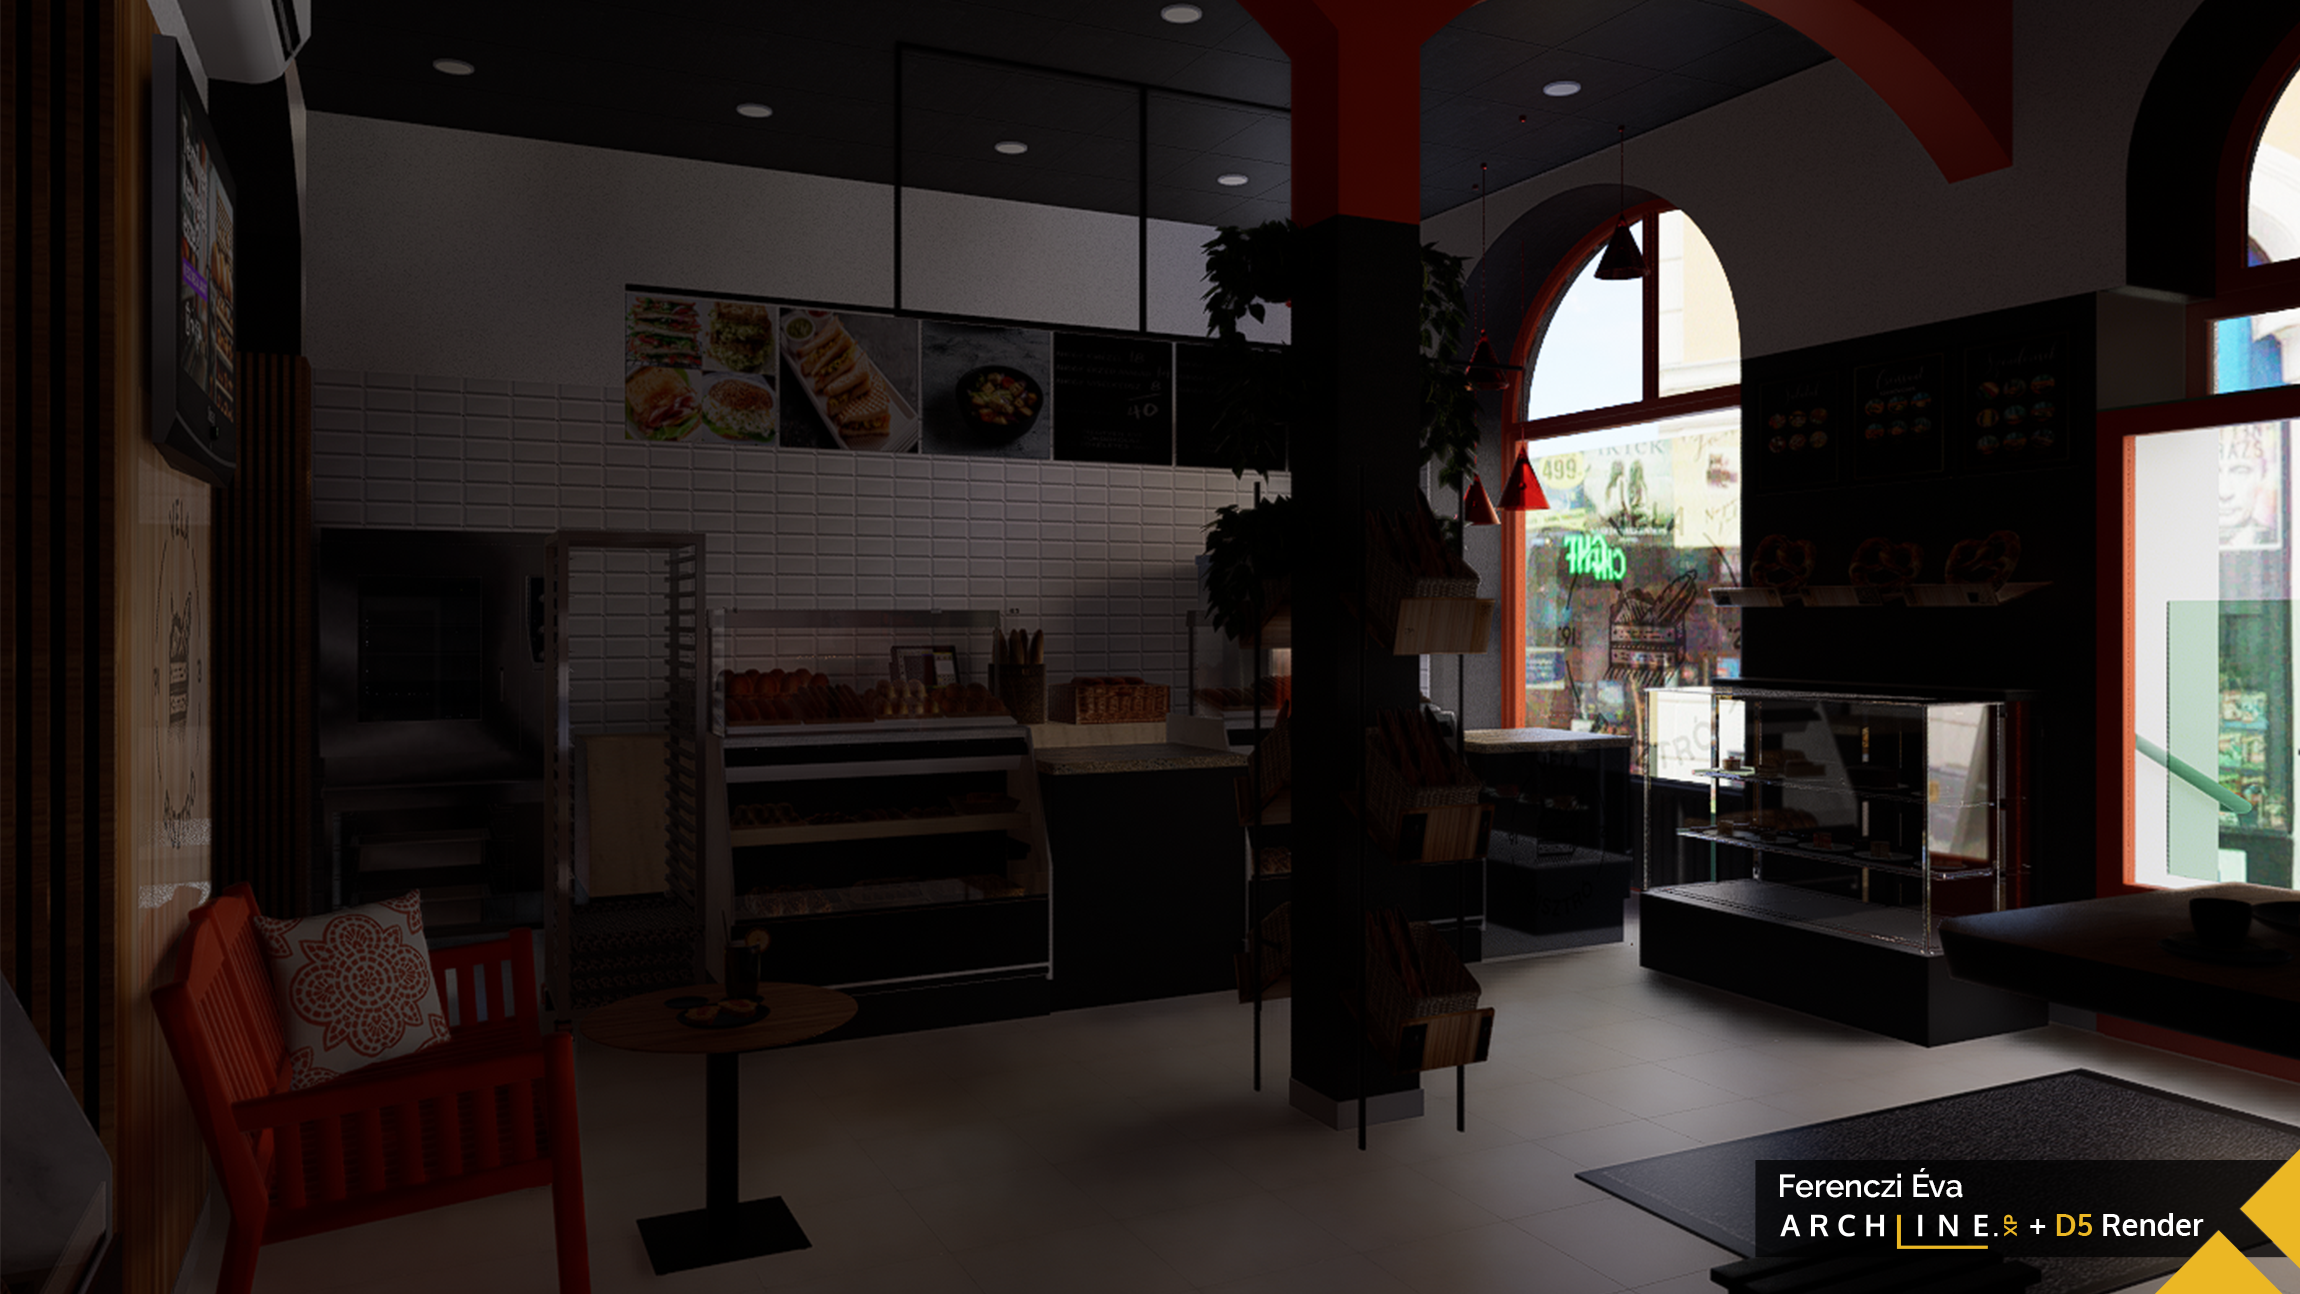
Without light sources
D5 Render with lights
Project example – Kitchen variations
When I opened the project, the 3D space looked dark at first, but within seconds it brightened up. The workspace is completely different from ARCHLine.XP’s, yet still quickly understandable.
Exploring the materials and objects on the left panel, I tested a few. The placement logic is slightly different (one click, two clicks, drag, wait…?)—something to get used to.
After placing objects, I wanted to close the large left-side Assets panel, which covered much of the screen. At first, I couldn’t find the close button. It was hidden among overlapping black panels, but eventually, I located the “X.”
I created several variations for the kitchen design. Each version was edited in ARCHLine.XP, then rendered in D5 within minutes. One version after another—render after render—within about half an hour. Looking out of the skylight, it was fascinating to see how the subtle HDRI background affected the overall atmosphere.

Modern version
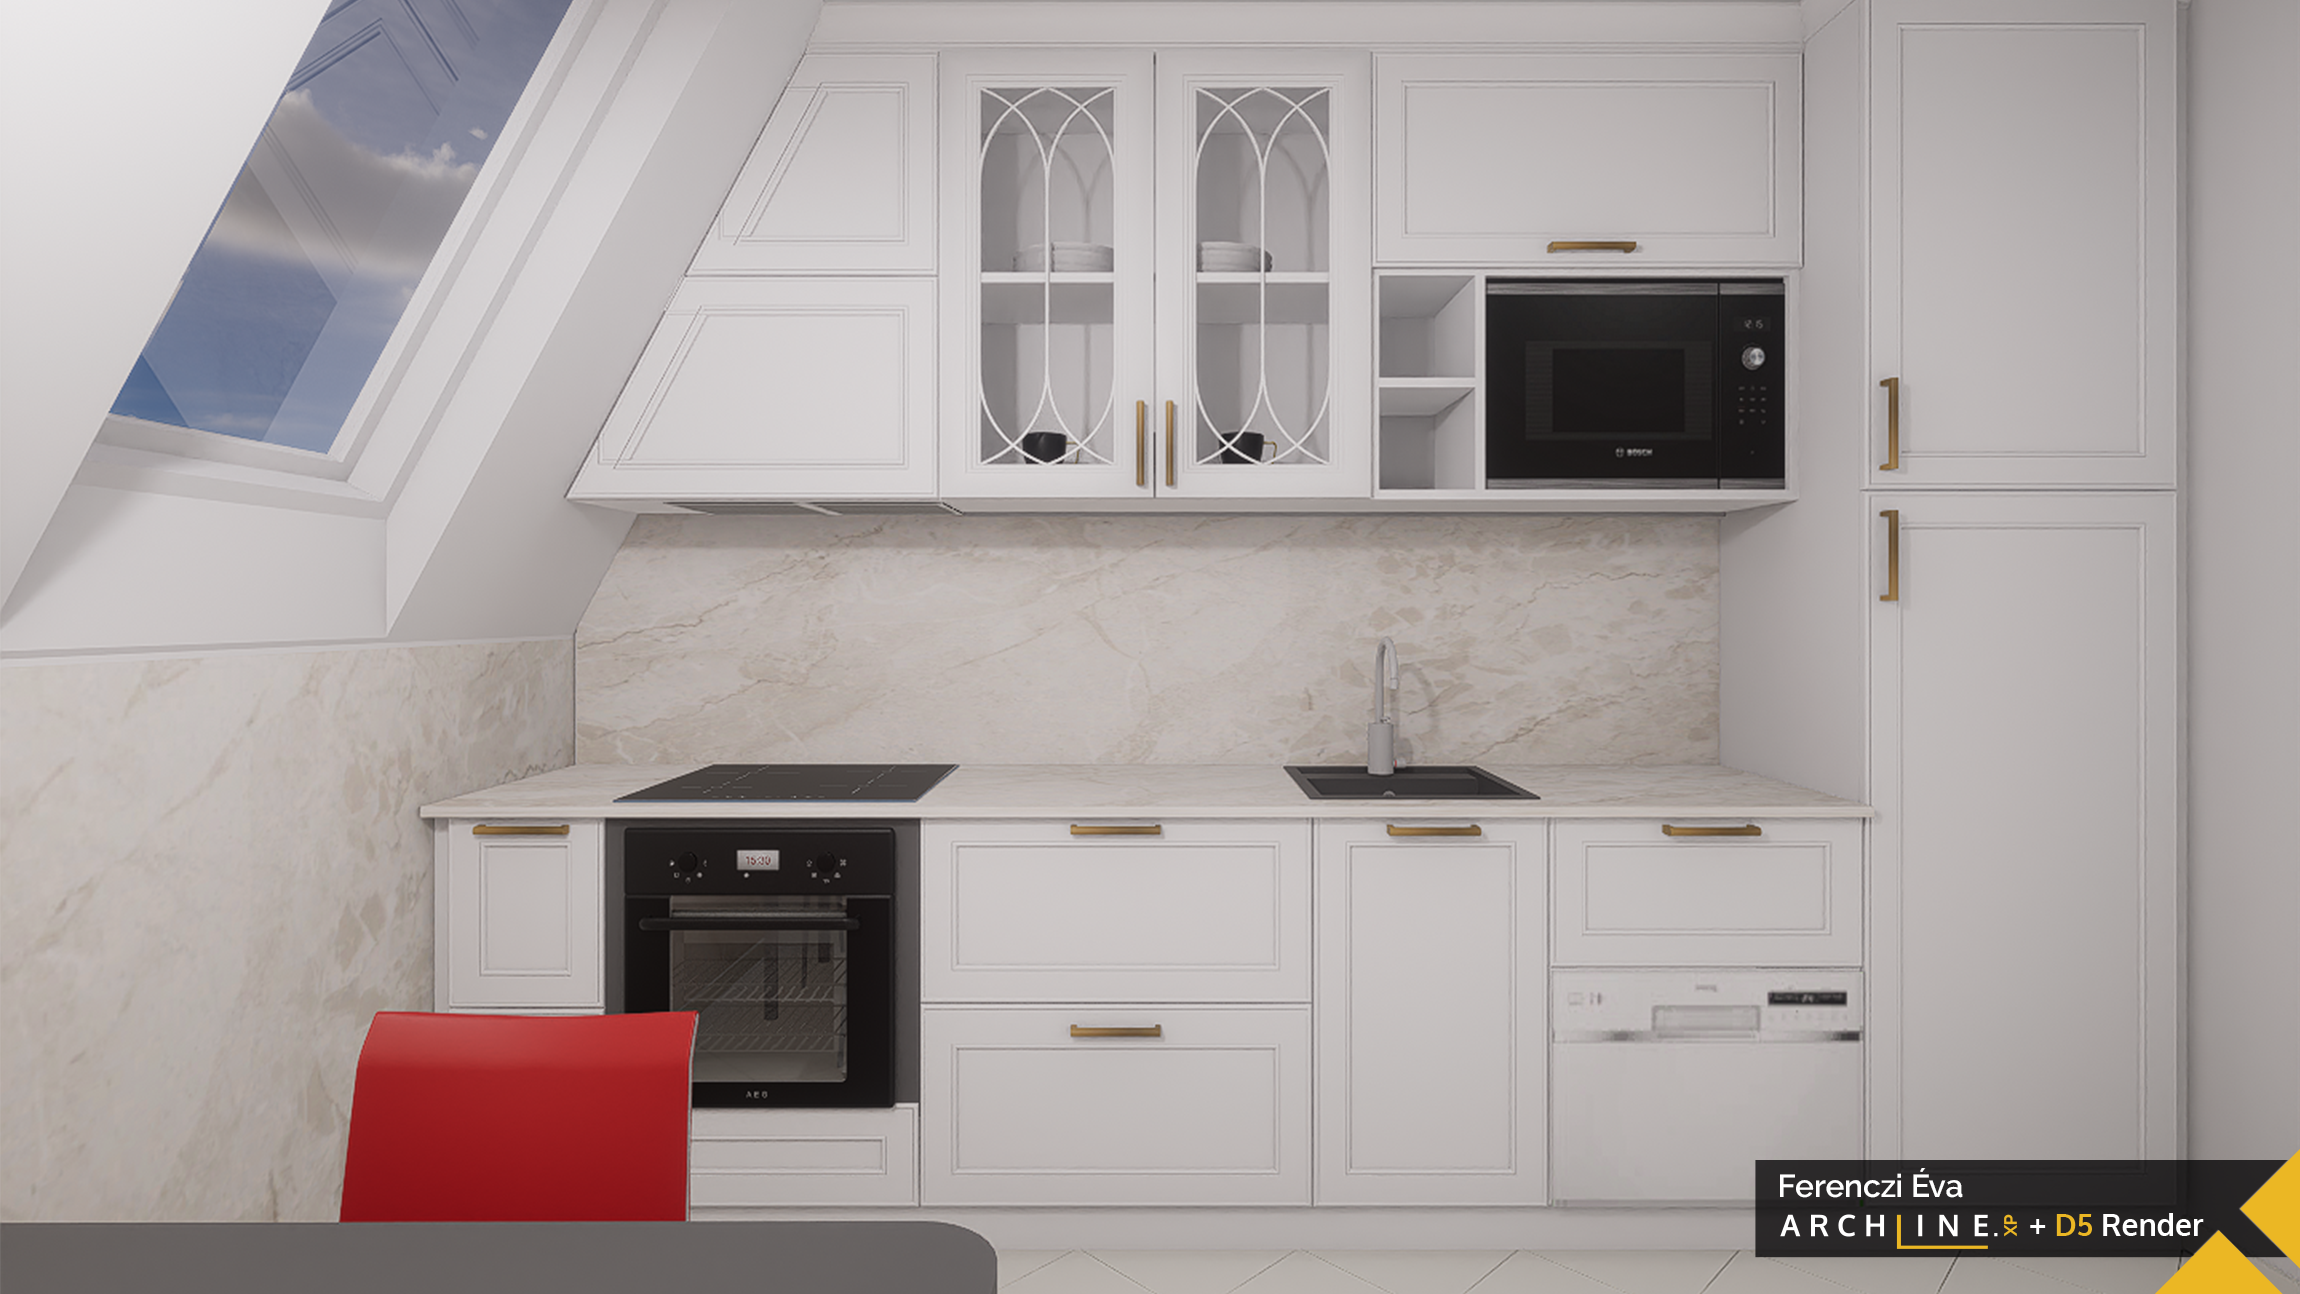
Classic version - with mini dishwasher
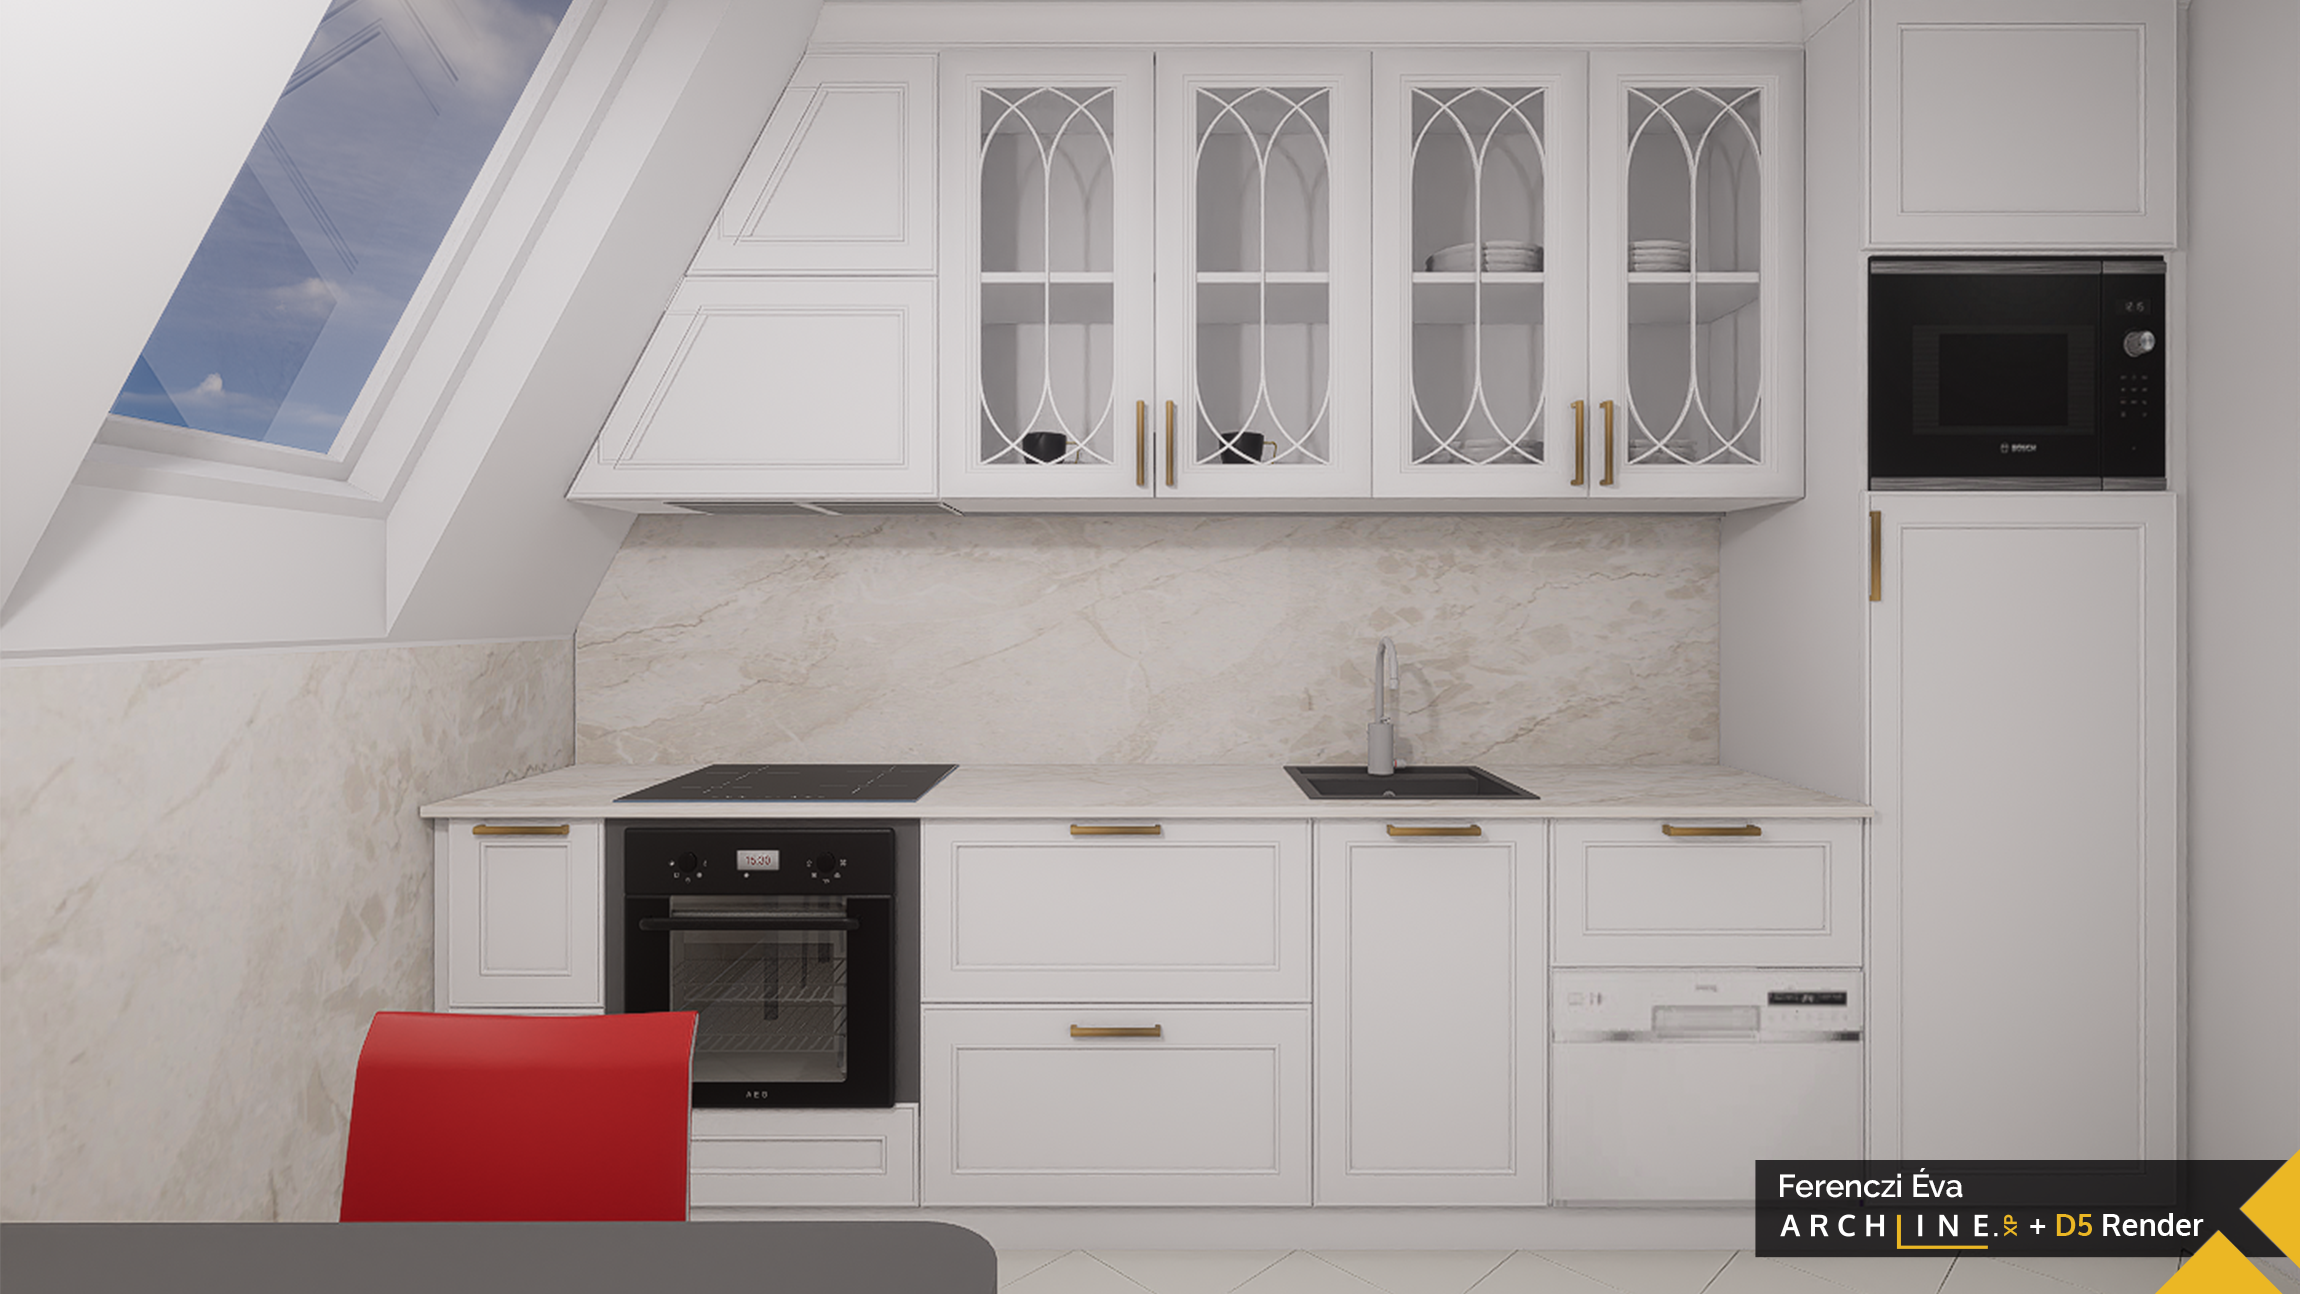
Classic version - with 4 glass doors
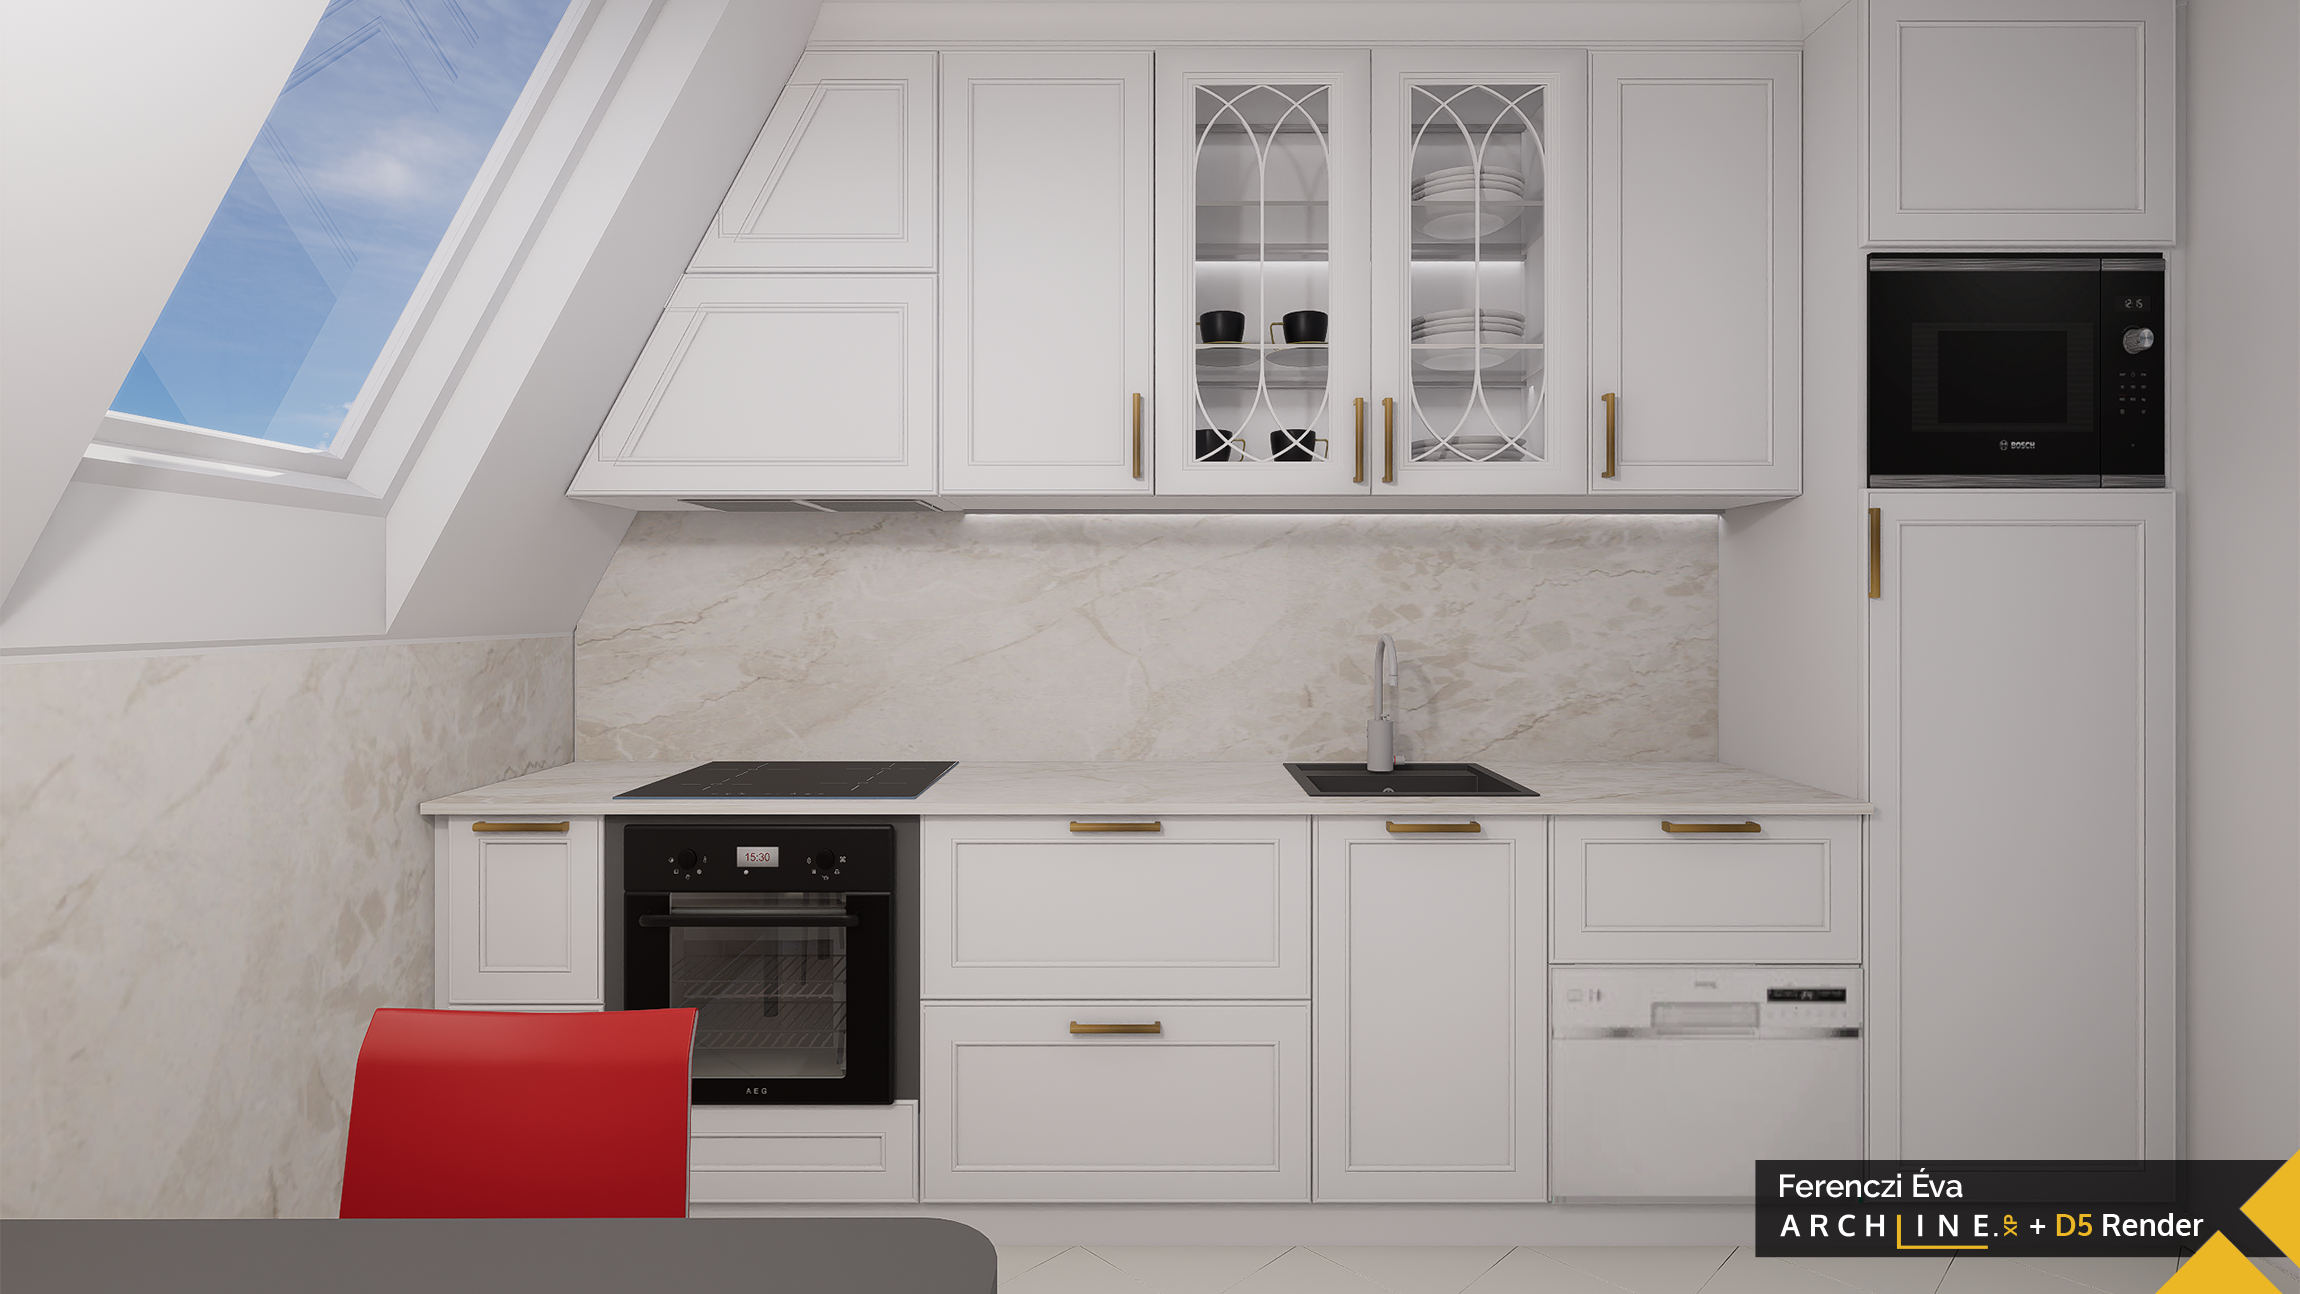
Classic - the winning version
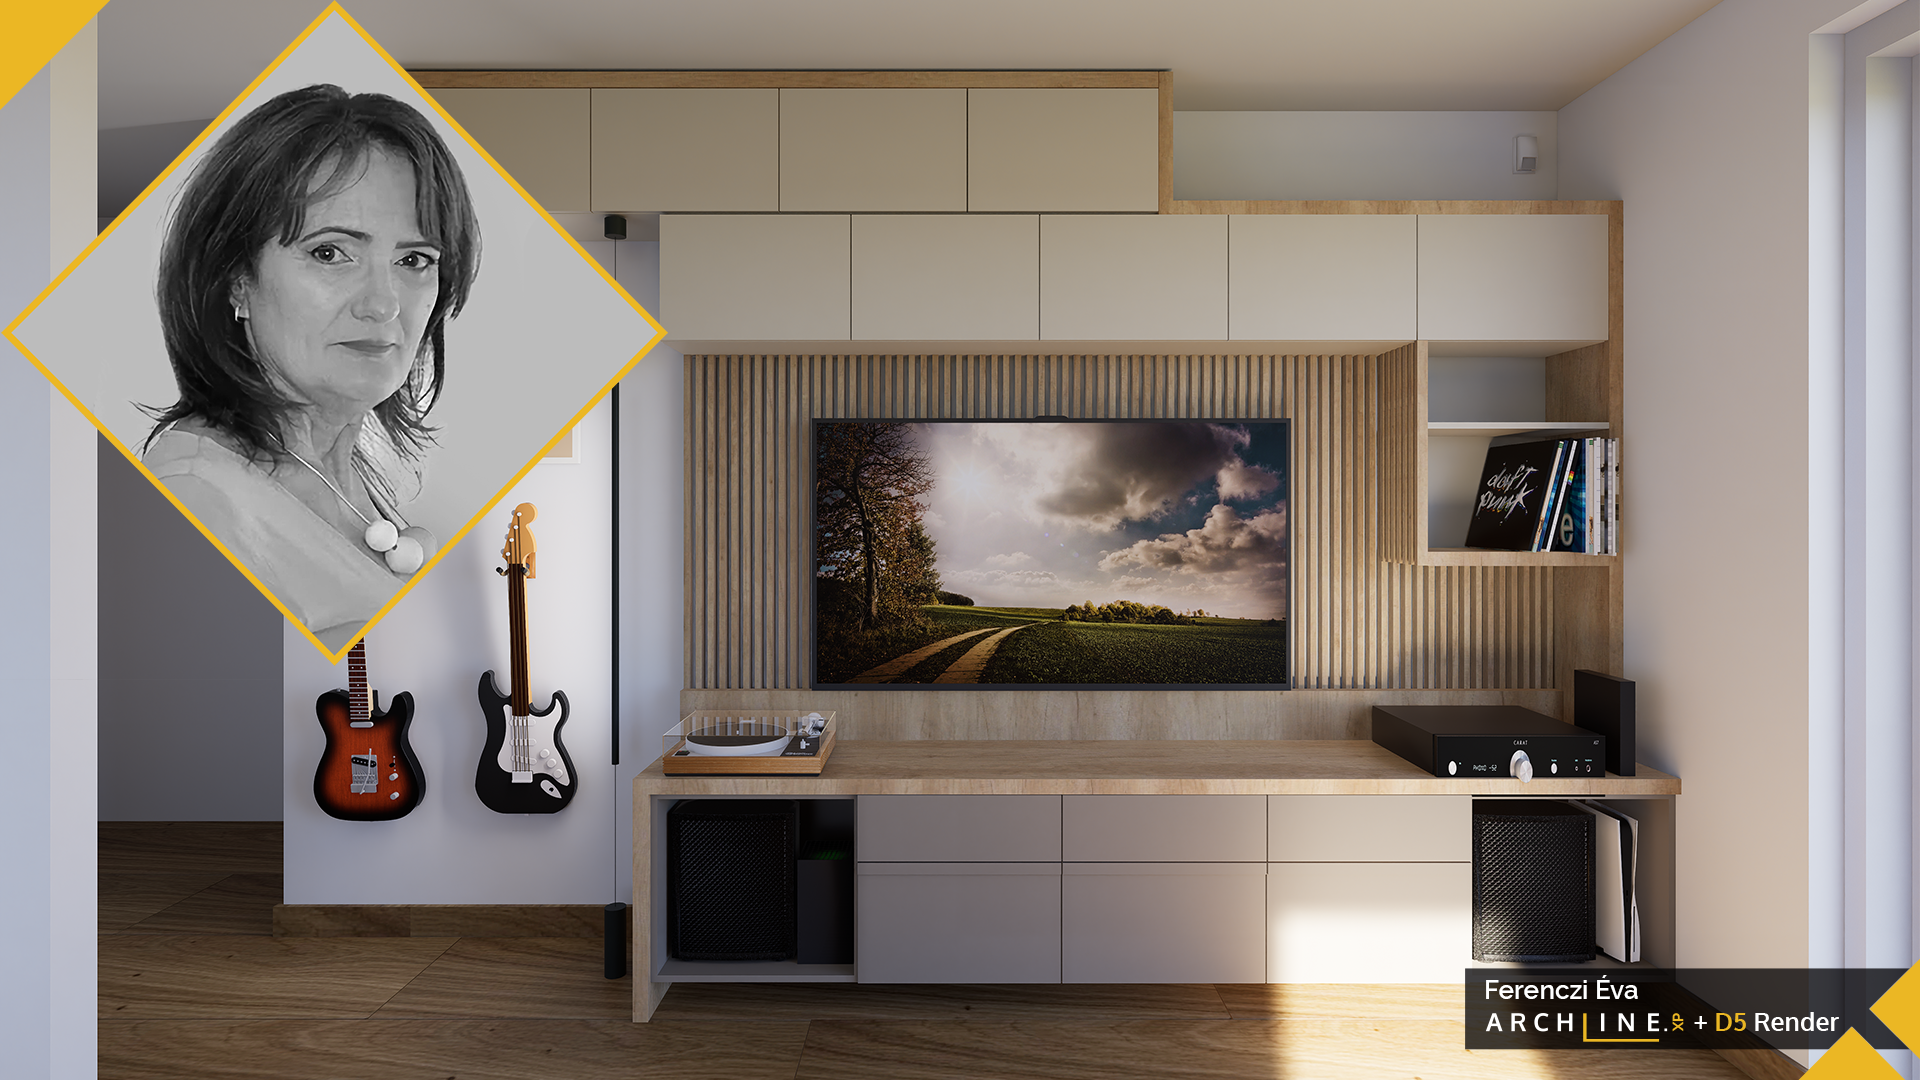
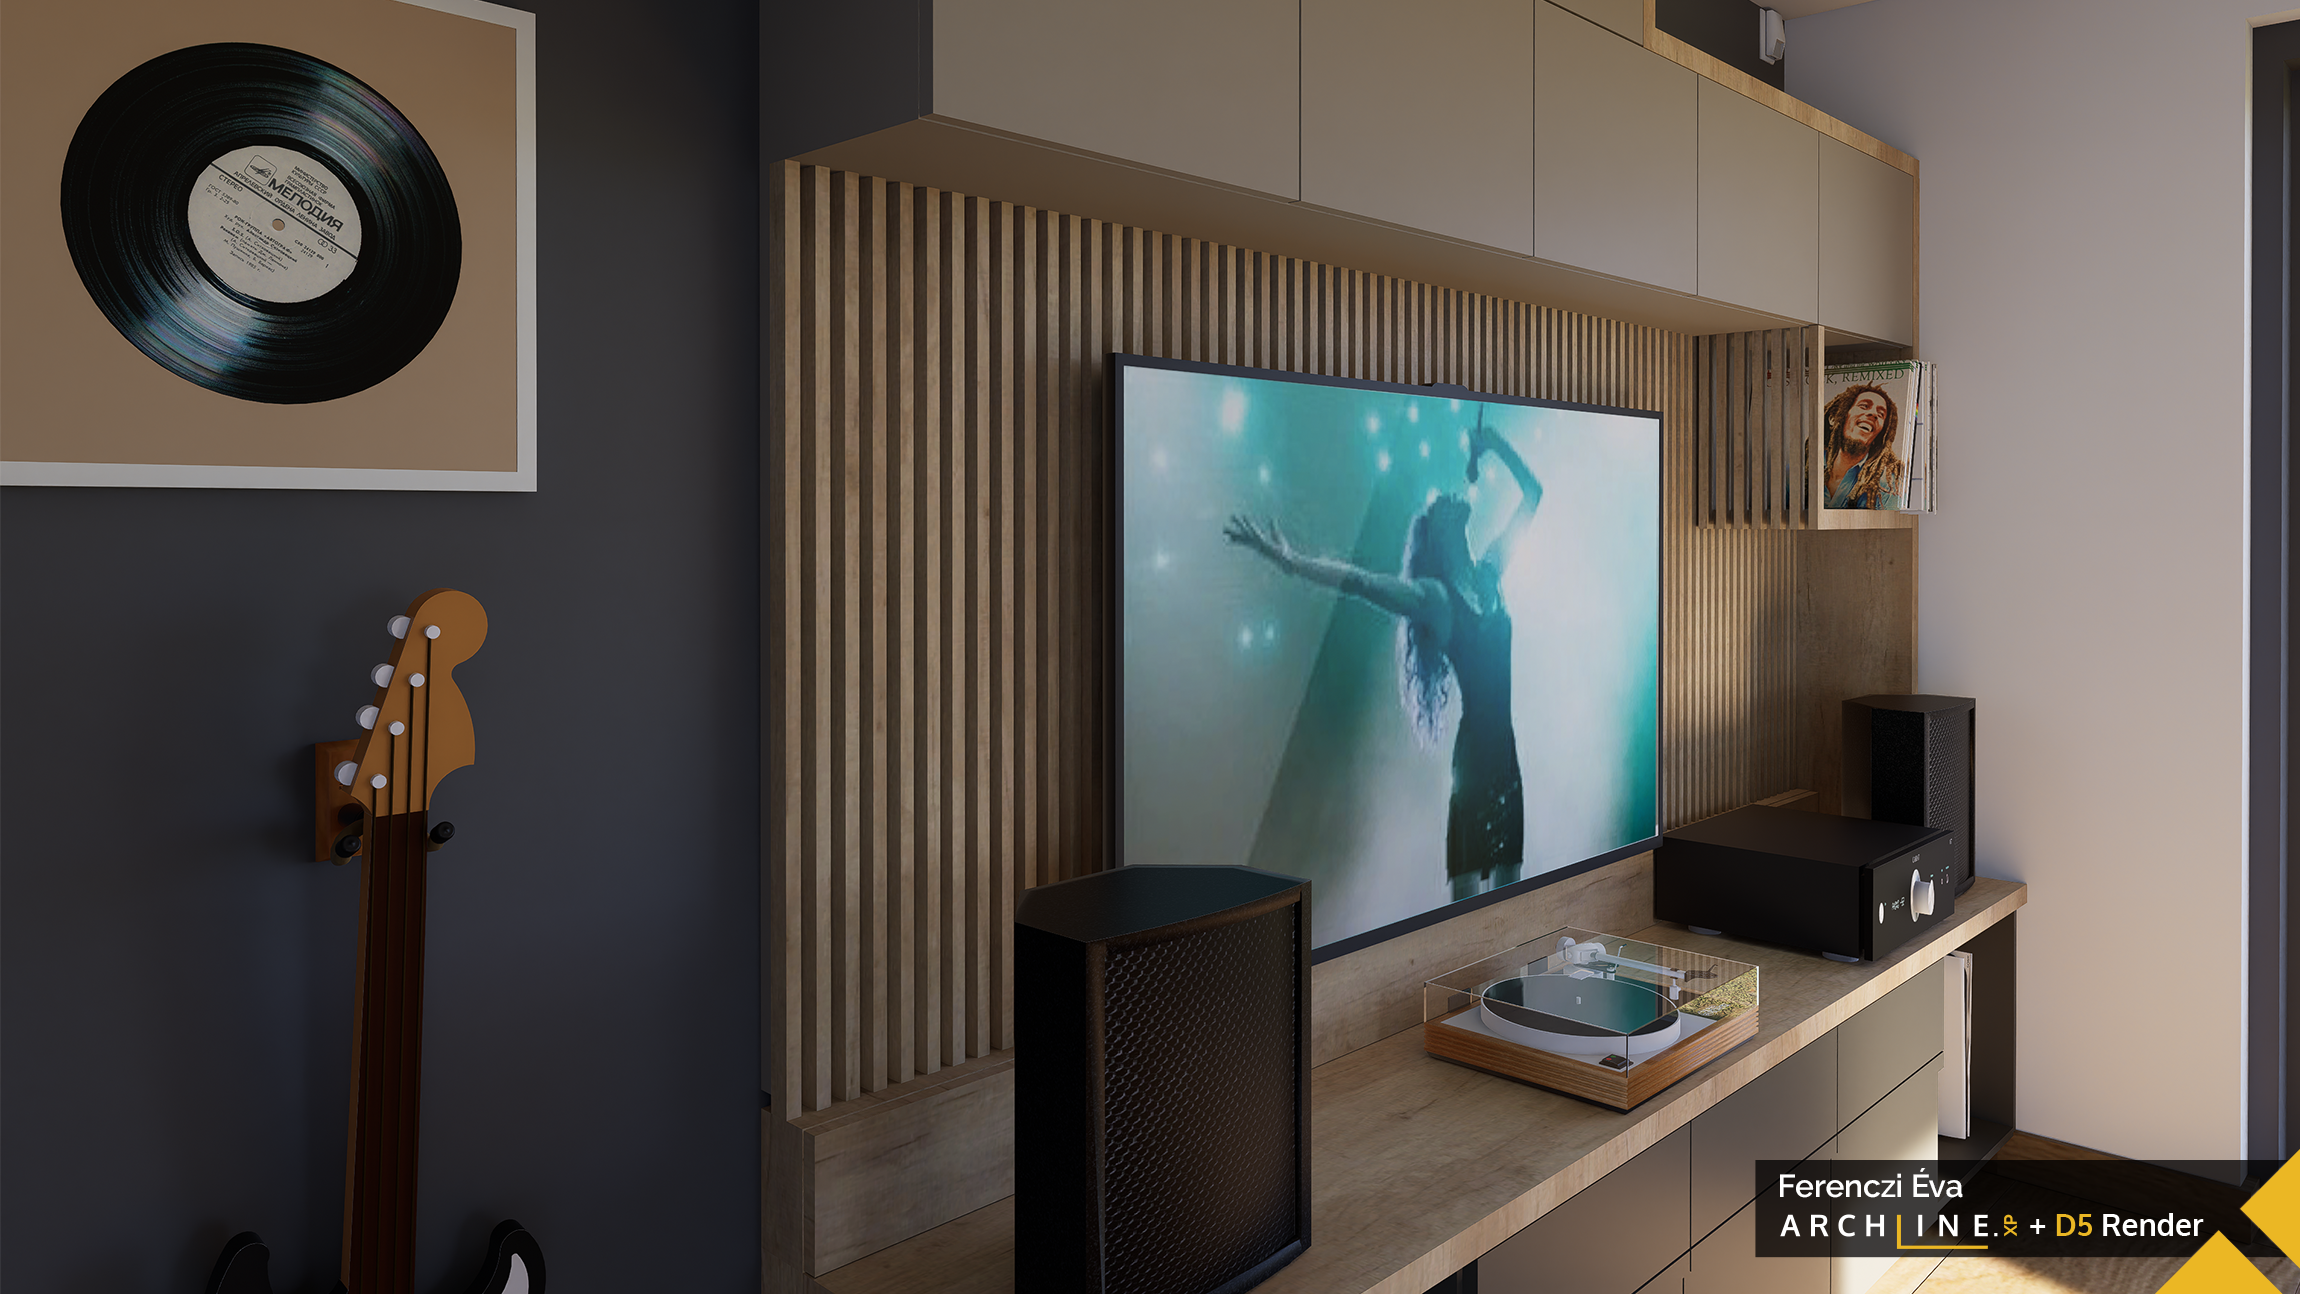
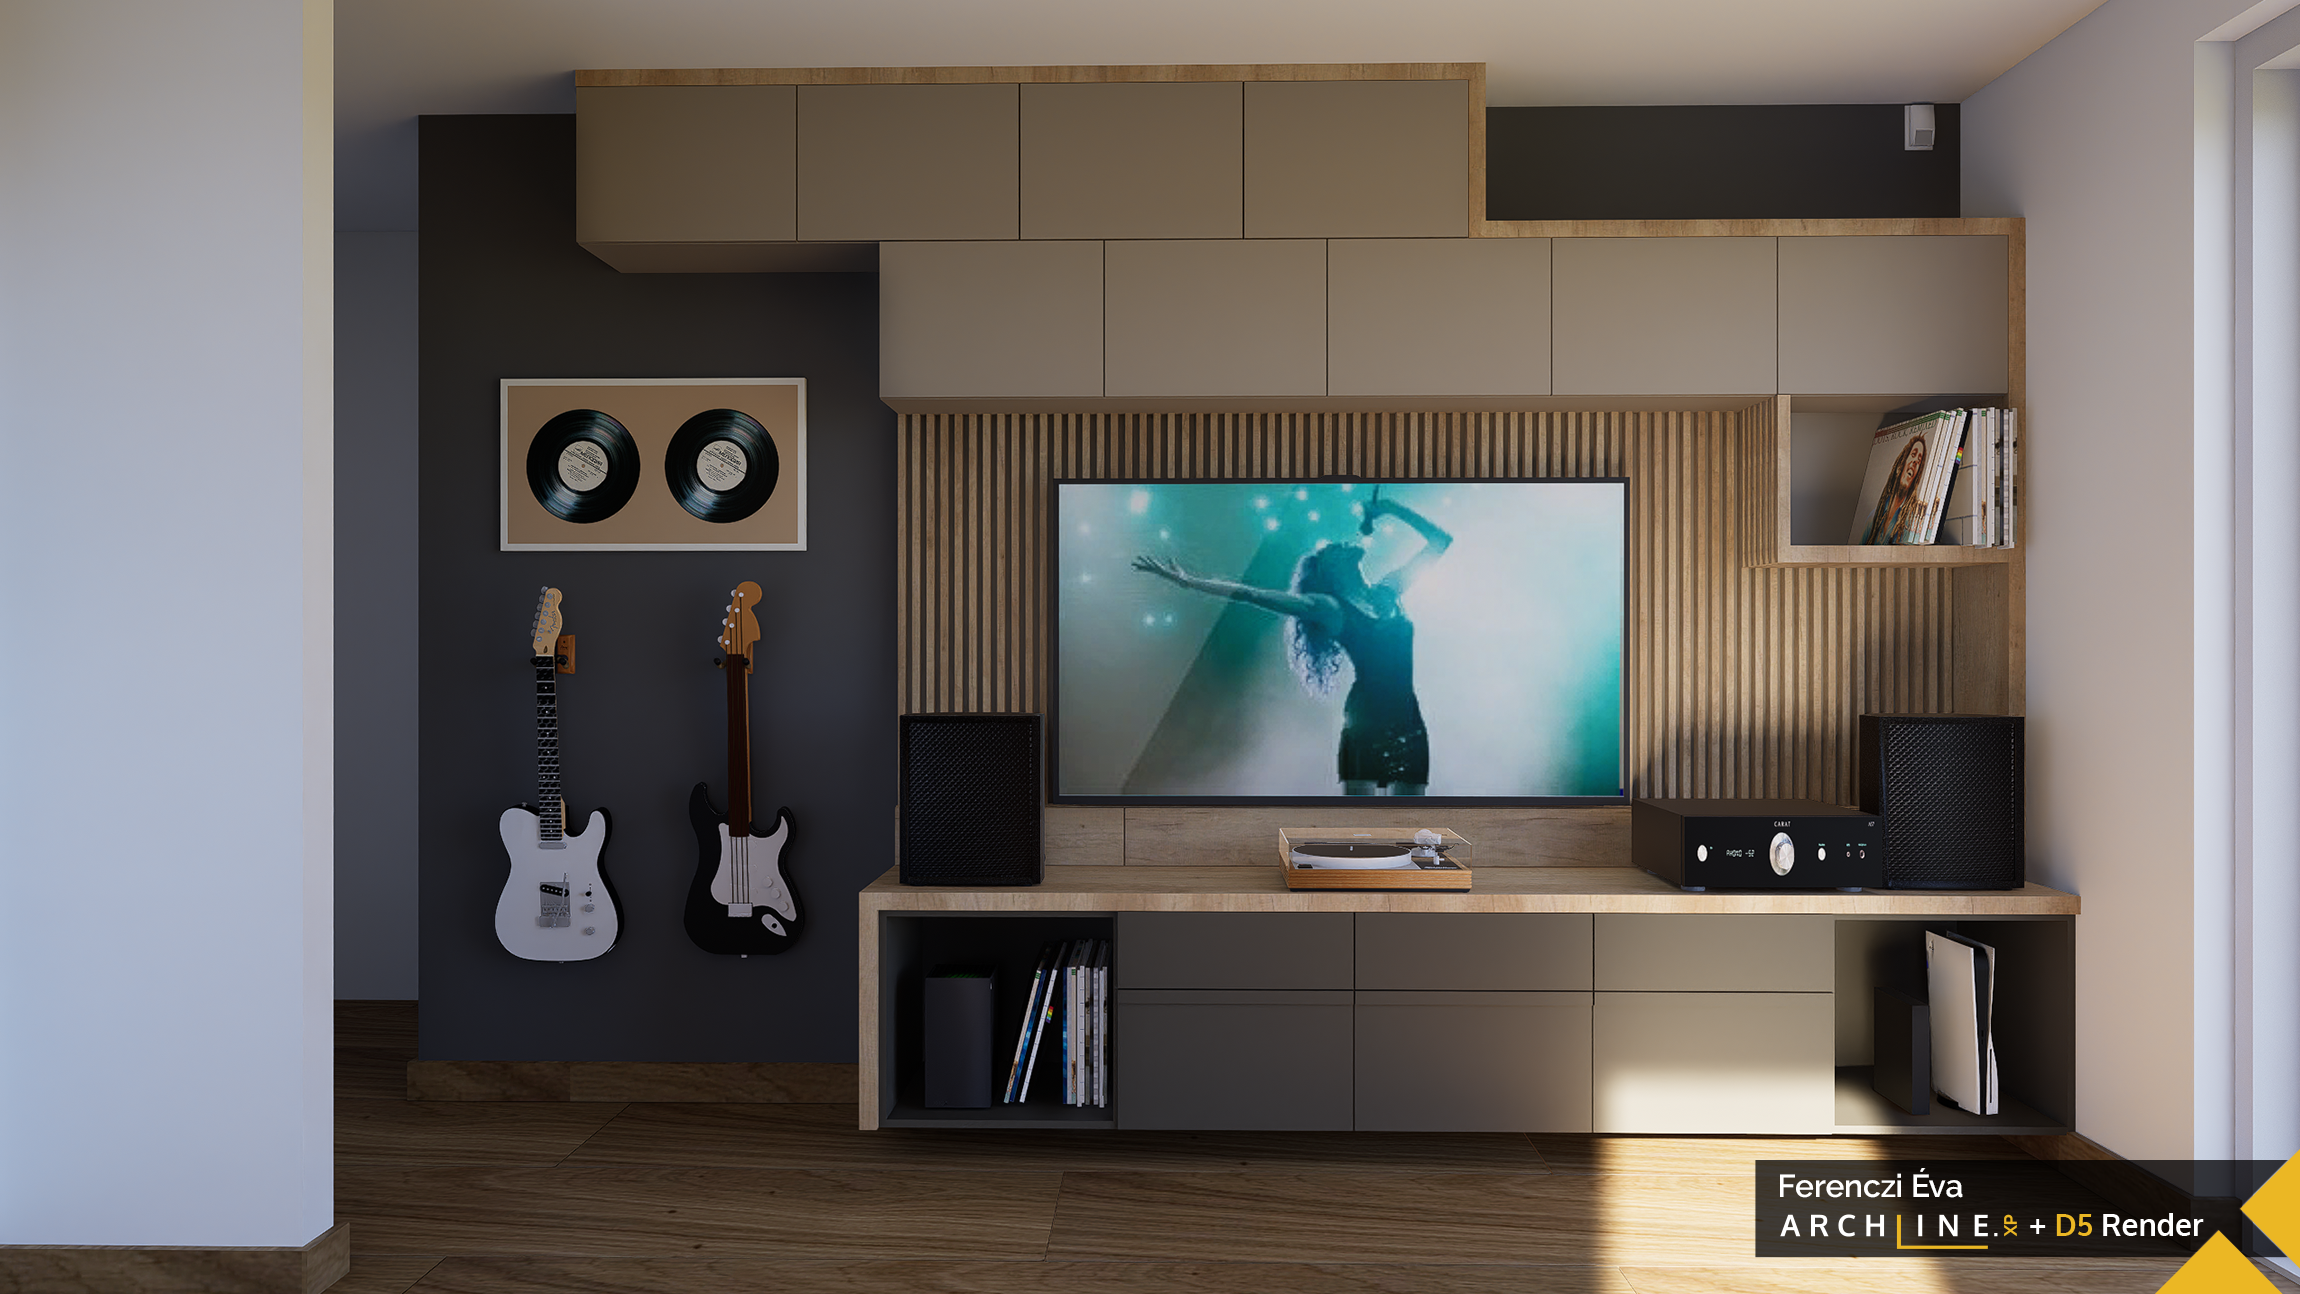
Project Example – TV Wall Design
The next project was a TV wall.
And yes! Without any prior adjustments, D5 produced an excellent render image right away! Of course, it could be refined further, but the quality was surprisingly good.
Only after this did I look at the Home menu and tutorial videos, which are particularly useful for first-time users. Before that, I had to realize why I couldn’t continue working in the other menus: of course, the Render tool must be closed first. 🙂
I created the pendant lamp model and applied the graphite-gray wall color directly in D5 Render.
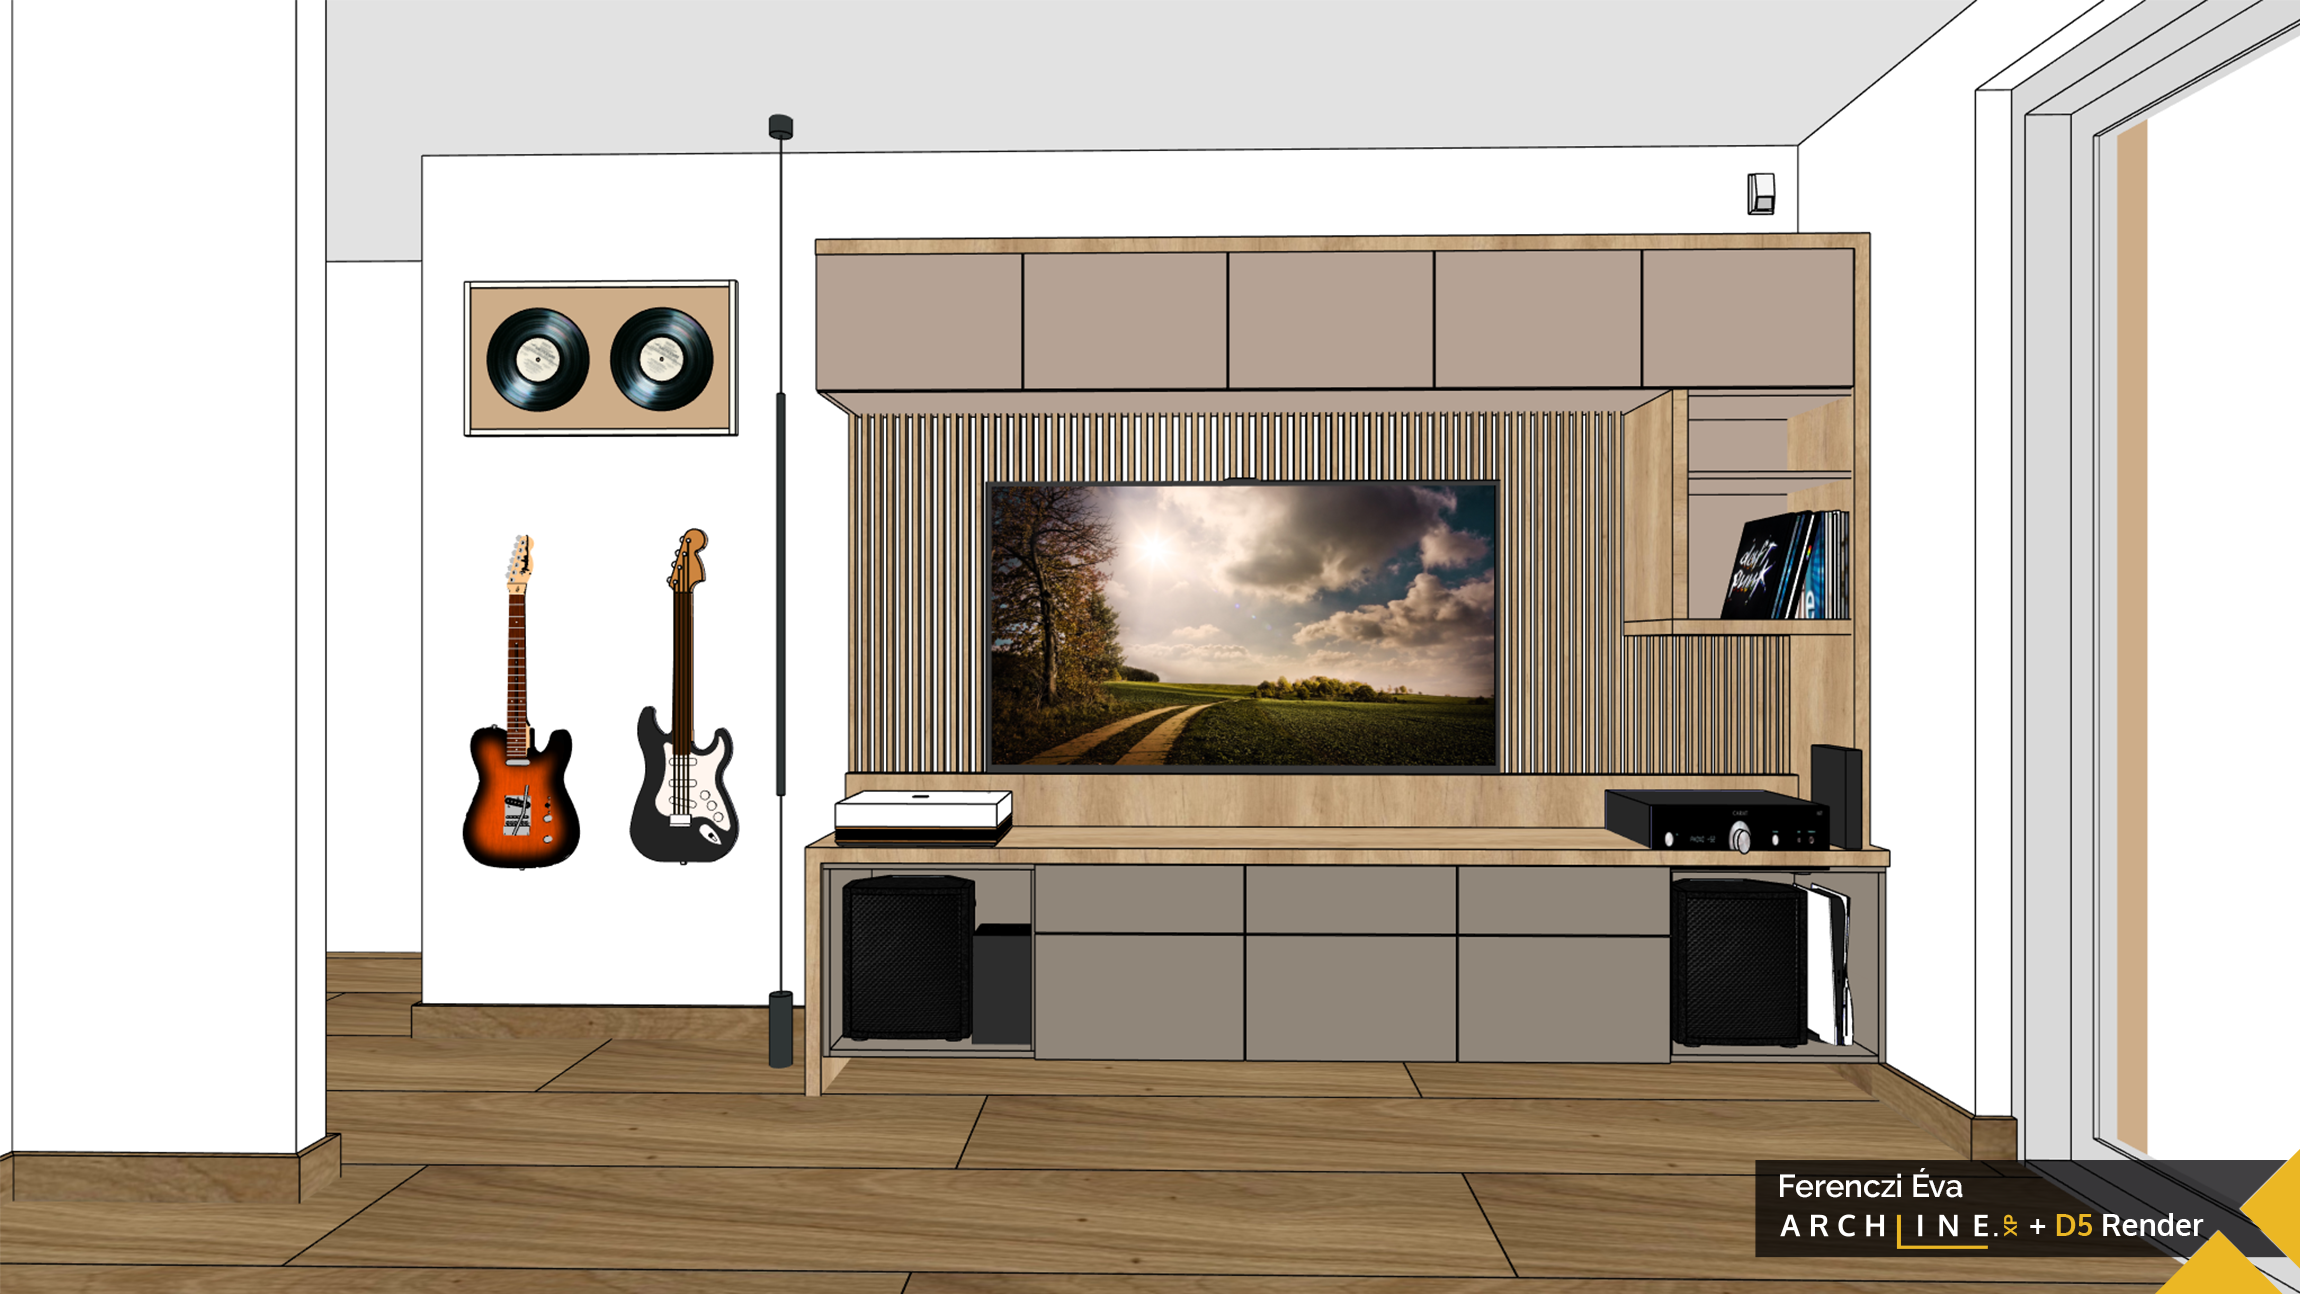
Preliminary concept plan
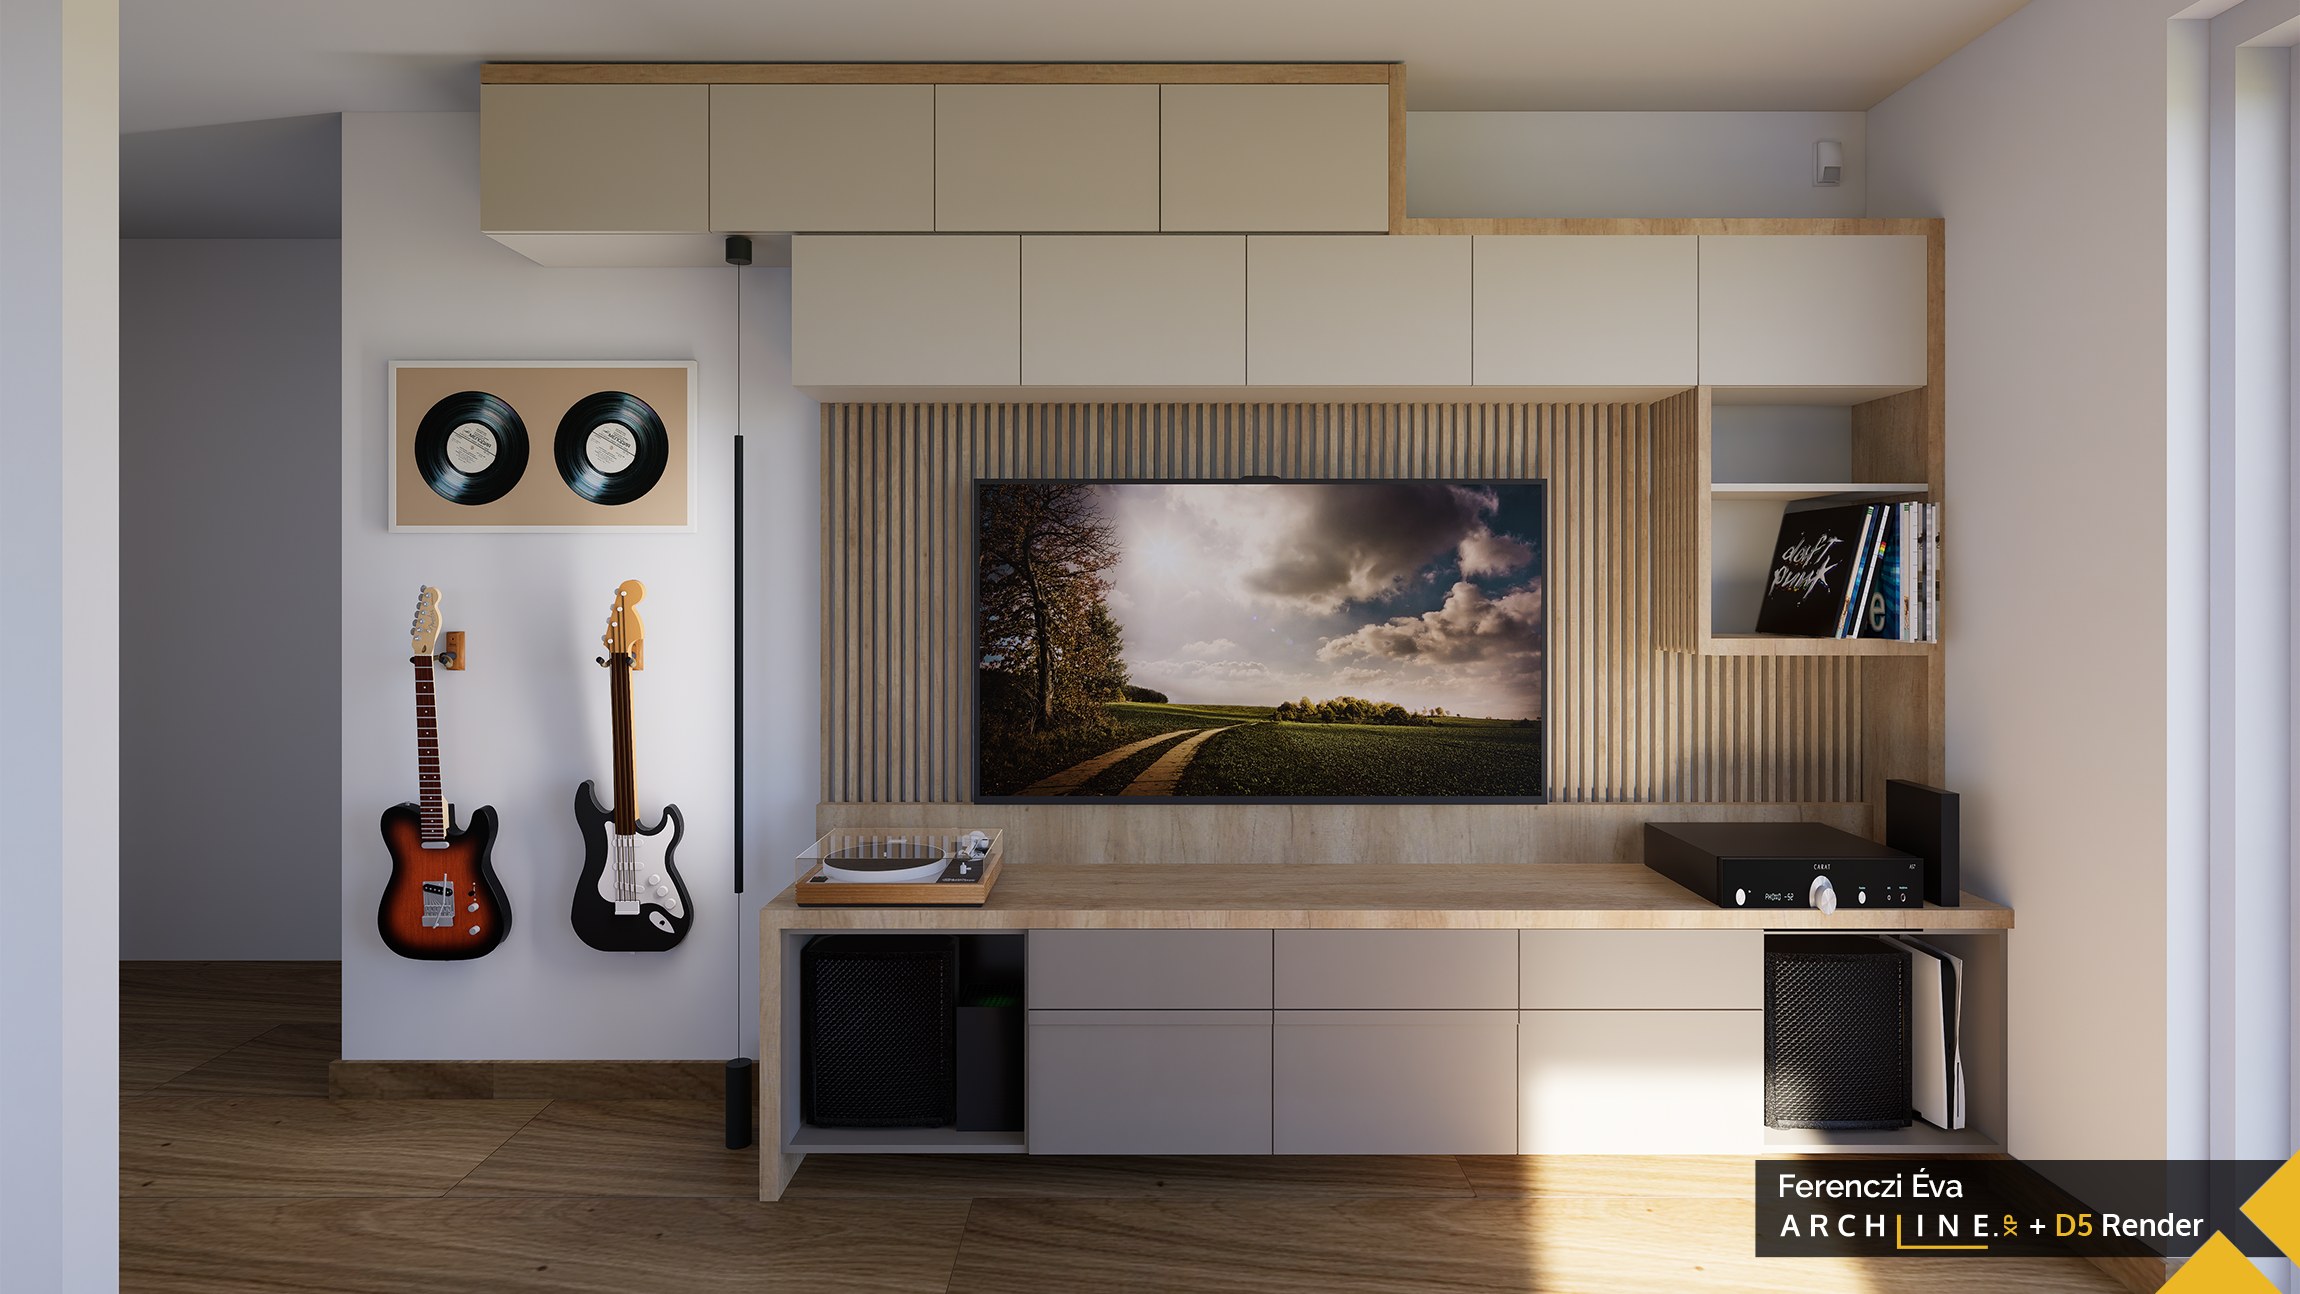
With upper elements, pendant lamp
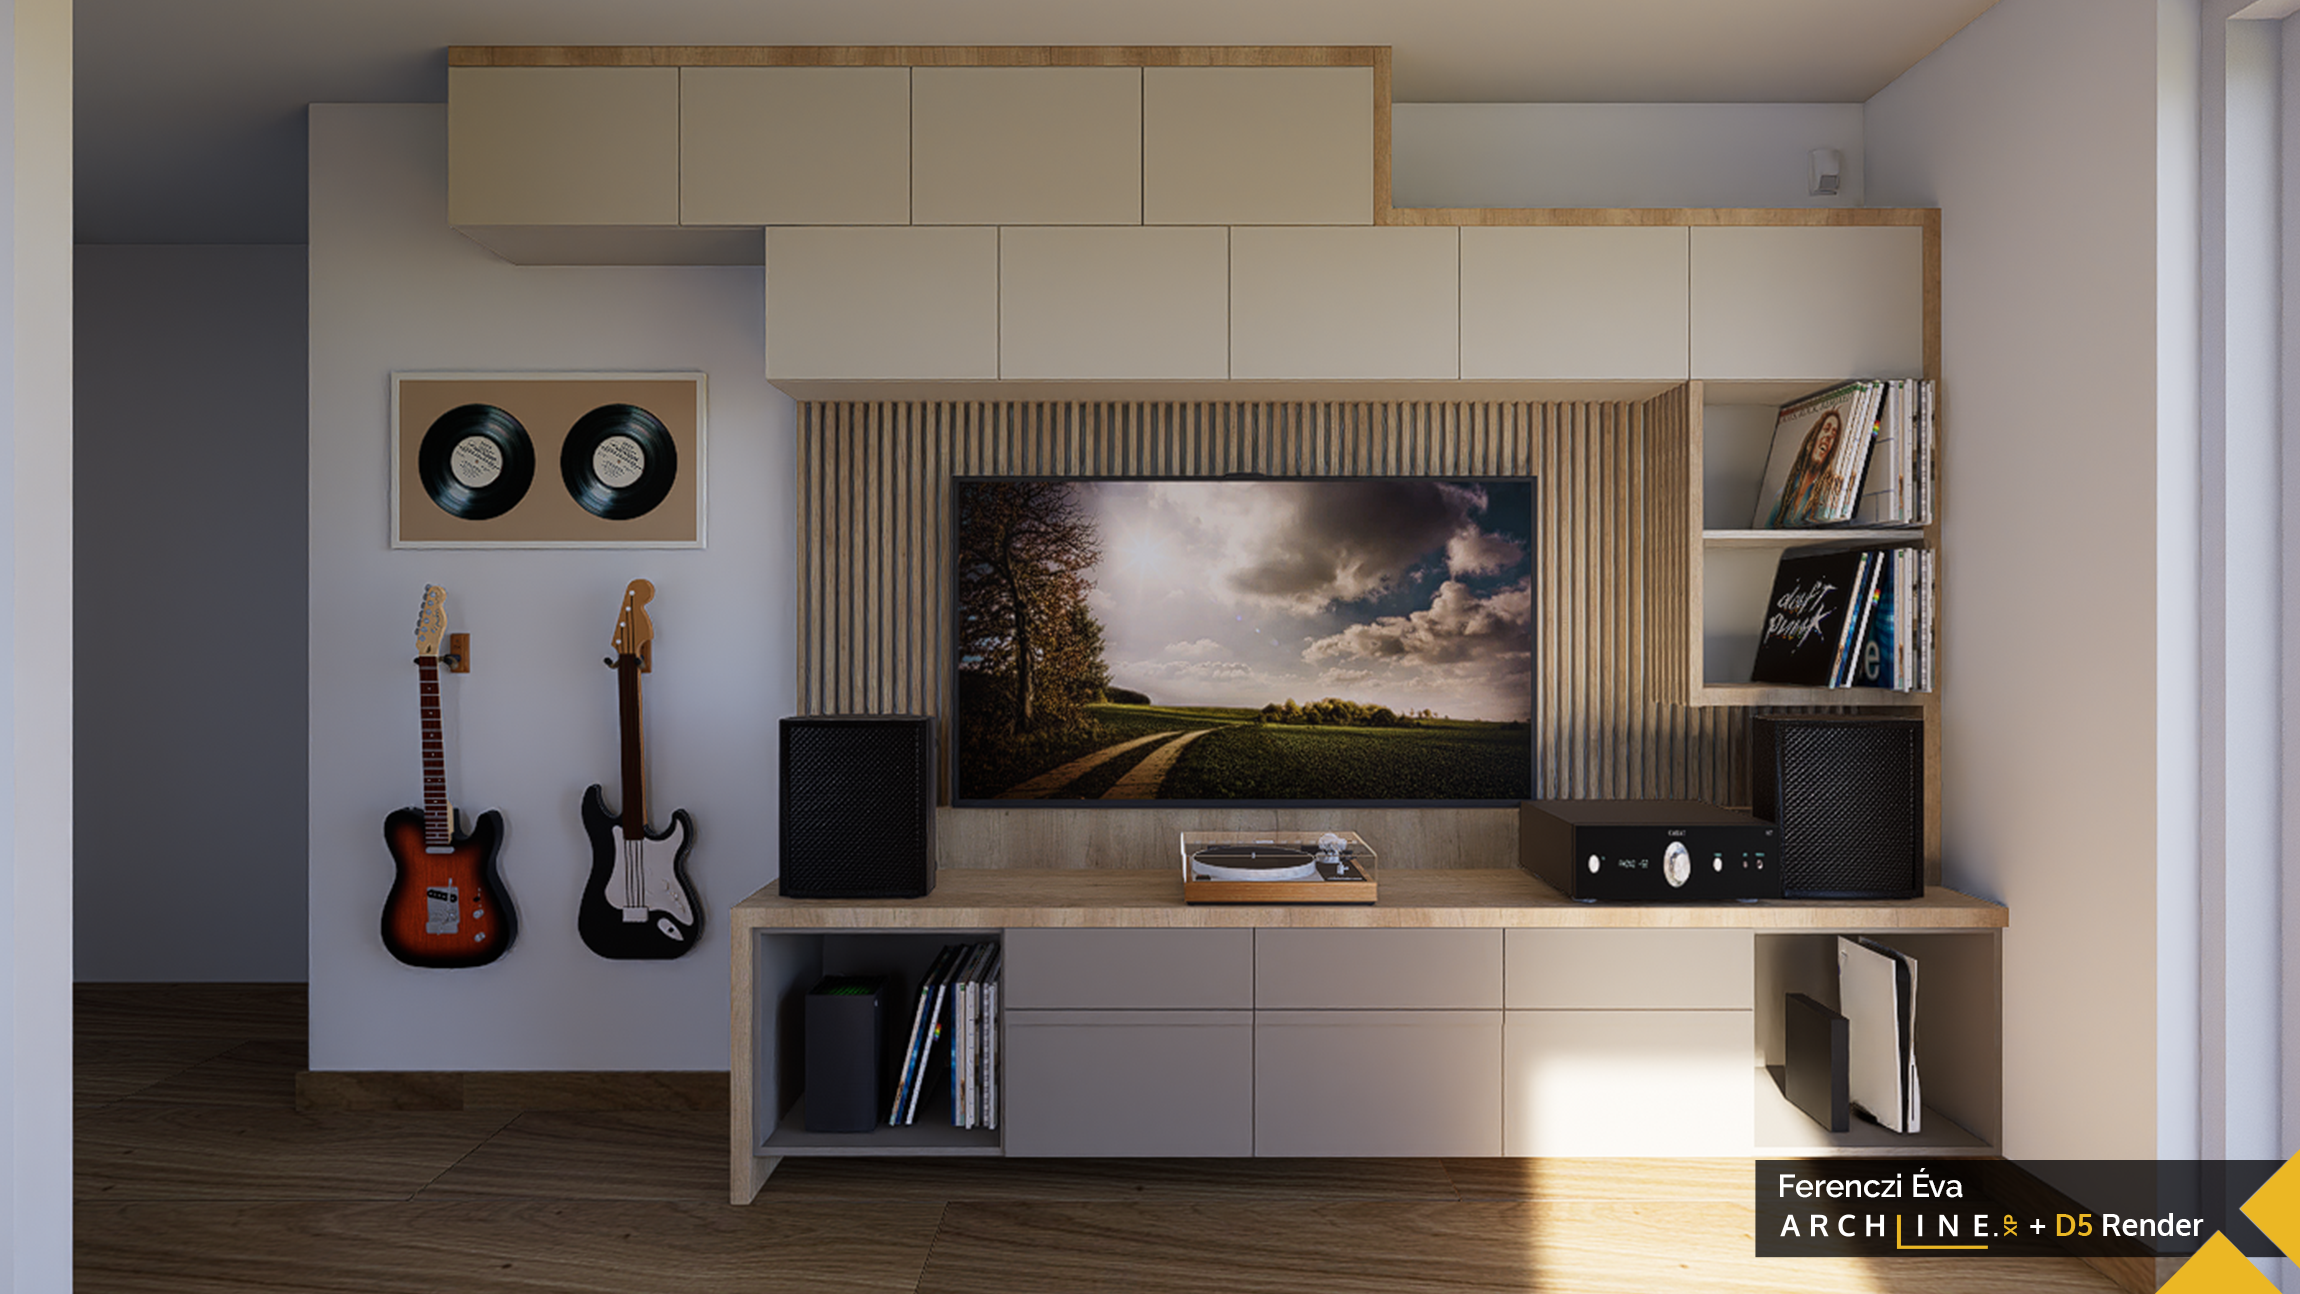
Without a lamp
Navigation
Navigation here is different too. By instinct, I used ARCHLine.XP’s controls for rotation, panning, and movement, but like in other 3D software, the controls differ.
It quickly becomes second nature though:
W – forward,
S – backward,
A – strafe left,
D – strafe right,
Q – move camera down,
E – move camera up,
Since D5 Render uses a video game–style FPS navigation system, anyone familiar with PC gaming will feel right at home.
Good news: camera views saved in ARCHLine.XP are instantly available in D5, making it easy to switch between key perspectives.
Lighting and Synchronization
After rendering, I reviewed the images and returned to ARCHLine.XP to adjust light fixture positions and modify lighting where necessary (this is where light synchronization helps). However, I placed LED lights directly in D5—for speed and practicality, especially when only the light effect is needed without modeling the LED strip itself.

Sun position not set
Sun position set
If I wanted to adjust the time of day, scene orientation, or wood grain direction, I returned to ARCHLine.XP, made the changes, then synchronized the project again. In less than 3 minutes, the new render was ready.
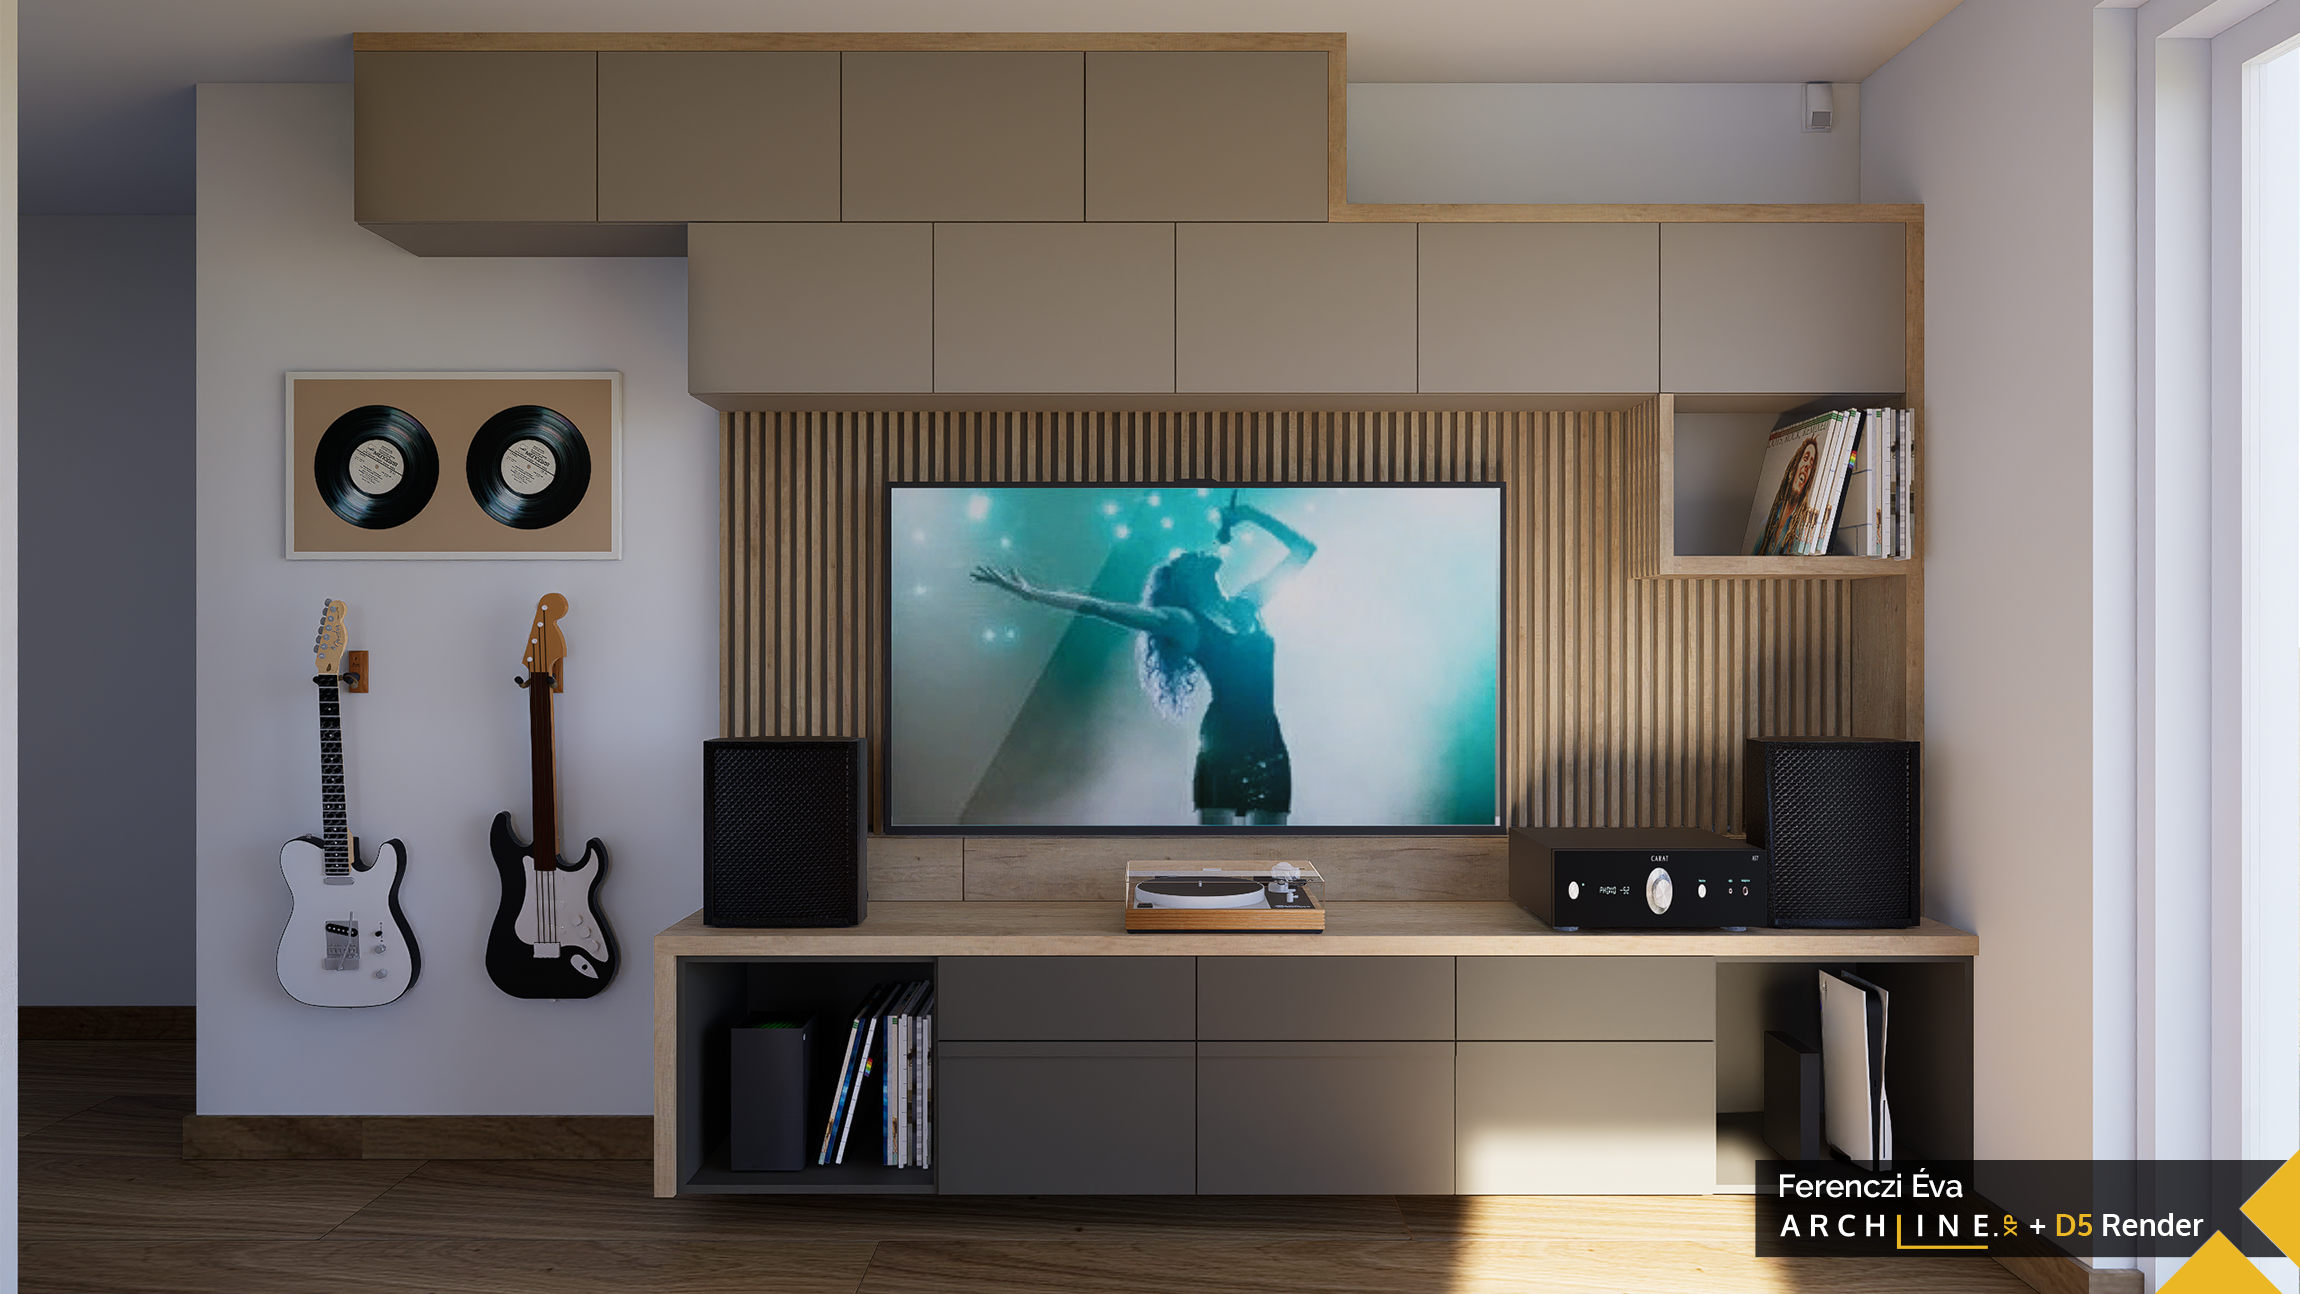
At first everything seemed perfect—until the client pointed out that the wall behind the TV was still white instead of anthracite gray. So, another render: just 1 minute 28 seconds. Of course, that’s expected—after all, it was only a TV wall.

Grey wall 1.
Grey wall 2.
Gray wall shelf furniture change
Use D5 Render’s vast, high-quality library to fine-tune lighting, adjust materials, and place decorative objects.
During synchronization, a quick and decisive click ensured that every sync was successful, and the changes happened almost invisibly—by the time I switched back and opened the D5 interface, the modifications were already applied.
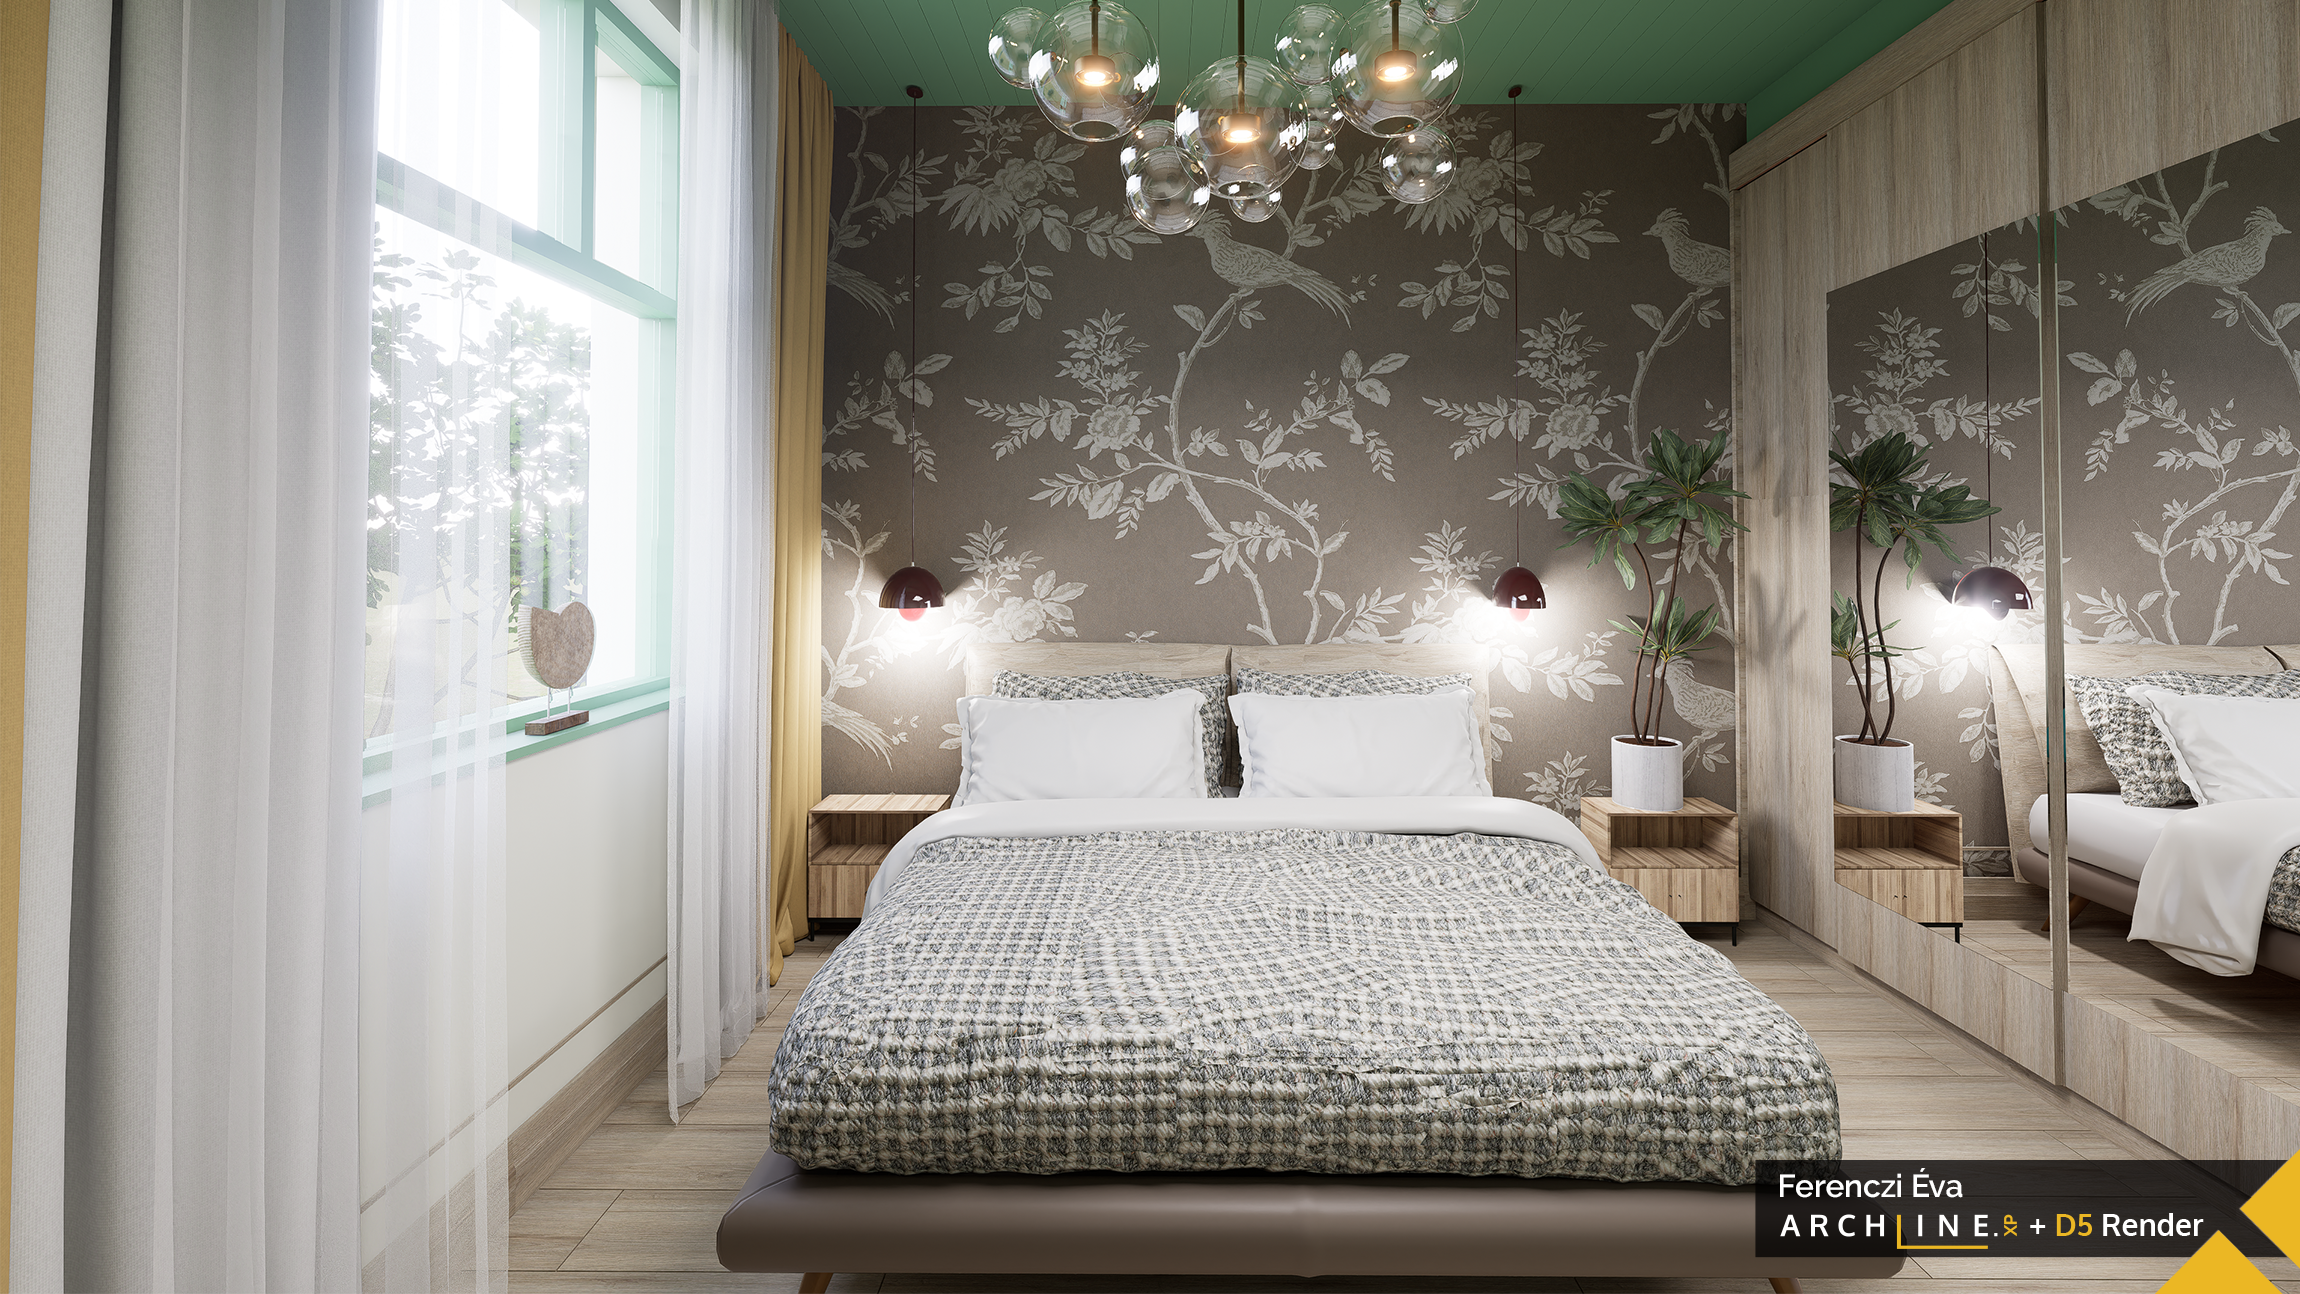
Project Example – Bedroom
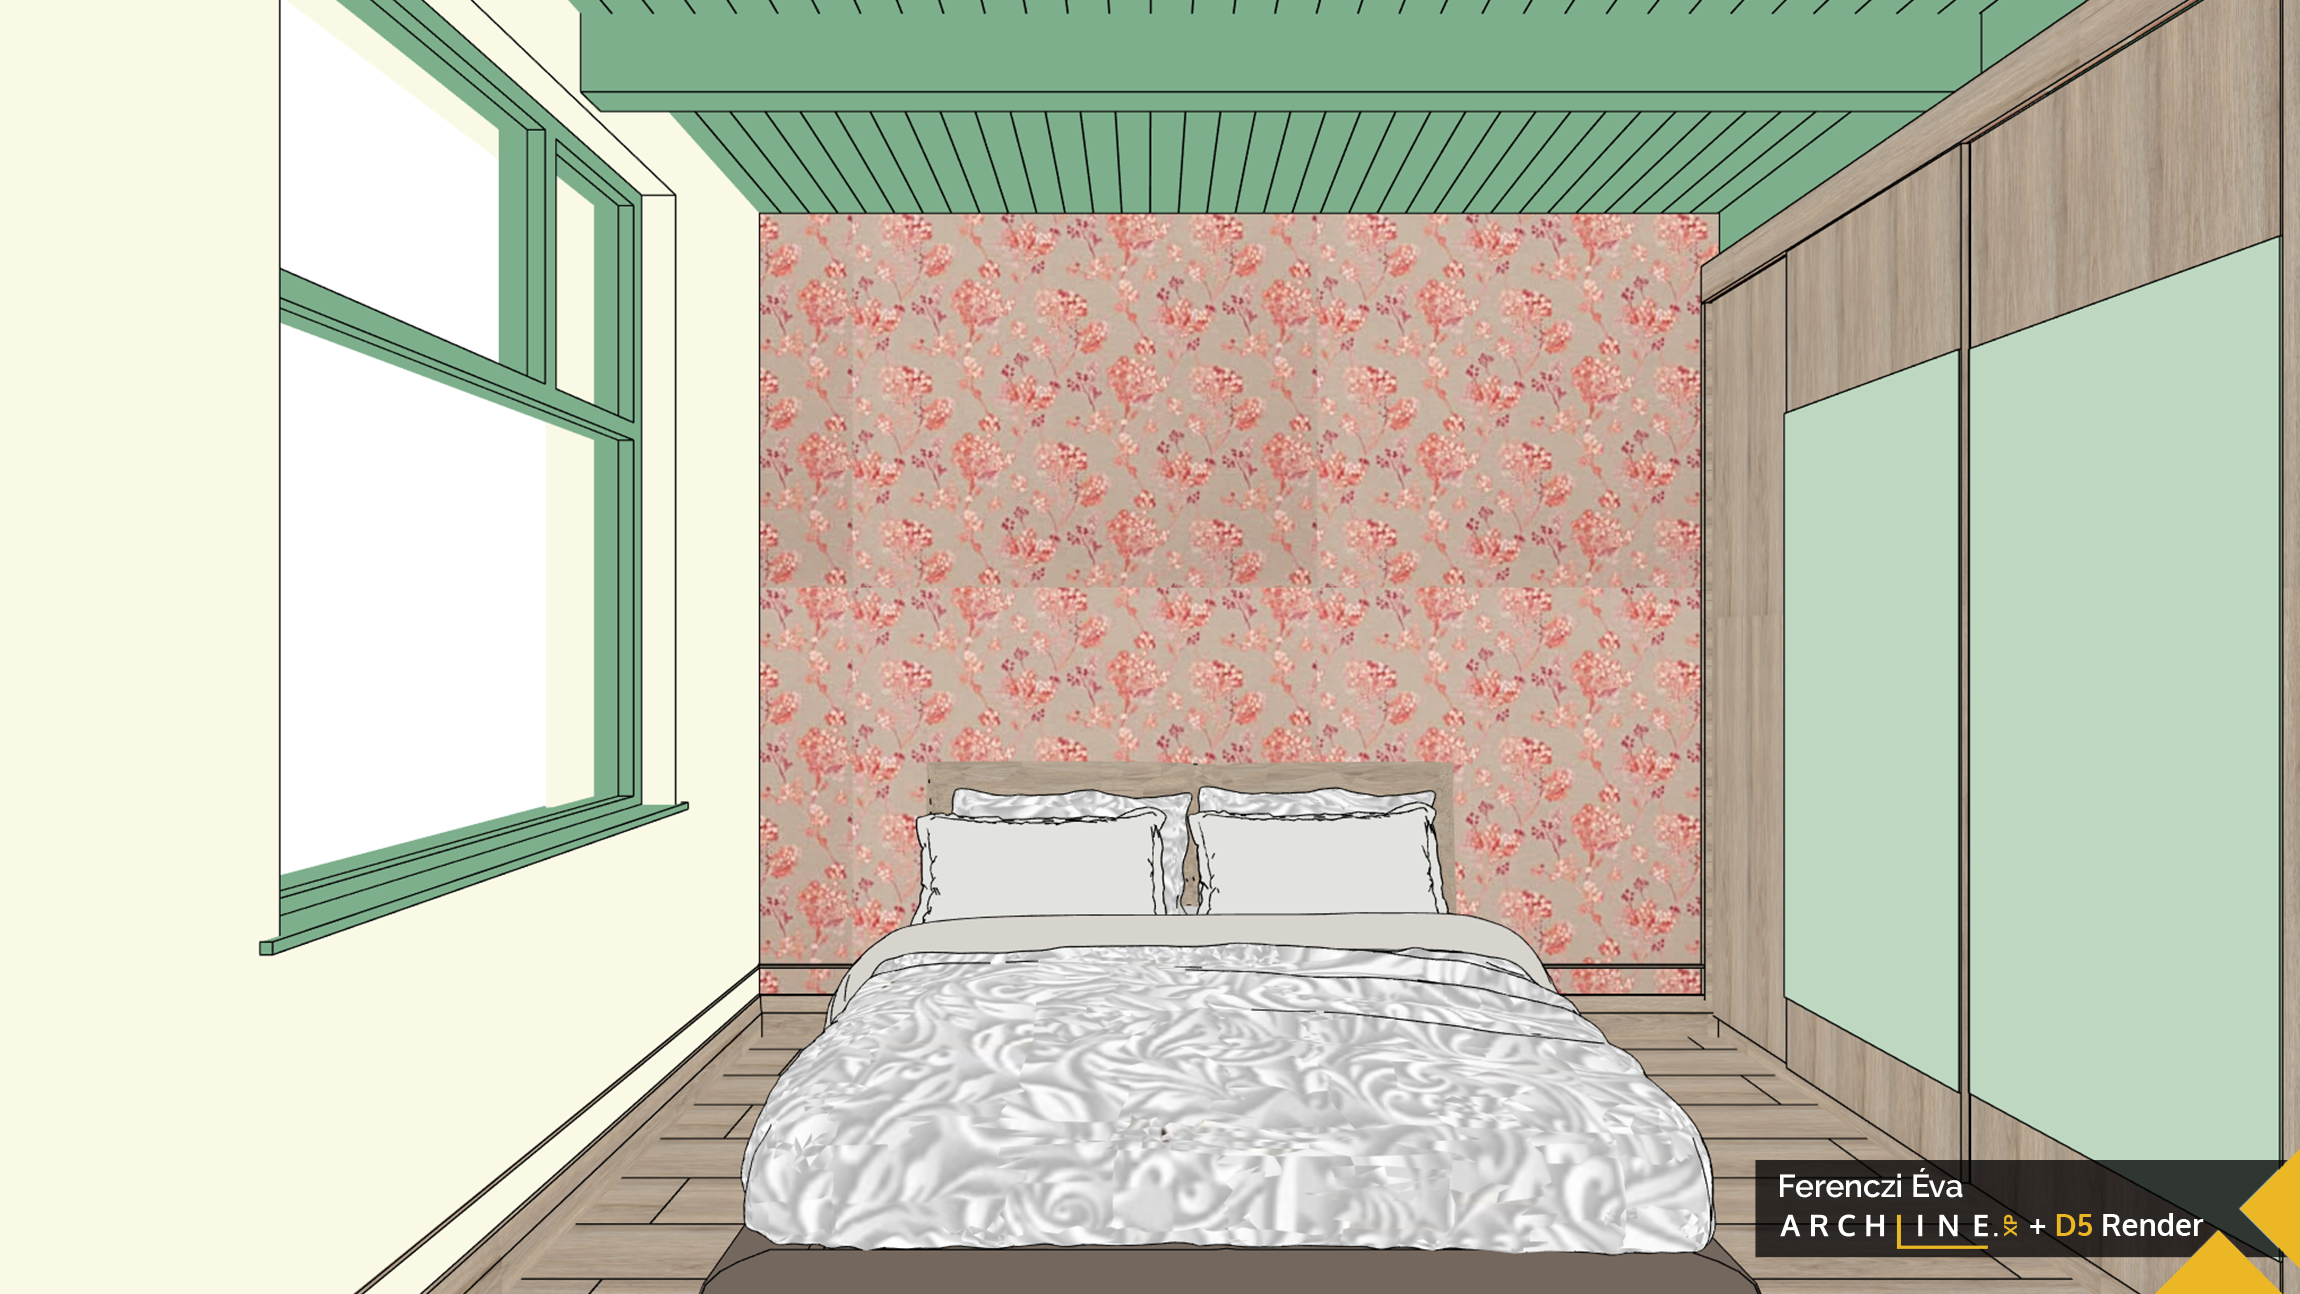
ARCHLine.XP snapshot
Modelled in D5 Render: shorter beams, no wall decorations, no carpet
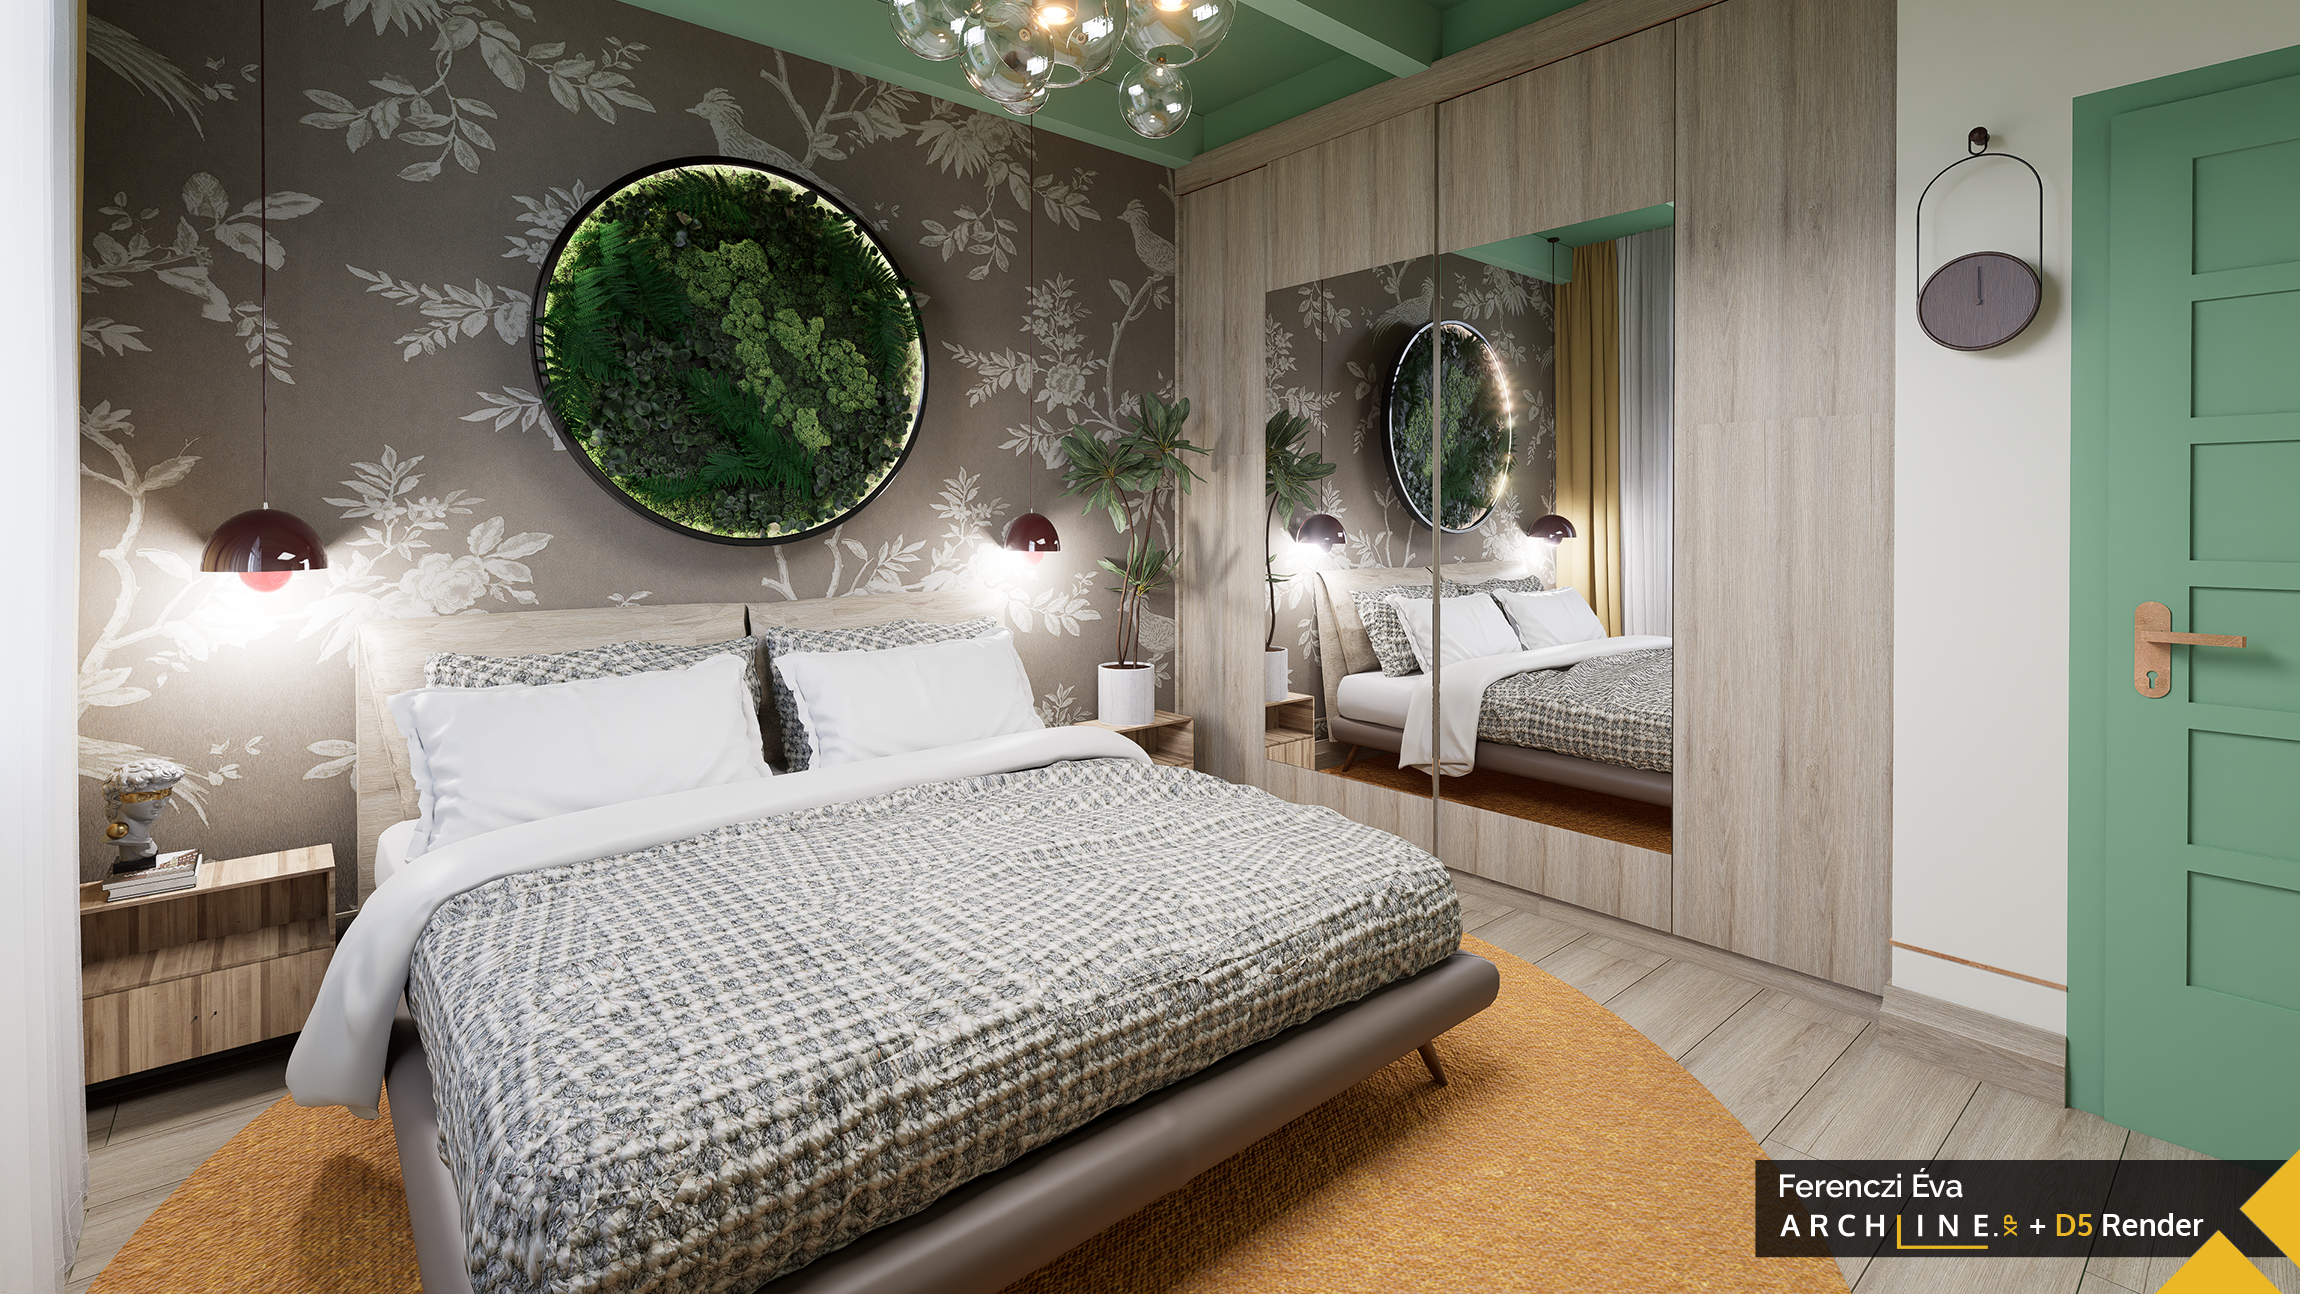
Final layout 1.
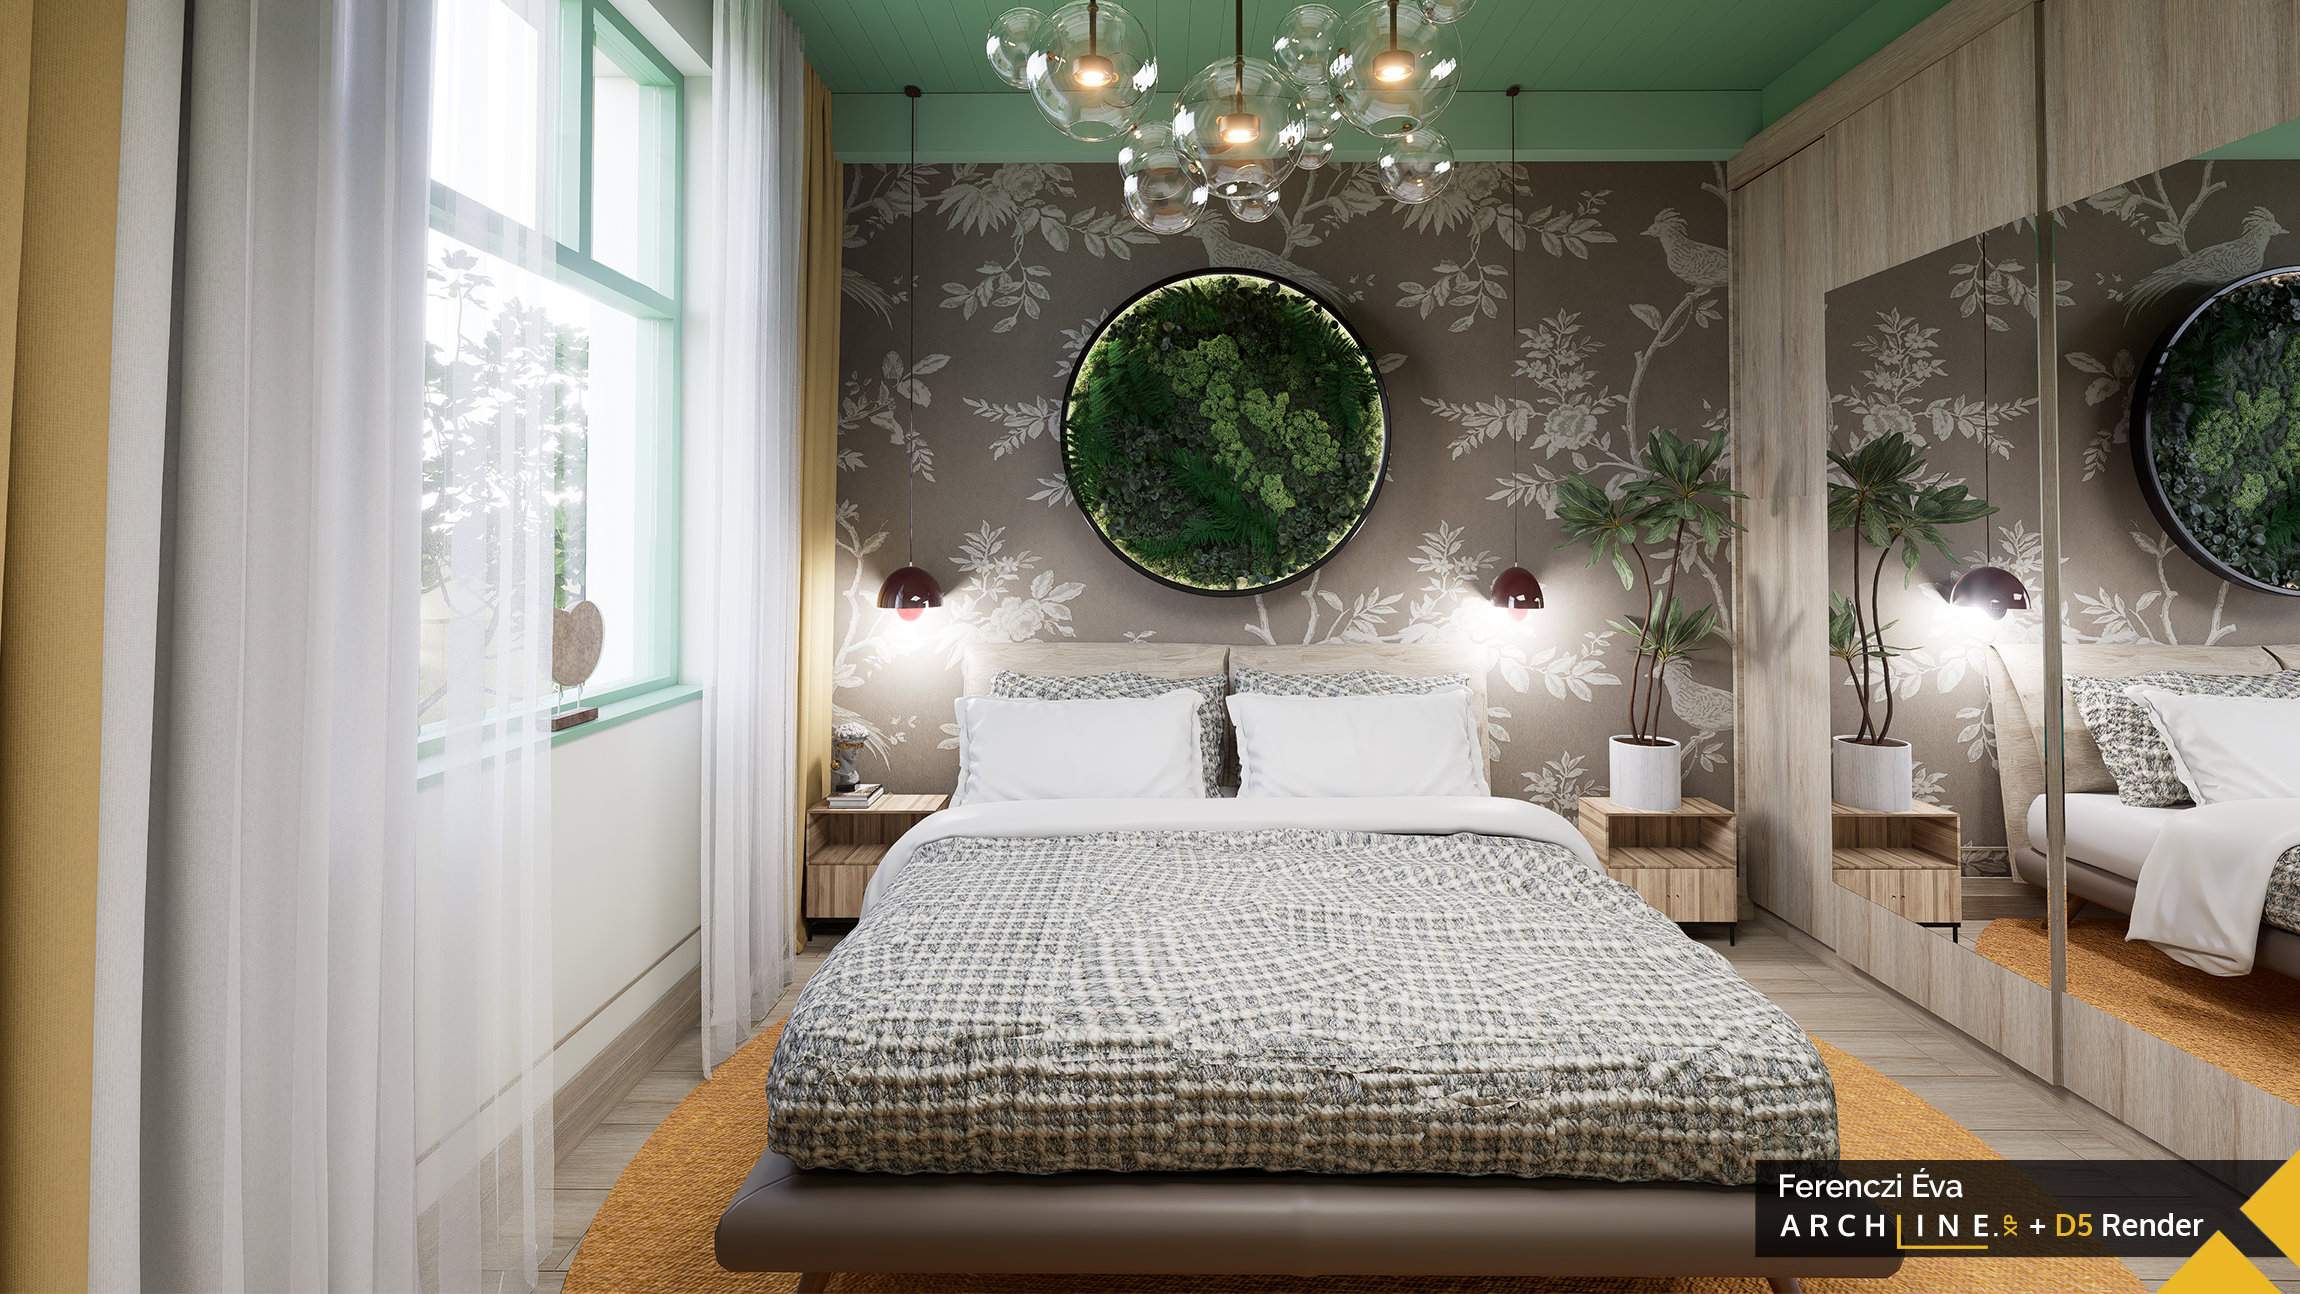
Final layout 2 - creating an additional view in D5
Should you use D5 as an integrated tool or separately?
The advantage of integration is real-time synchronization. Once the project is set up in ARCHLine.XP (including views and configurations), it transfers seamlessly to D5 Render, where you can freely add lights, materials, and decorations.
It’s important to know that synchronization is one-way: changes made in D5 (such as added objects or material replacements) are not sent back into the ARCHLine.XP project file.
Extra tip: HDRI in D5 is not just a background—it defines the natural lighting and mood of the scene. Definitely worth experimenting with!
The Biggest Takeaway? It was almost impossible to produce a bad render.
As an instructor, I especially appreciate that my students can now create D5-quality visuals alongside their ARCHLine technical drawings. The two programs together speed up the workflow and clearly raise the visual quality.
Teaching visualization is a joy—students are always eager for the first class (and the ones that follow!).
I hope this demonstration inspires you to experiment as well! As both a designer and mentor, my goal is to help you make the most of these tools.
If you get stuck at the first steps or want to develop an efficient workflow, feel free to reach out. Let’s talk about it! Share your experiences in the comments or contact me directly.
If you’d like to learn more about D5 Render, click HERE!
Contact:
Éva Ferenczi
Mobile: +36304376455
e-mail: This email address is being protected from spambots. You need JavaScript enabled to view it.