Professional articles | Blog | ARCHLine.XP
ARCHLine.XP 2016 and the New Rendering Modul
Blog written by ARCHLine.XP user Siroco.
As we are getting closer to Christmas experienced ARCHLine.XP users can hardly wait for their “little treat”, the testable version of ARCHline.XP for the 2016. This is not the ultimate version because it will be finalized by using the feedback from users and testers. Among the new features the most exciting for myself is the new rendering engine which help us to create even better photorealistic images.
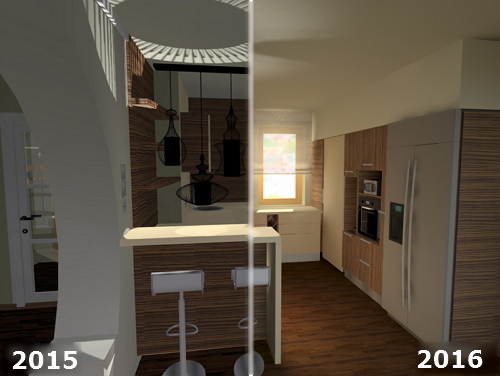
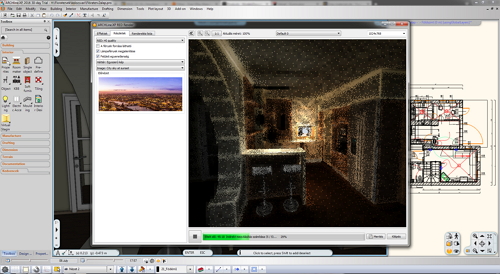
The kitchen model from my previous blog was used to test the new rendering, in the first place I did the rendering in 2015 version.
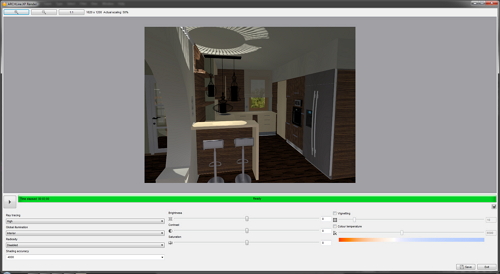
For the settings I chose the “High” option for Ray tracing and the “Night-Partly Cloudy” for Light effect, and I set a relatively simple type of “green + cloudy” picture for the background.
The photo becomes checked after starting the rendering, then it clears out quickly and after 3 minutes the well-known photo appears.

Certainly this photo is acceptable, although the surfaces are very smooth and too contrasting, the light spot on the ceiling is very unrealistic especially because the only light source is the sun.

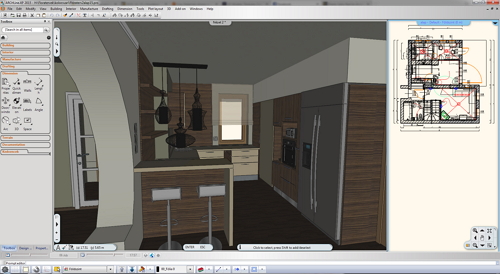
After all this I was very excited to open the 2016 version. The main screen is not changed too much, may be the frame of the left side menu is finer, the overall the impression is much more elegant.
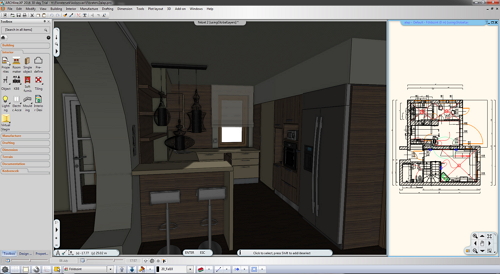
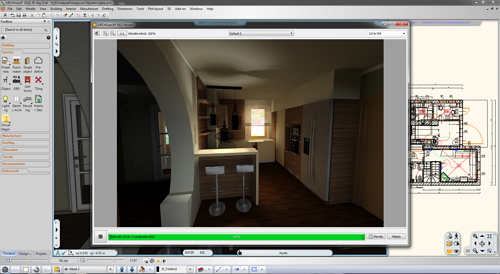
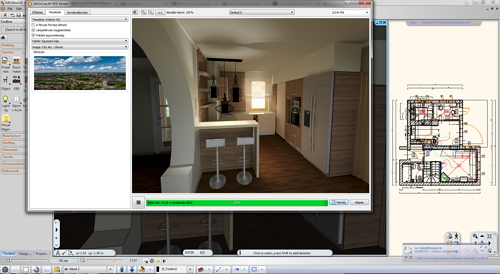
Without making any changes on the model I opened the rendering.
It is noticeable immediately that the gleam of sunshine can be seen very nicely in the opened model, but not in 2015.
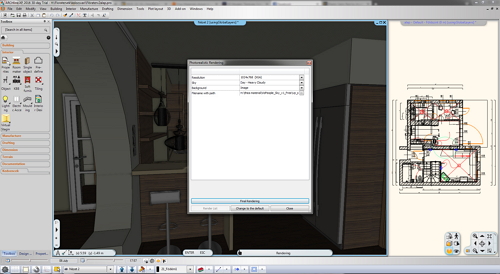
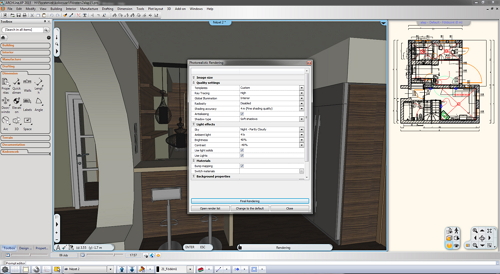
Here we can set three options:
The Resolution, the Sky, and the Background. These are not too many compared to previous version. Let’s see the rendering.
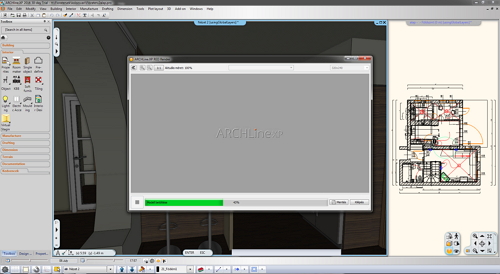
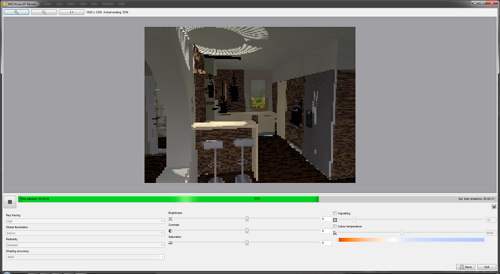
We cannot see anything for a minute, the model is just uploading.
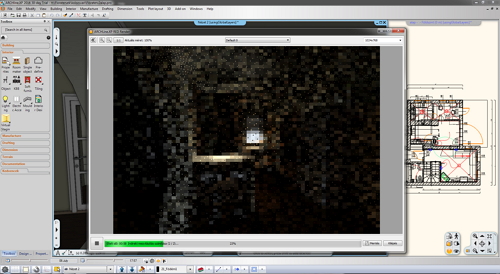
...then the screen is starting to become checked, then these are getting finer and finer,
After 2 minutes the photo is recognizable,
After 3 minutes it is perfect, then the ray tracing starts....
5 mins 26 sec and the result is ready.
I think we can say that the rendering took a little bit longer, but the result is significantly much better. There are no bizarre light spots on the ceiling. It can be seen that the only light source is the sun, the gleam on the floor and the shade of the lamp on the wall is very nice and natural.
Let’s see what else the new rendering can do:
On the left side of the toolbar there is a “«” sign, with this help we can set further parameters.
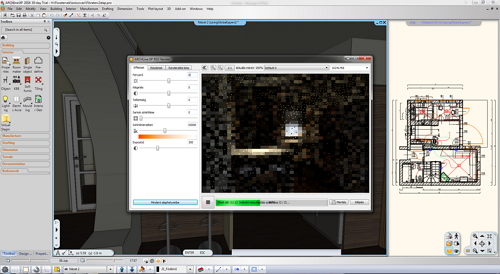
Choosing “Effects” we can adjust the basic “Light-Color-Contrast” settings. The second tab, the “Details” is much more interesting.
It is unfortunate that we have to start the basic rendering to have an access to these tabs.
There are some predetermined settings under “Details” tab, such as “Quick Interior (basic settings), Interior HQ, Low, Medium and High Quality options.
Undoubtedly choosing these options simplifies the rendering, but I am not happy that there are no more information about these options, and choosing any of them the rendering starts immediately.
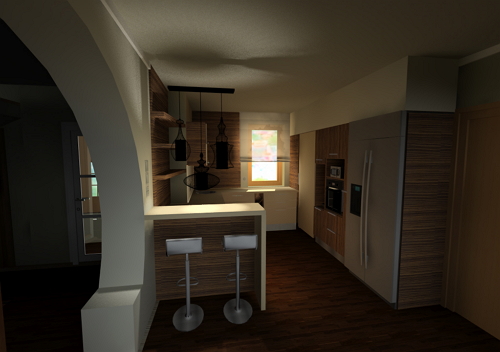
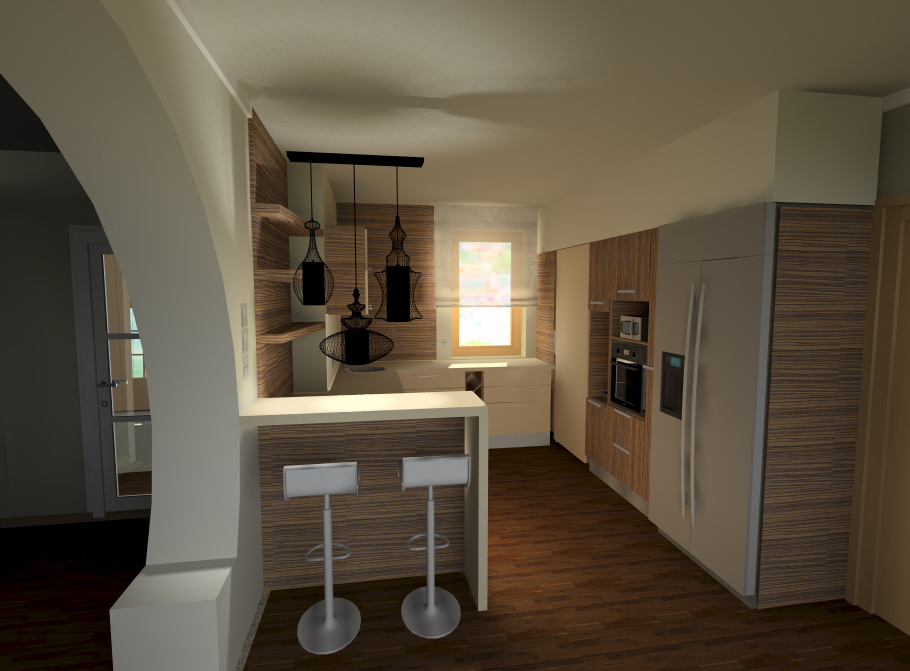
For comparison I start a new rendering choosing Interior High option, but sadly the estimated rendering time does not appear, so I can only hope it won’t take long.
This rendering took 31 minutes, but outcome is very professional. To get this result the brightness was only fine-tuned, we can do further adjustment, but this rendering seems prefect for me.
Just one more thing, the pre-set background picture is pretty nice, though it has the same disadvantage, choosing one from the list just to check it, the rendering starts immediately.
The Rendering is still under improvement, I do hope there will be a chance to start more renderings at the same time.
Overall, this is a good rendering, significantly better than the previous one. There are a few thing to polish, so users and clients will find using it with a great pleasure.
{KomentoDisable}