Professional articles | Blog | ARCHLine.XP
BIM Tools For Creating Lighting Plans
ARCHLine.XP is the only software on the market that is comprehensive for both architecture and interior design.
The software's scope enables both architects and designers to carry out design projects in their fields and even participate in larger-scale projects. In the below example, we'll see how ARCHLine.XP helps you with a complex task: creating lighting plans, managing light sources, and building an accurate quantity take-off of our luminaries.
Why use ARCHLine.XP for creating lighting plans?
- ARCHLine.XP supports up to 22 different types of files for import (DWG, DFX, RFA, RVT, OBJ, 3DS). Therefore, you are guaranteed to work together seamlessly with any contributor or fellow-designer, regardless of the software they use.
- You can download ready-made lamps and other models from BIMobject.com or the Trimble 3D Warehouse, straight into our project, and you can convert the items into luminaries easily.
- ARCHLine.XP-made projects can be read into calculation programs such as Dialux, Relux and AGI 32.
- You can create lighting plans, electrical diagrams. Also, you can collect our light sources into quantity take-offs.
- By integrating photometric data and other manufacturer info into our objects, your model will hold all the necessary and relevant information.
- For architectural visualization, you can use ARCHLine.XP LIVE: this simple and powerful rendering engine offers stunning results, by accurately reading the preset light behaviour.

Below is a typical workflow for creating a lighting project. We'll discuss where you can draw relevant photometric data from, how to incorporate the data into your model, and how you can present your end results.
1, Downloading Objects Into Your Design
3D Warehouse: ARCHLine.XP connects directly to Trimble's 3D Warehouse, the largest collection of user-made 3D objects. Although the 3D Warehouse objects do not have BIM properties on their own, we can add these properties to the objects later. Find the objects you need, and download them straight into your model.
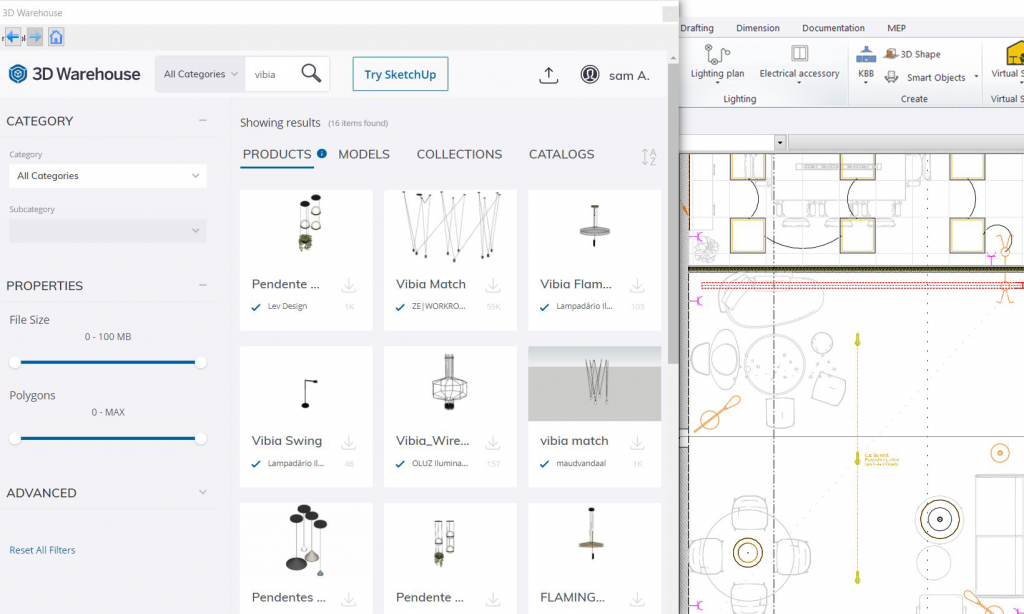
The 3D Warehouse is a great source of user-made items. Use the filters to keep track of the file size and the number of surfaces, so as not to make your model too heavy.
BIMobject.com: this library of BIM elements allows you to download lamps from multiple manufacturers. It generally offers objects in Revit (RFA), SketchUp (SKP) or in IFC file formats. If you work from BIMobject.com (or any similar platforms, where BIM elements can be found), then the downloaded objects will keep their parameters with which the manufacturers equipped them. It should be noted that with Revit families, ARCHLine.XP will also help you to clear away the unnecessary parts of the object, keeping the most important ones and allowing us to incorporate those that you need.
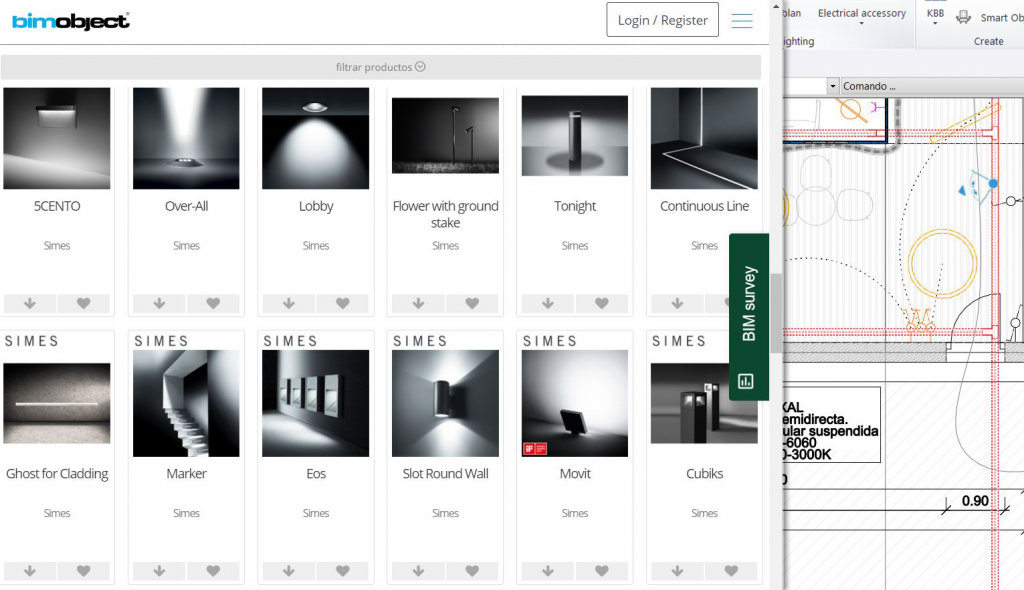
The BIMobject.com library is a great source of actual real-world products. You can filter items by manufacturer, too.
Manufacturer websites: the other option you have is to download the BIM items directly from the manufacturer's own website. Mostly, they will offer you Revit or 3D objects (OBJ files, for example). ARCHLine.XP is able to successfully integrate most file formats from these sources.
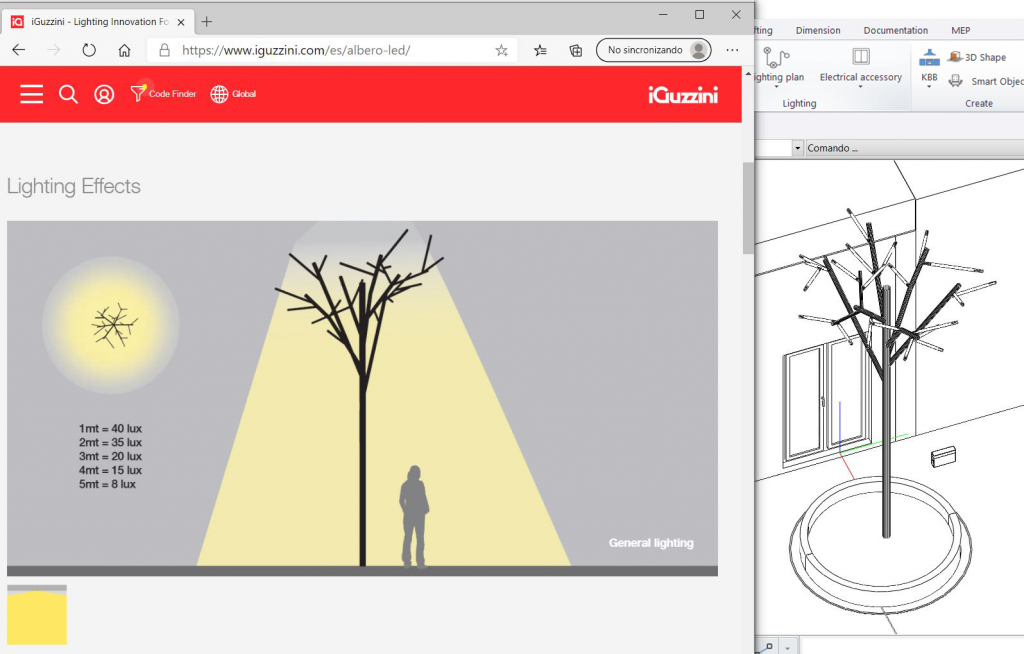
Most prominent manufacturers have their products available in 3D model form, as well. Look for the item you need, and download it along with its technical data sheet.
2, Object Management
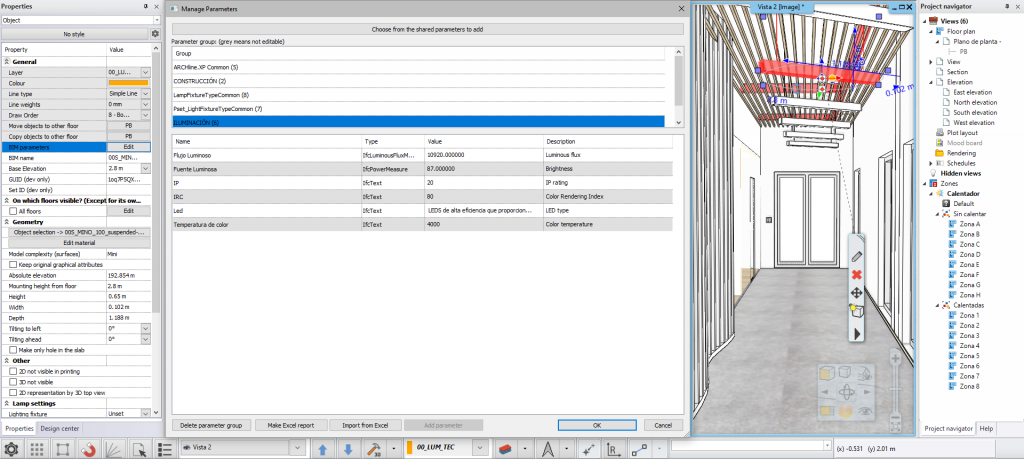
Parameters: you can add parameters to our lamps, which you need (Luminous Flux, Light Source, Color Temperature, Color Reproduction Index, Protection Index, etc.). We recommend adding a "url" parameter as well, to be able to locate the online technical sheet either from the manufacturer's website or in a folder on our Google Drive.
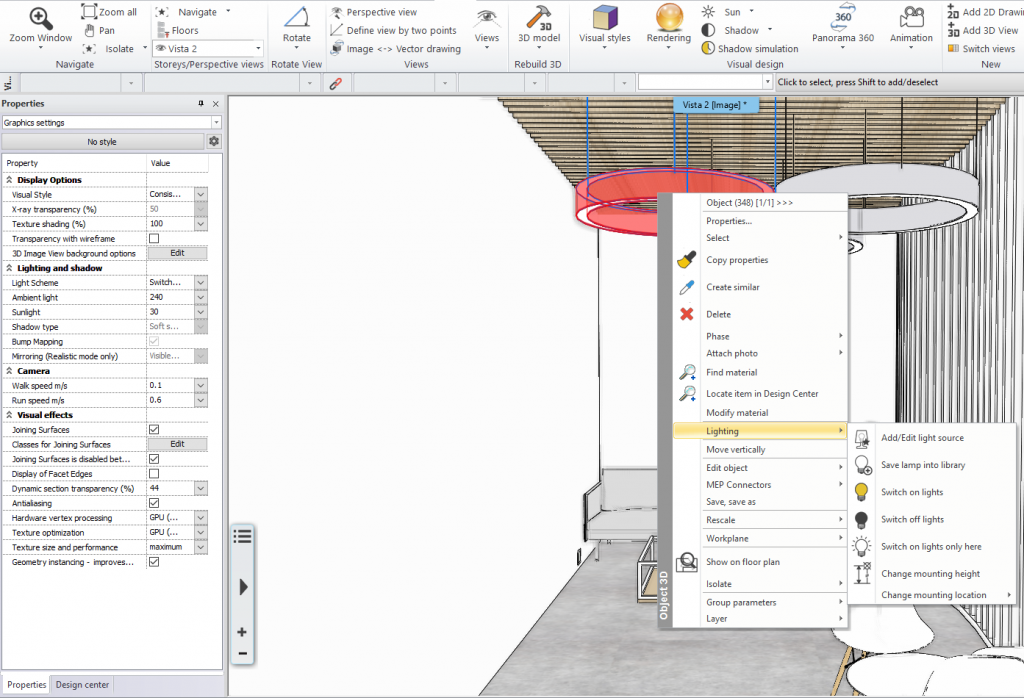
Converting objects into BIM luminaires: you have the option to convert simple objects into BIM luminaires. Basically, you will have to select the object, click on the context menu and select "lighting". Here, you can designate the corresponding mounting type, and once you did that, a light bulb icon will appear on the object, and on its thumbnail, indicating that the object is now equipped with a light source.
Photometric data: you can incorporate photometric data to the luminaire, via IES light sources. ARCHLine.XP is equipped with such light sources, but you can always add your own as well. Remember that the "nesting" of elements such as transformers, drivers and other components is possible as well. For this you have to create and incorporate them within the program's Sketch Mode, in which the objects can be modified.
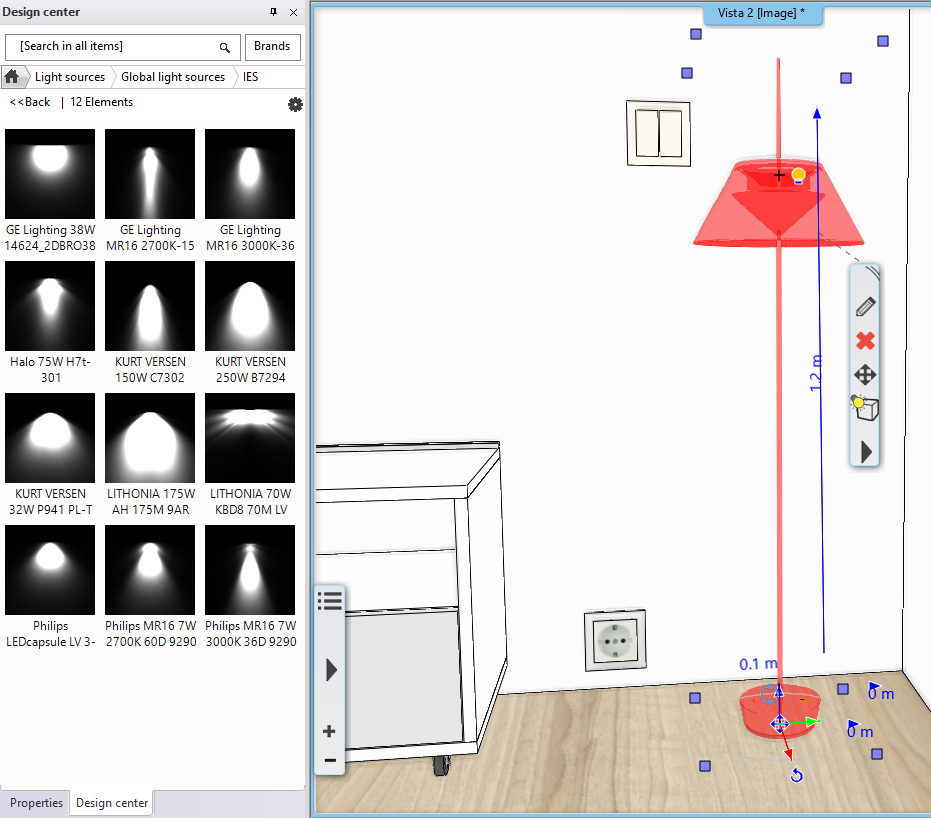
Adding IES light sources ensures more realistic light effects.
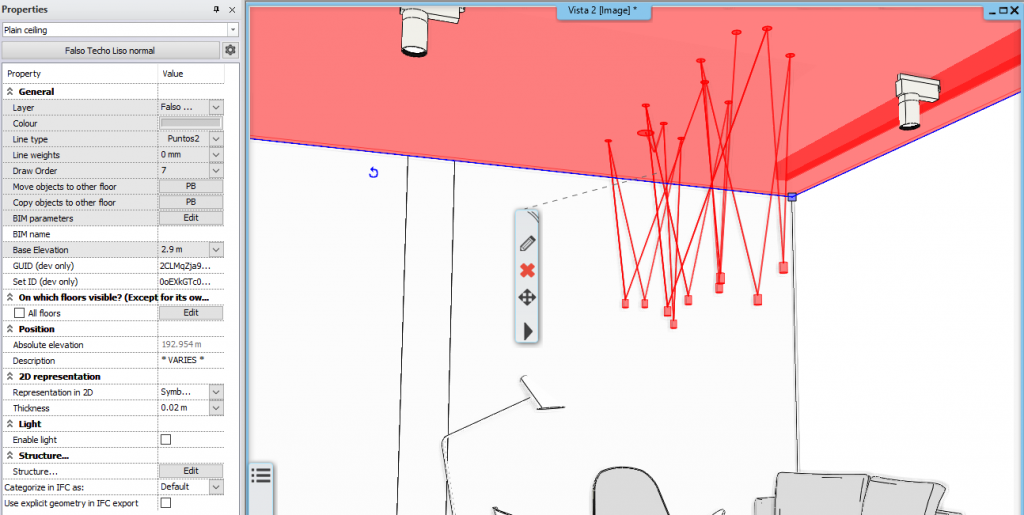
Positioning your objects: when placing objects (in our case, lamps), you can place them arbitrarily, or you can assign them to another items. In our example, you attach a lamp to the false ceiling for cleaner object management. ARCHLine.XP offers us the possibility to have items recessed (or nested) into a false ceiling. When you position items this way, the luminaire will be part of the false ceiling, and inherit the proper layer settings, too.
3, IFC Data Exchange
One of the strong points of working in a BIM environment is the openness to other platforms. Let's see how information flows in- and out of ARCHLine.XP
Import: ARCHLine.XP makes it easy to import IFC files from any BIM platform or BIM software. Tap onto huge sources of information, already available to us in IFC file format: in our context, this means that you can import real-world products onto our plan, thus you save modeling time. Also, you can bring in complete architectural models this way, and you can focus on the interior.
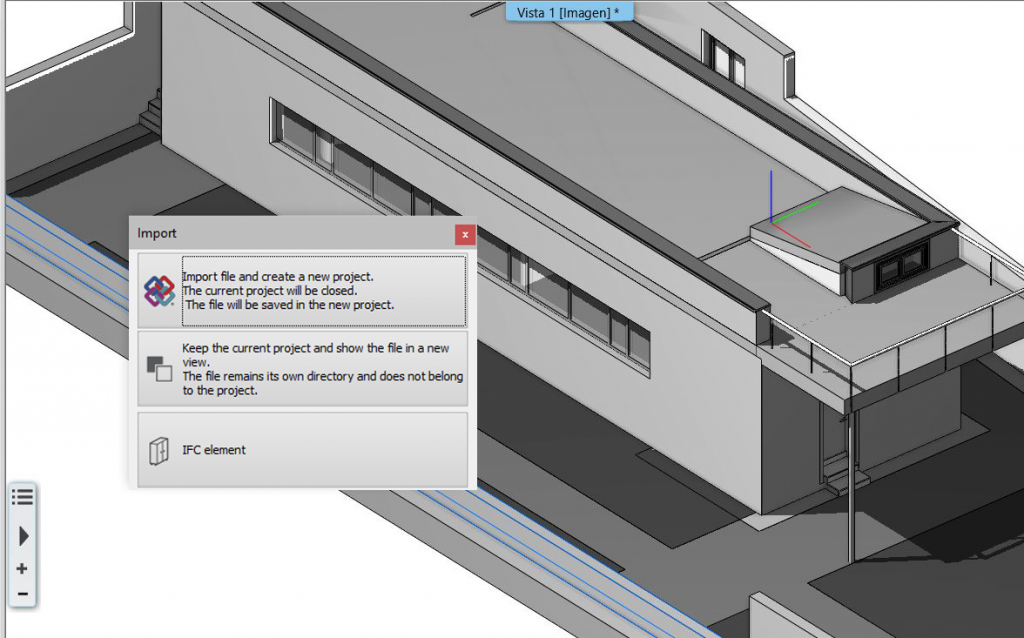
Importing an architectural file will save lots of modeling time.
Export: you an also export our 3D model via IFC into different software products available on the market, which will serve you for light calculation. In this example, we chose Dialux. you can see that the compatibility of the IFC file is complete, the file structure, the different models and all the integrated objects are preserved. You do not have to reincorporate the luminaires again, simply make a transcript of the IES files and establish the calculation locations.

No information is lost, thanks to the abilities of the IFC file format
4, Documentation
Creating a lighting project, you might end up using multiple programs, which is not really an efficient way to work. This is why it's important that ARCHLine.XP offers a complete solution package which contains 3D modeling, 2D drawings, electrical diagrams and drawings, construction details, lighting management, mood board, all in one environment.
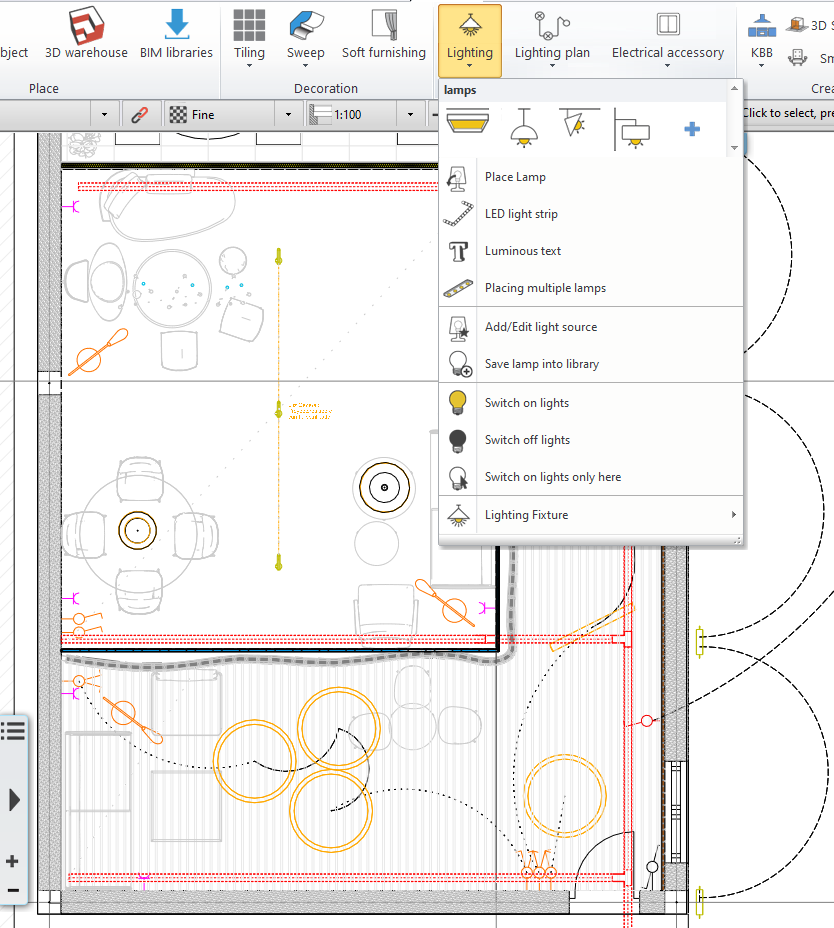
Lighting: there's a wide range of options to place lamps, luminous 3D texts, LED strips. Also, you can establish the type of mounting and other lighting accessories.
Lighting plans: you can create electrical circuits by assigning the corresponding switches to lamps, or other electrical equipment. Remember that, as always, good layer management is key for a neat looking and organized electrical diagram. Another strong point of ARCHLine's "Lighting plan" toolset is that it keeps track of which lamps and switches are already on the network, and which are not, so as to minimize design errors. Just an extra step away, we can also calculate the room's estimated built-in power.
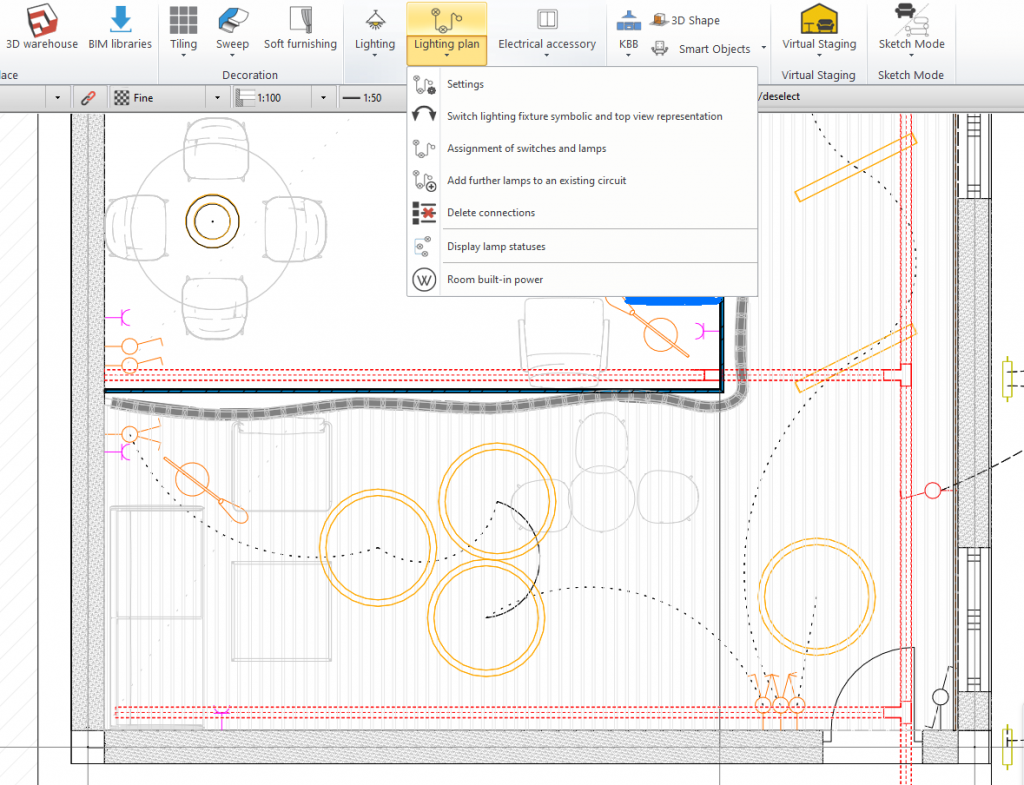
Graphical overrides and logical structure of your lamps will ensure a clean and organized lighting plan
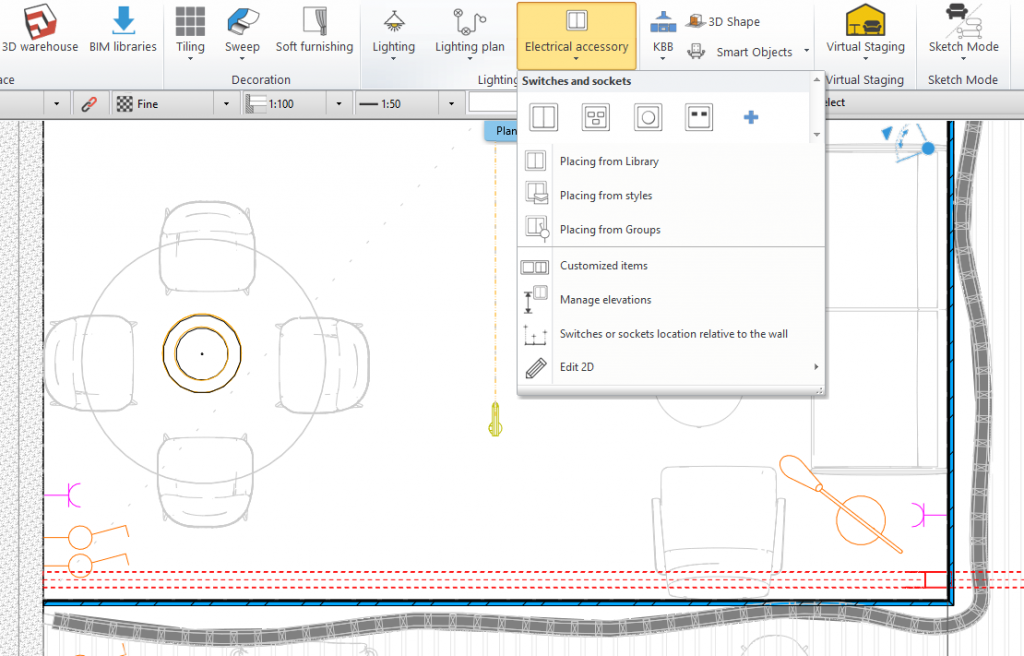
Electrical accessories: we can incorporate switches and sockets into our project. Determine the 2D symbol for your item, and equip your accessory with valuable info, such as item number, price, etc.
Annotations: by placing annotations, labels and texts, we can integrate further info into our plan.
5, Using The MEP Toolbox
ARCHLine.XP allows the pre-dimensioning, location and layout of simple MEP parts. In this example, we use the MEP builder for creating a wiring network for our lighting project. We take into account the modeling of cable sections, trays and the incorporation of connectors to our luminaires. With the option of "graphic overrides" you can distinguish different installations and systems, using the colors assigned.
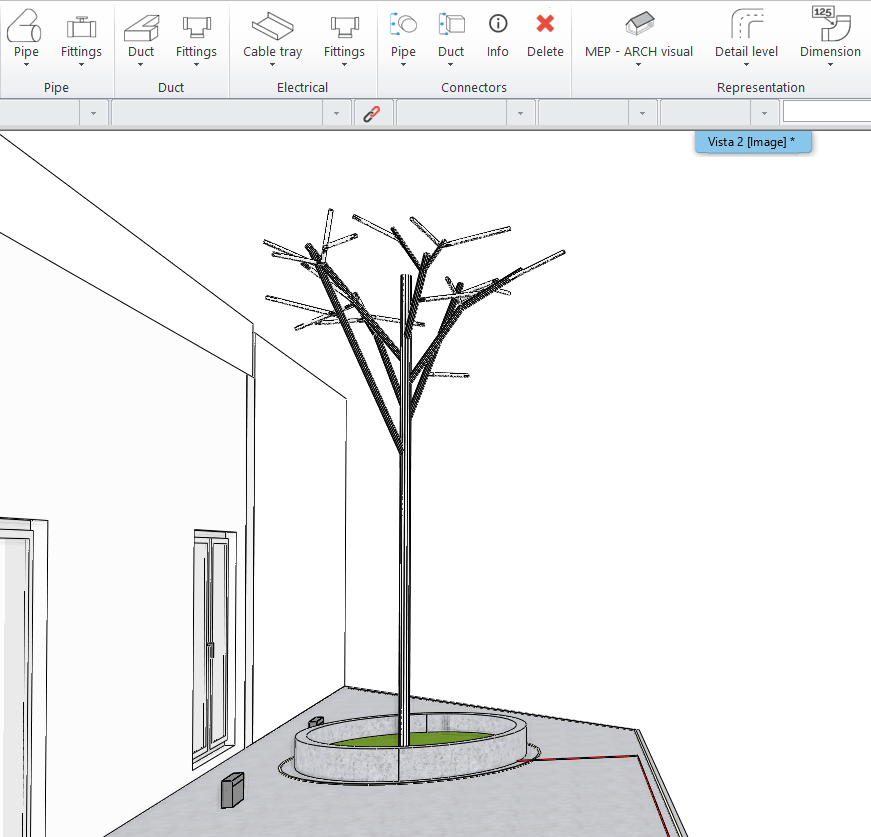
MEP tools can be used to create a wiring plan for our external light sources
6, Dimensioning and Lists
ARCHLine.XP allows to do all measurements, dimensioning, and the computation of the elements that we have in the project. Using the "Room" tool, you can find out which specific space a certain luminaire is located in. Naturally, this method requires for us to have a good management of the project content and an adequate nomenclature of its elements - luckily, ARCHLine.XP offers tools for these purposes as well.
When we are done, we can grab all the info into an Excel sheet, so as to help with our purchase orders on the desired lamps.
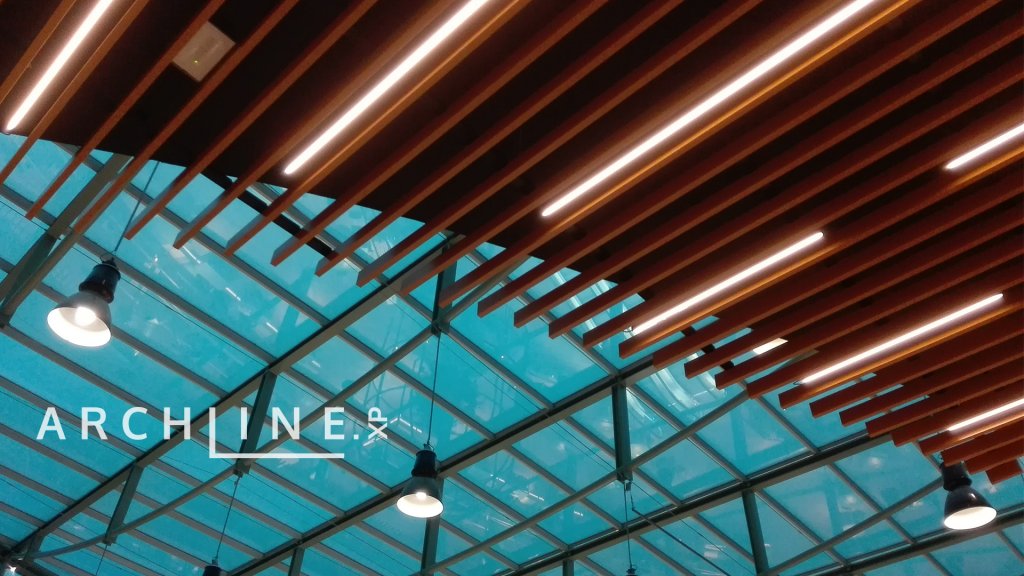
7, Visualization of Your Lighting Project
Let's see the end result! When it comes to architectural visualization, the ARCHLine.XP LIVE rendering software gets us great results. ARCHLine.XP LIVE reads the photometric information that you have incorporated into the model, so all lights will be pretty realistic. The program also offers us the possibility to configure the lights, turn lights on and off, create 360 videos and virtual tours.
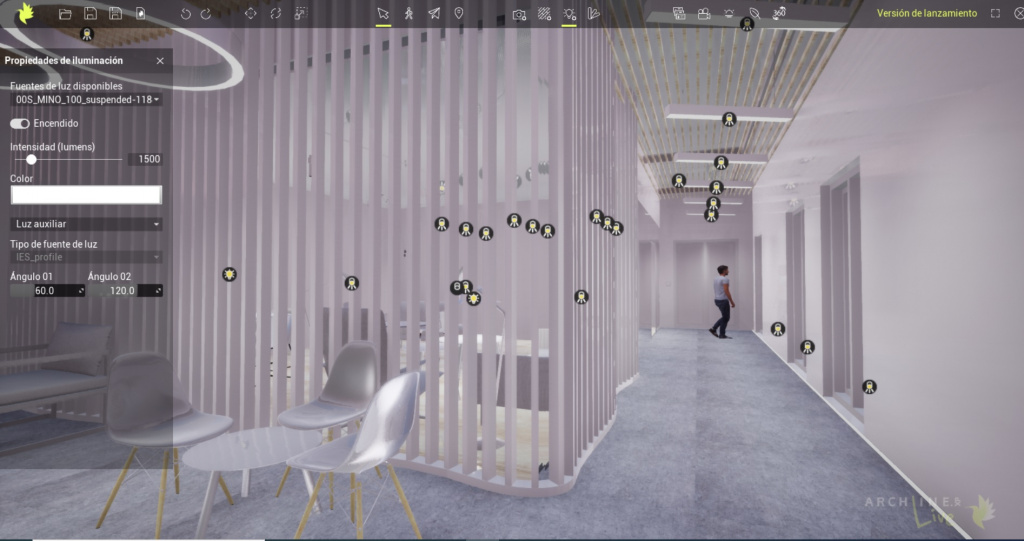
ARCHLine.XP LIVE in action, visualizing real-world lamps
With ARCHLine.XP, you have all components needed to conduct your lighting projects. Click here for a more in-depth analysis on how ARCHLine.XP can help you with managing jobs like these.
Written by:
Sam Abaga
ARCHline.XP Spain
Original Spanish version