
Professional articles | Blog | ARCHLine.XP
ARCHLine.XP 2026: Scan to BIM Made Practical for Designers
Based on Marco Guglielmin's webinar
If you are an architect or interior designer working mainly on small or medium sized projects, you have probably heard the phrase “Scan to BIM”, but it may still sound like something reserved for surveyors or large engineering firms. In reality, affordable scanners and smarter BIM tools now make 3D surveys an everyday design resource rather than an exotic extra.
ARCHLine.XP 2026 introduces new Scan‑to‑BIM features that aim to do exactly this: help you turn raw point clouds into clean floor plans, sections and BIM models without needing to become a data‑science expert or a land surveyor.
Why Scan to BIM has been hard until now
In any data‑driven workflow, collecting, cleaning and preparing the data is critical. For BIM, and especially for architectural and interior design work, this “data acquisition and preparation” phase has historically been hidden in a black box.
You either carried it out yourself in a traditional way (for example using tapes) – labour‑intensive and not necessarily accurate – or you asked a service provider and received a heavy, expensive 3D point cloud. Technically impressive, yes, but for many designers difficult to open, slow to navigate, and far removed from what you actually have to deliver: 2D drawings and a 3D BIM model composed of walls, slabs, openings and furniture.
Fortunately, spatial data‑capture tools are becoming cheaper and easier to use, so architects and interior designers can bring scanning into their own workflows. At the same time, ARCHLine.XP’s new Scan‑to‑BIM tools make point clouds lighter, clearer and more BIM‑friendly, so they integrate naturally into everyday projects.
A simple three‑phase method
In a recent webinar, Marco Guglielmin from CADline Software S.R.L (the Italian Partner of ARCHLine.XP) presents Scan‑to‑BIM as an iterative three‑phase method:
- Preparation – make the point cloud usable.
- Management – place and control it in ARCHLine.XP.
- Restitution – interpret it into architectural BIM elements.
Think of it as three questions:
- What kind of data do I really need?
- Where does the point cloud sit inside my project?
- How do I turn those points into walls, slabs and openings?
1. Preparation: from “too big” to “just right”
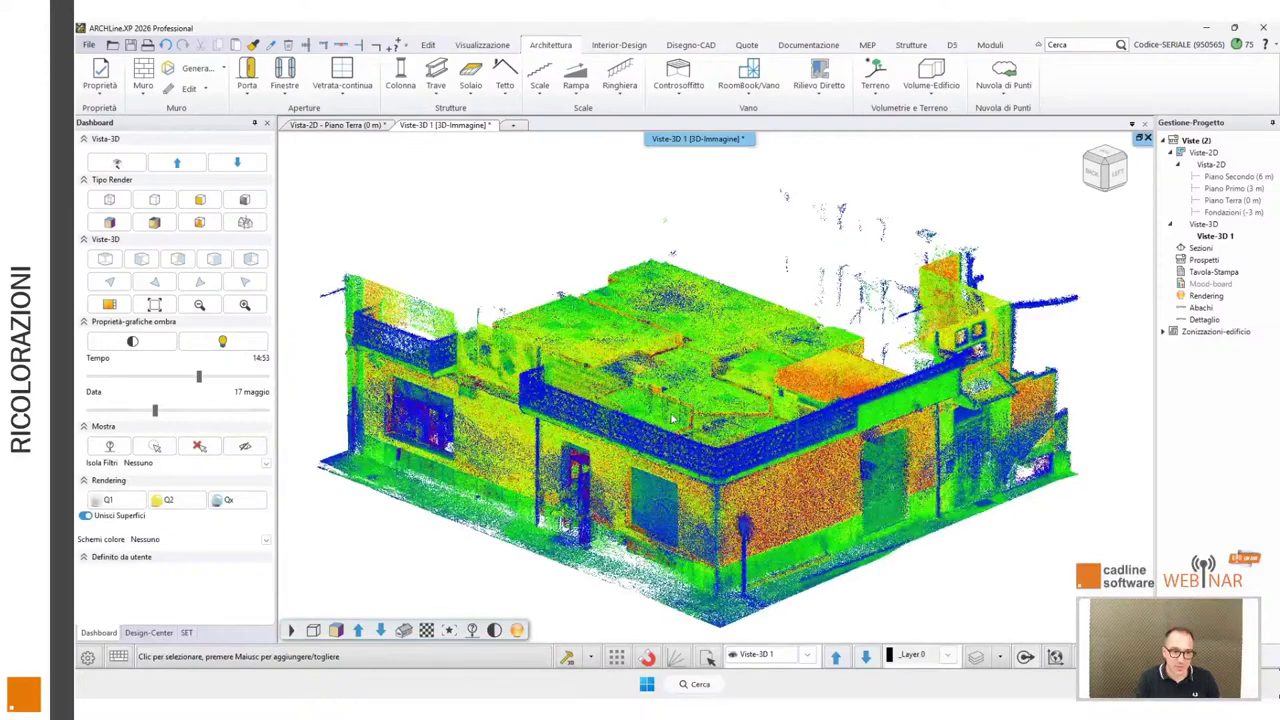
Modern surveys can easily produce hundreds of millions of points. If you try to use them directly, you will fight with performance instead of focusing on design. ARCHLine.XP 2026 introduces several ways to reduce and clean point clouds while preserving what matters.
Key ideas:
- Different technologies (static laser scanners, SLAM, photogrammetry, drones) create point clouds with different density, precision and noise. A dense point cloud (very detailed) is not automatically a precise point cloud (every point is in the correct position in the space).
- As a designer, your goal is not to reproduce every measured point, but to create an accurate BIM model that represents the building's intended geometry.
ARCHLine.XP lets you:
- Import common formats (E57, LAS, ReCap RCP/RCS) and convert them into a lighter internal format.
- Perform true 3D cutting: when you clip the point cloud, you actually delete points, reducing file size and RAM usage.
- Use plan‑based cleaning to remove non‑architectural content, such as furniture, in vertical bands around each level so interior point clouds become visually simple before you start modeling.
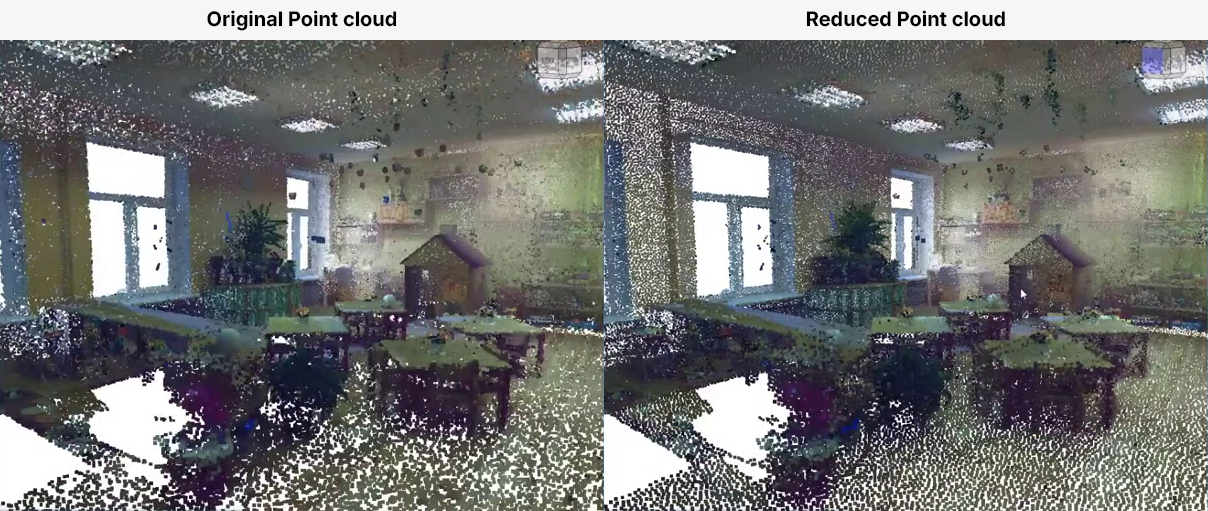
On top of this, there are three decimation modes:
- Random by target size (e.g. 270 million → 200 million points).
- Random by percentage (e.g. keep 3%).
- Spatial decimation (e.g. keep one point every 2 cm), which produces a uniform, hole‑free point cloud of a few million points—often more than enough for architectural work.
For you, the practical outcome is that survey data becomes easier to open, navigate and work with on a computer that meets the recommended system requirements for ARCHLine.XP.
2. Management: making the point cloud “BIM‑aware”
ARCHLine.XP is a BIM system. It organizes projects with levels, views and a structured building model. A raw point cloud, by contrast, is simply a collection of measured points in 3D space. The second phase is about interpreting that data and transforming it into an intelligent BIM model.
ARCHLine.XP 2026 allows you to:
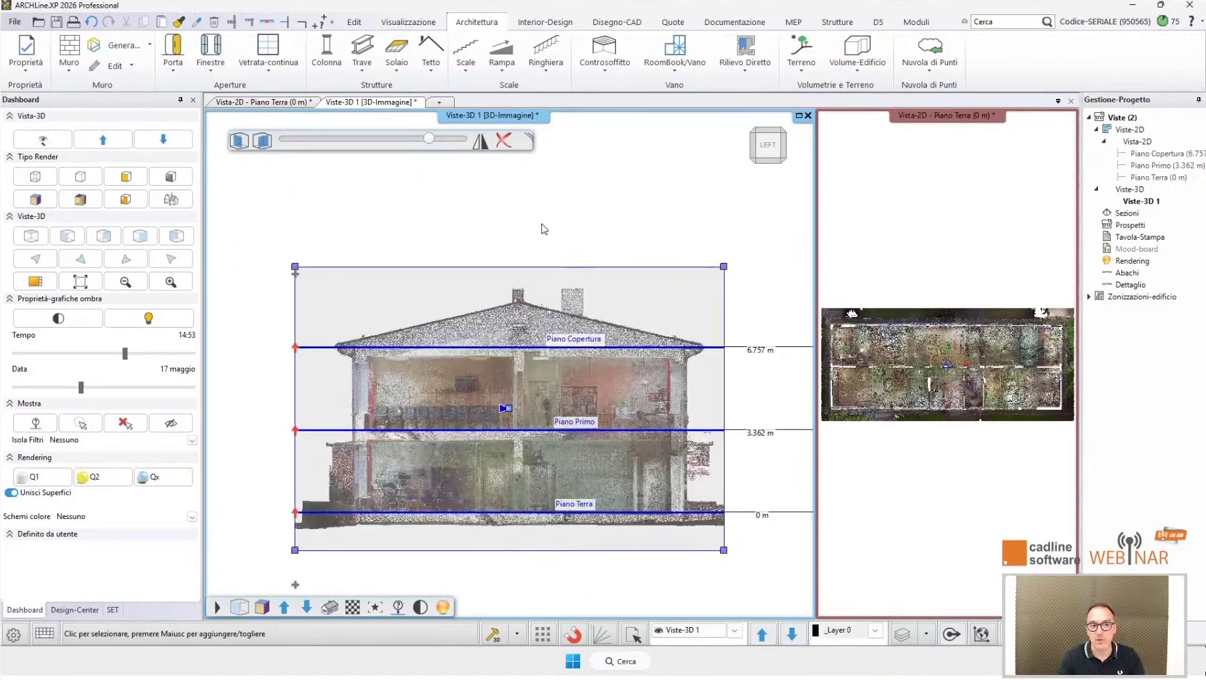
- Align point clouds to levels: pick points, define floor heights and then round them to sensible values (for example, a measured 3.395 m becomes a clean 3.40 m).
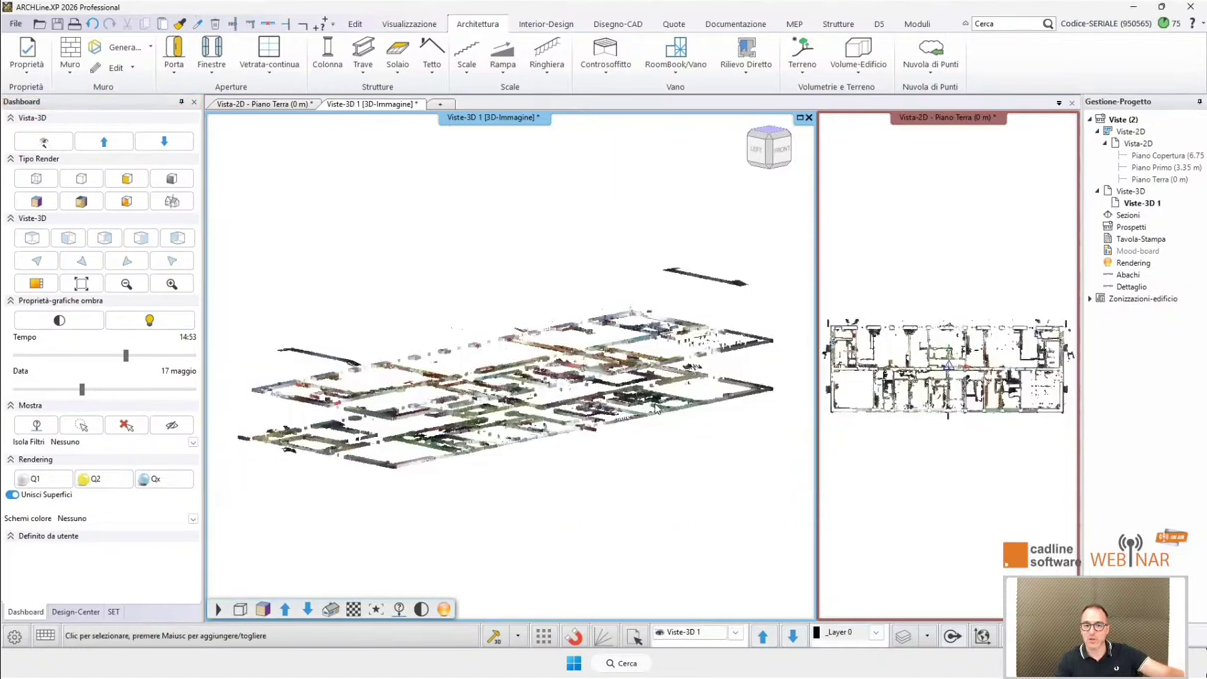
- Generate automatic slices per level: for each floor, the software cuts a horizontal filter (e.g. 1 m above the floor, 20 cm thick) and associates it with that level’s plan view.
- Use a filter plane to raise or lower the filtered area in fixed steps (e.g. ±10 cm) while staying in the floor plan view, so you can quickly “look” above a wardrobe or under a beam without creating dozens of different filters.
- Apply similar filters in sections, giving you focused working views for vertical elements like doors and windows.
Throughout modeling, the point cloud is a controllable background: you can turn it on and off, recolor it (for example, monochrome for clarity, or reflectance‑based coloring to differentiate materials), and adjust point size to highlight details when needed.
3. Restitution: from points to design elements
The third phase—restitution—is where designers usually feel the most uncertainty. How do you go from millions of points to a clean BIM model without getting lost?
Marco Guglielmin’s key message is that restitution is interpretive. Just as with classic notebook surveys, you do not copy every raw measurement literally. You compensate and regularize the data so the resulting plan and model are coherent and usable.
Rather than relying on blind point-by-point snapping, ARCHLine.XP promotes an intelligent modeling workflow. Snapping remains available whenever needed, but following every individual point can introduce scan noise and irregularities into the BIM model:
- Walls end up at 89.9° instead of 90°.
- Window widths become 1.47 m where the building logic clearly suggests 1.50 m.
- Floor heights stay at awkward values like 3.395 m.
ARCHLine.XP’s commands are built to help you compensate intelligently:
- Walls in 2D – you draw a box over the wall zone; the software calculates the best‑fit direction from the cluster of points and rounds thicknesses to whole centimeters. You then connect segments with familiar T and L connection tools.
- Windows and doors – you place a window between two points in plan, then adjust its parametric height and width in 3D using the point cloud as a reference. Rather than reproducing every local irregularity in the scan, you define accurate BIM elements that represent the intended building geometry. Once one window type is correct, you save it as a style and reuse it across the project.
- Sections for interior work – for interior doors or complex profiles, you cut a section, attach a point cloud slice, and model directly in that view. The point cloud gives you geometry and proportions; the BIM tools give you clean, parametric elements.
The result is a design‑ready BIM model that respects the survey within a chosen tolerance, but remains editable and dimensionally clean.
What about survey quality?
You might wonder whether all this only works with very precise, expensive scanners. The webinar deliberately shows both extremes:
- A high‑precision static laser survey of a school, with hundreds of millions of points and very fine lines.
- A deliberately “rough” SLAM survey of a 100 m² duplex apartment, with around 9 million points and visible streaks and drift.
In both cases, the same workflow applies: prepare, manage, restitute. For the SLAM example, the slices are thicker (2–3 cm), and the typical survey accuracy is around 1 cm. This provides a practical and reliable starting point for modeling the existing building. The point cloud serves as a precise reference, while the final BIM model is created by the designer using ARCHLine.XP's tools to accurately represent the building's geometry.
Beyond the desktop: BIM Leader and Gstar BIM
Scan‑to‑BIM does not stop at your workstation. CADline’s BIM Leader platform lets you upload point clouds, federate them with BIM models, share them with colleagues and clients, and use them for coordination meetings (for example, checking clashes between the model and reality or tracking construction progress with successive scans).
Under the hood, ARCHLine.XP shares its core technology with Gstar BIM, a sister product aimed at other markets with different licensing. File formats and updates are aligned, so workflows remain consistent across brands.
Why this matters for architects and interior designers?
For many designers, the first Scan‑to‑BIM project feels intimidating: new data types, unfamiliar tools, fear of slowing down projects. ARCHLine.XP 2026 is designed to make that first step manageable:
- You can start with one pilot project—perhaps a renovation where existing conditions matter.
- The software helps you reduce and clean the point cloud so it behaves like a normal background, not a “monster file”.
- Modeling tools support your usual way of thinking about walls, slabs and openings, while quietly using the point cloud for guidance.
Over time, Scan‑to‑BIM stops feeling like a separate discipline. It becomes another powerful capability in your everyday toolkit: you can capture reality more quickly, rely less on incomplete as‑built drawings, and design with greater confidence that your BIM model truly reflects the building you are working on.
For a better understanding of the complete workflow, we've also published two video excerpts from the original webinar:
The entire session can be seen here.