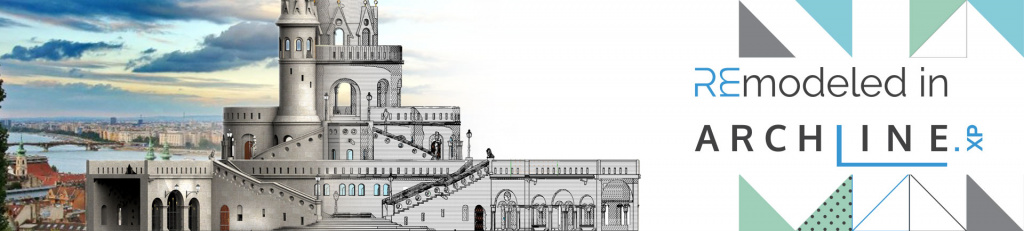
Professional articles | Blog | ARCHLine.XP
Remodeled in ARCHLine.XP - Fisherman's Bastion, Budapest
The Fisherman's Bastion (Halaszbastya) is an integral part of the UNESCO World Heritage-acclaimed Budapest riverfront. With its towers and arches straight out of a fairy tale, it's asking to be modelled in ARCHLine.XP. Let's see how we did it!
The Bastion was built between 1895 and 1902 as part of the series of developments that were to celebrate the 1000th birthday of the Hungarian state. Designed by architect Frigyes Schulek in neo-gothic style, it was meant to be a panorama terrace, not only providing an excellent view, but also emitting an air of the glorious past to its visitors. We set off to model this remarkable structure - as always, we focus on what we can learn during the process, what are the tricks we can adapt to our everyday design work.
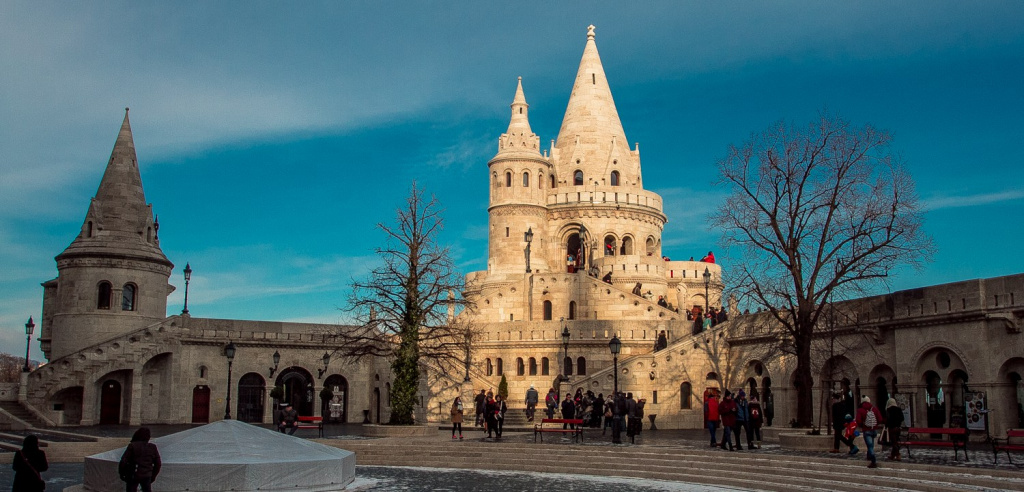
Photo by: Laszlo Balkanyi - WeLoveBudapest.com
Remodeled - grab the blue slider and move left and right to toggle between the elevation drawing and rendered image.
Also, check out the rendered visuals we made, and read about the steps we did to model this masterpiece


Remarks and tips on using existing drawings
The basis of our work was a floorplan. Since we wanted to use these drawings extensively as reference, we imported the JPG files into ARCHLine.XP, and then calibrated them to make sure they're in scale. Note that these are raster images, and their resolution was pretty low, too - if we want these plans to help us positioning our models precisely, we need to redraw parts of the images manually.
rough draft:
quadriga, reliefs, building models of the surrounding
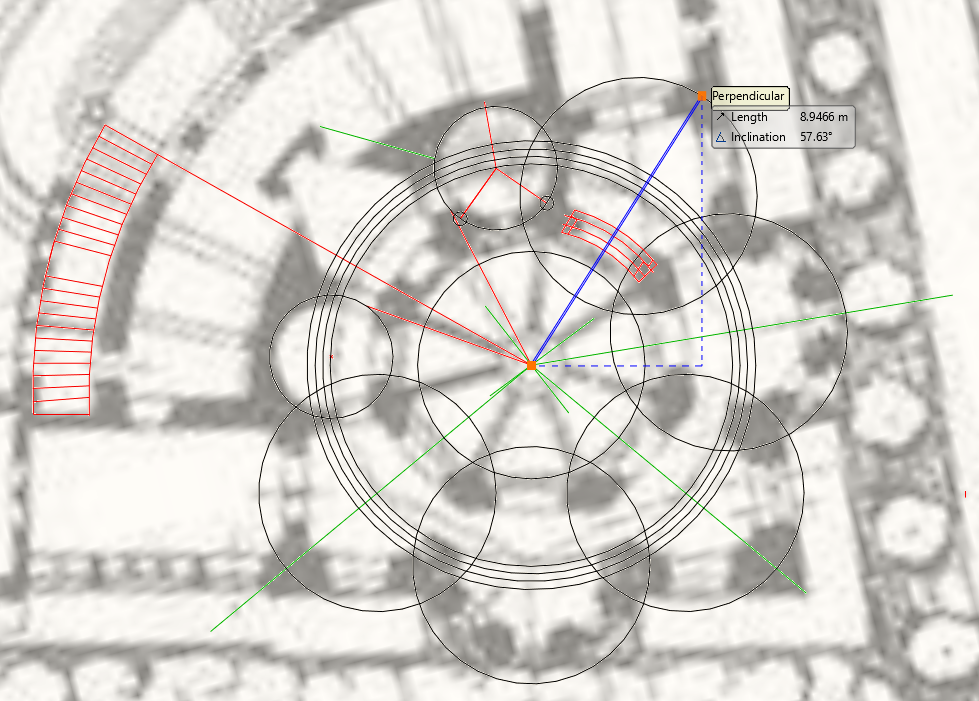
The flower petal-like patterns become more abundant, when we redraw them.
We used the standard 2D drafting toolset of ARCHLine.XP, creating lines, polylines, circles, etc. It's good practice to use several line colors so as not to get lost, and to differentiate the helping lines from redrawn walls and stairs. It's true that redrawing the images is a lot of work, but this is the only way we can be sure that the originally intended geometrical forms (which is made up by circles gathering around a central focal point) are kept. It's not compulsory to redraw everything, so we can focus on the key elements and shapes.
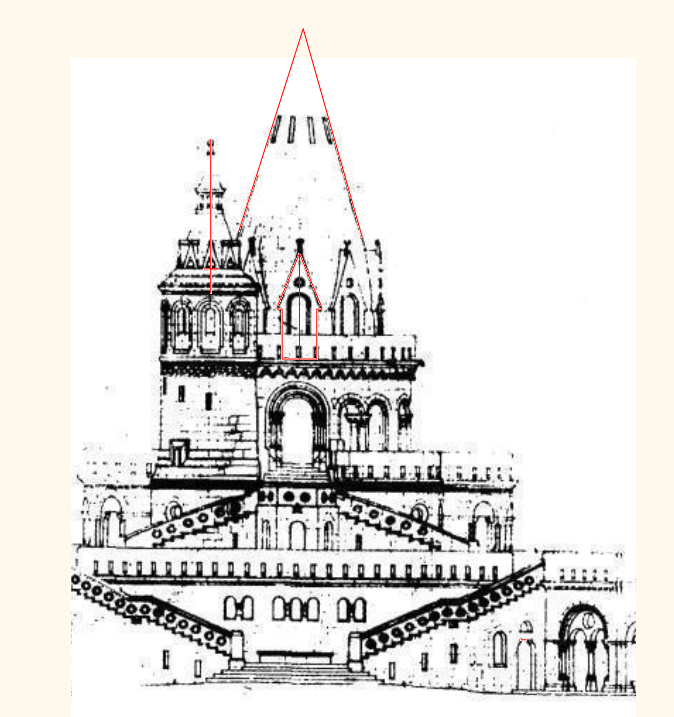
The elevation drawing was treated similary - if we want to get accurate data out of it, we need to redraw the key areas.
Before we started the actual modeling, we also made a few section profile drawings and a few details (see below for the arched double window). We'll need these later.
Section profiles for railings and plinths on the left, a window profile on the right.
It's good practice to put all line drawings like these onto easily manageable separate layers, or floors (or both) because we'll need to pull them up frequently to act as drafting aids.
Staircases, railings, and decorative items
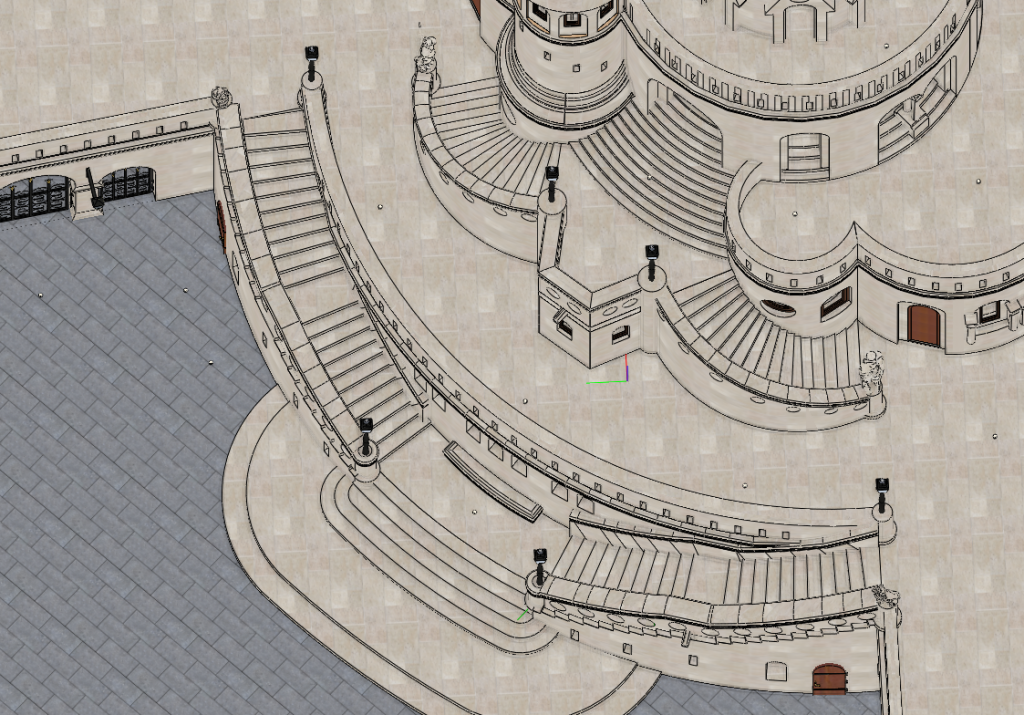
Staircases and symmetrical shapes everywhere - organic shapes are a challenge to model.
Although ARCHLine.XP comes with pre-defined staircases, we had to model organic shapes here: staircases are very heavily represented in this structure, and they come in all forms, shapes and sizes - curving, narrowing towards the top, etc., all circling around one point, the center of the middle tower.
We started by pulling up our line drawing, and adding in the linework for where the treads of the stairs should be.
Then, we used the stair by tread tool, which is able to pick the internal point of any closed chain, thus forming the tread. We kept on clicking into the areas where the treads would be, adding the riser height.
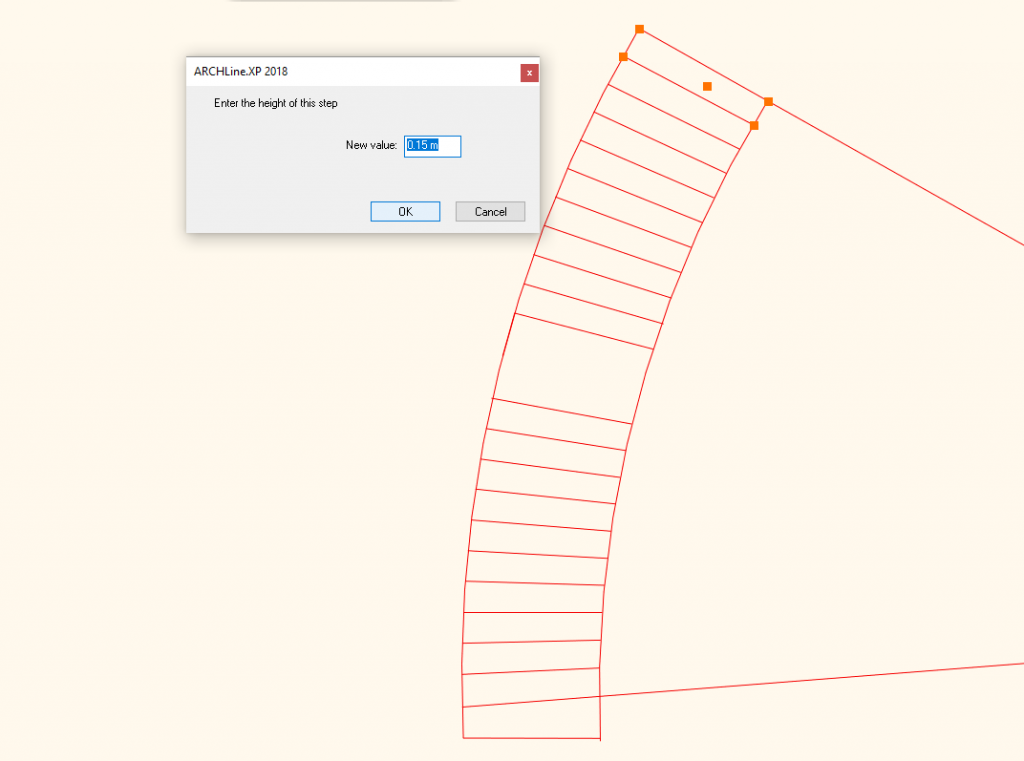
Picking the threads one by one, and specifying the riser height will result in a 3D stair - this is how we do difficult shapes.
Finishing with an Enter key, the program formed the desired shape - we can obviously fine-tune it, in terms of total height, texture, etc.
Every staircase in this model was created this way.
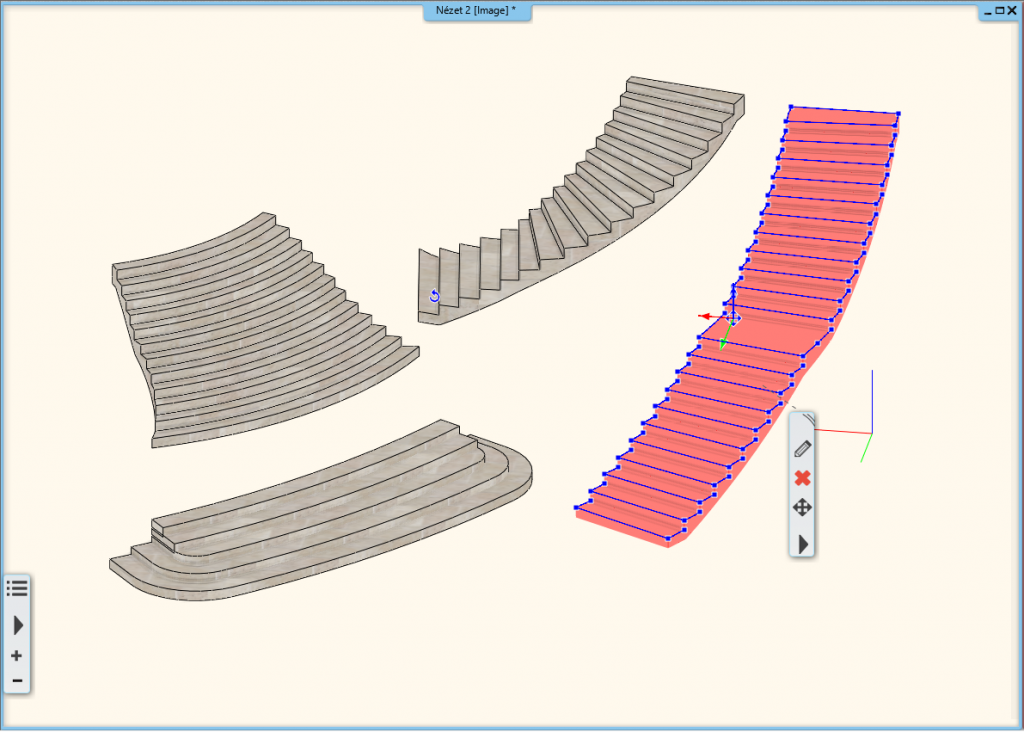
The resulting shapes can always be adjusted - we could move nodes, change the curve, etc.
The interesting funnel-like holes in the railings were possible to create thanks to a specialized modeling setting. In ARCHLine.XP, we are able to push any kind of object into a wall, and if we do, we can tell the program to "Make only the hole in the wall", leaving a negative cutout of an object in its place. This means that we create an object, which should look like the negative image of the cutout we want to create - then we push it into the wall, and tell the program to use this object as a reference for cutting a hole.
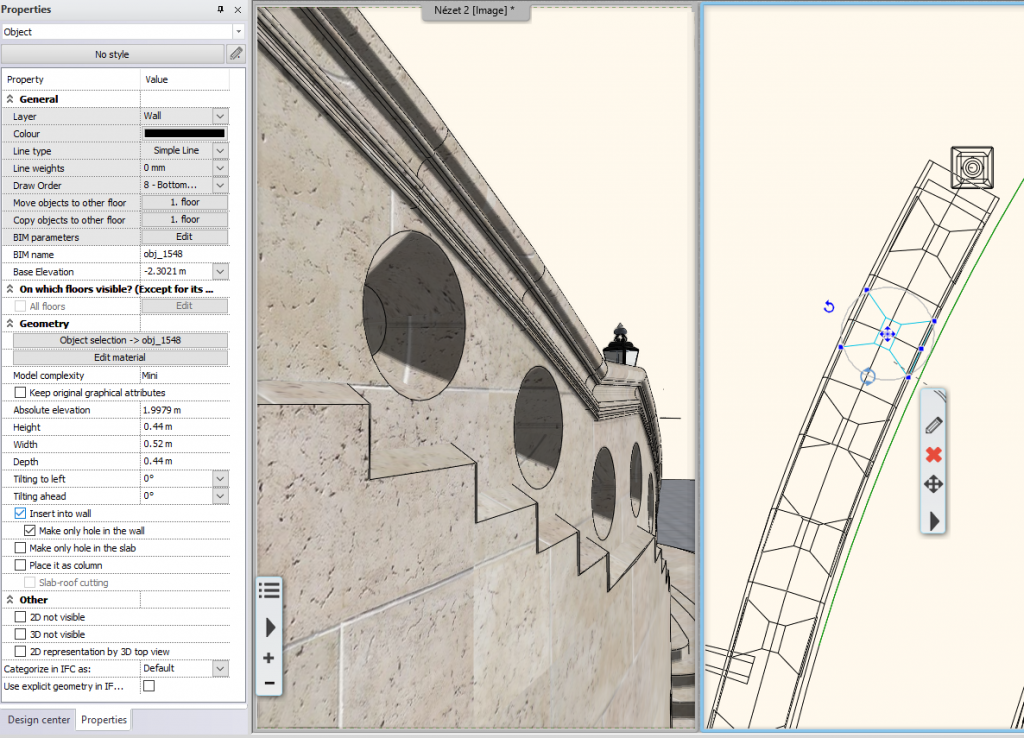
The trick is revealed on the right hand side - funnel-like objects cut their negative images into walls.
So far we have been using standard building elements, walls, stairs, slabs - let's look at what happens when these forms become more specialized.
Using 3D modeling tools
We can use standard architectural elements (walls, slabs, stairs) for most modeling activities, but there are scenarios, when we need to model more extreme shapes. For this, ARCHLine.XP provides a 3D modeling toolset - let's illustrate a few.
The towerhead
We made a line drawing of the towerhead's section profile, based on the elevation drawing we talked about before. Then, we used the Drafting / 3D / Revolve 360 tool - this feature takes a closed chain (which we have already created), asks for a rotation axis, and turns the closed chain into a solid of revolution.
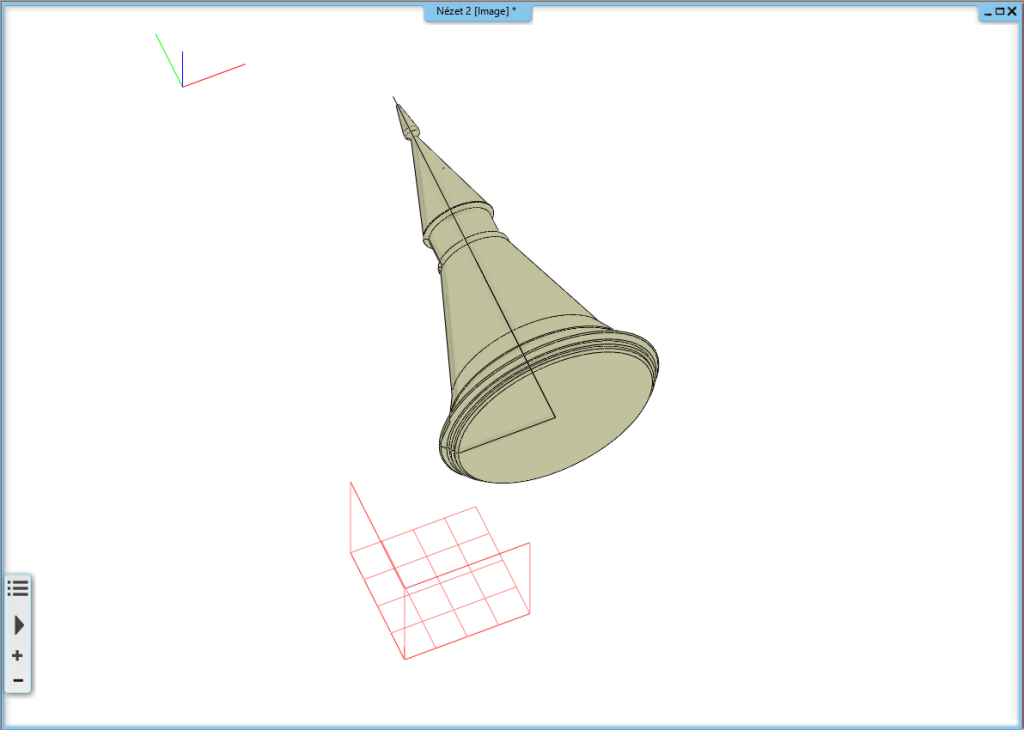
After the profile is defined (black lines), a solid of revolution is created.
The towerhead windows
First, we had to create a single window. The Drafting / 3D / Extrude command allowed to pick a profile - just like before - and end up with a 3D shape. These shapes/blocks were placed onto the towerhead. In order to make these windows see-through (that is, cutting the material behind them), we used the Drafting / 3D / Push-Pull (with profile definition) tool. We defined a closed profile first (the window), and then by pushing inwards, we managed to cut a hole into the towerhead.
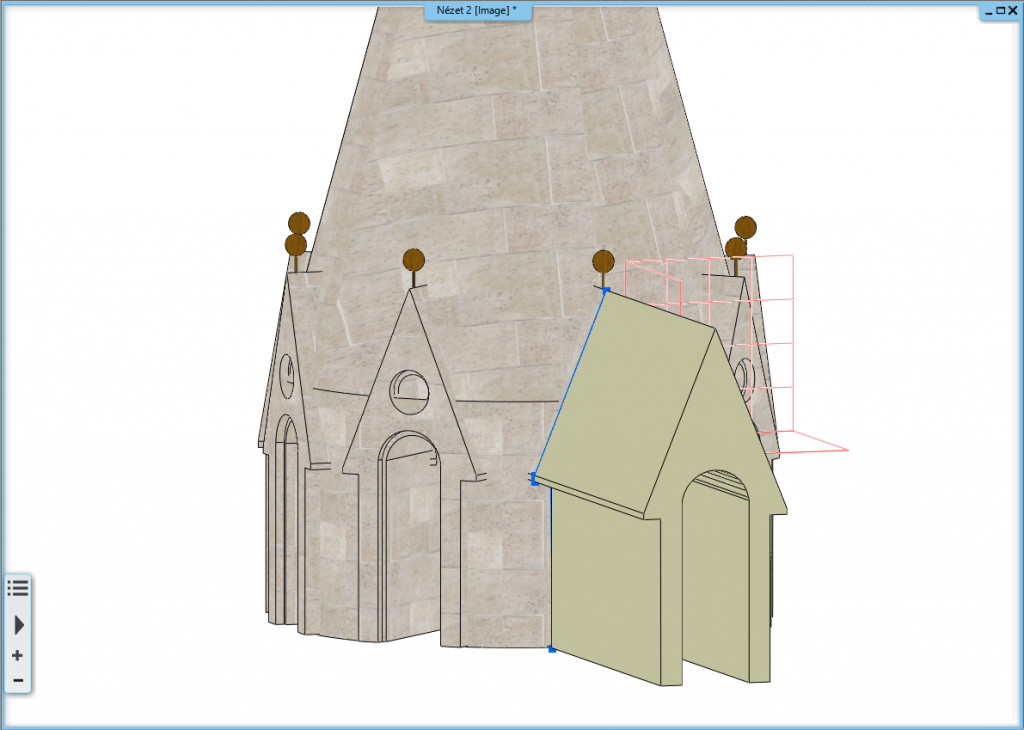
A 3D shape can be extended, or cut into - use this ability to create holes, superstructures, or anything else
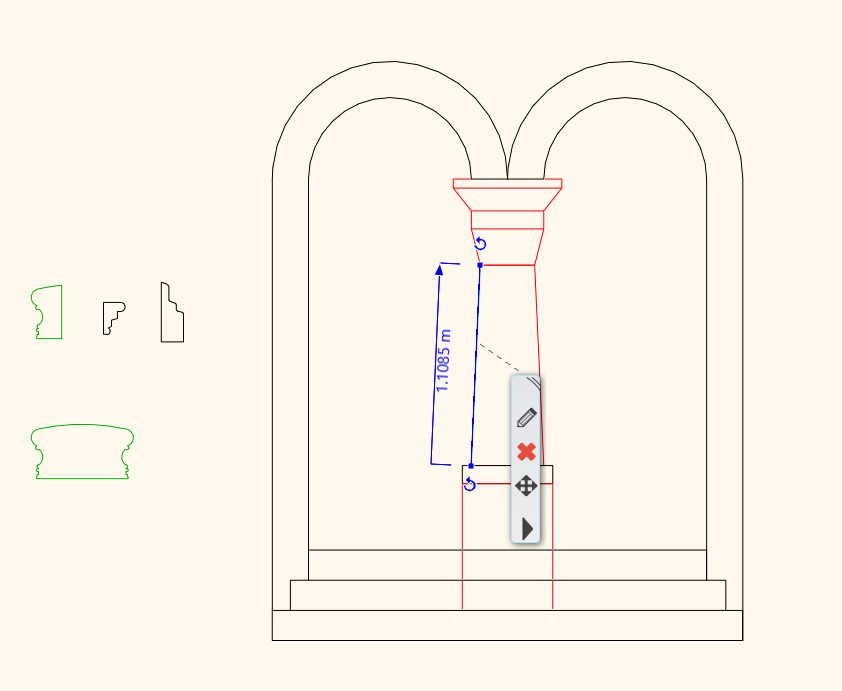
Columns
Columns were created with the combination of the same tools we discussed before (Revolve 360, Extrude, Push/Pull), so the resulting object was made up by several smaller objects. By saving these objects as one single item, we were able to move, rotate, duplicate the columns, without worrying about the objects falling apart to their smaller components.
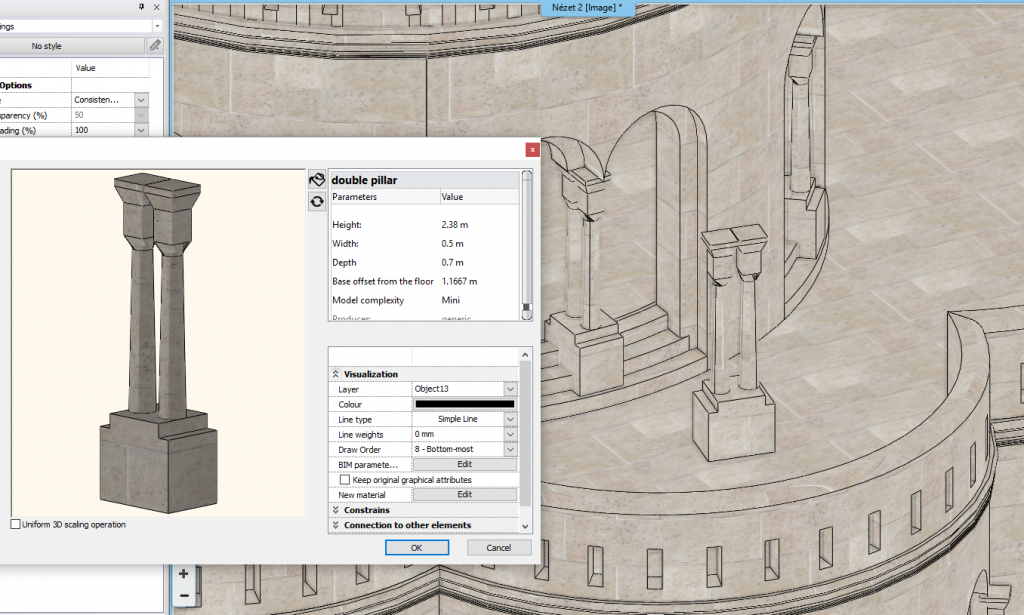
Clever object management helps us not to get overwhelmed with our models.
Windows and arches
The corridors are dominated by arches, pillars, and windows. Let's see an example - look at this image, and see below the list of features used to model these shapes.
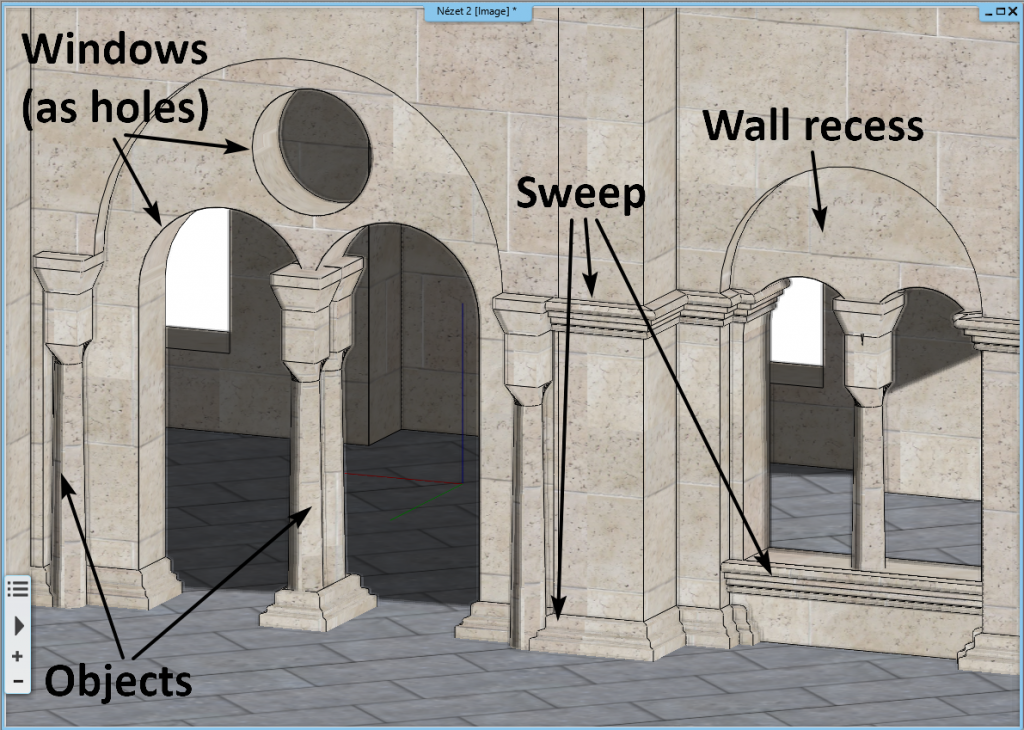
Illustration on how combining features result in complicated shapes.
Columns were made as objects, using the combination of the Revolve 360, Extrude, Push/Pull tools, then pushed into one single object.
Plinths (and other decorational elements) was made using the Interior / Sweep tool - a pre-defined cross section profile dragged along a path.
Niche around the arched windows - the niche/wall recess tool allows to pick a pre-drawn profile, and cut it into the wall.
Windows - we can pick a window profile from the library. After choosing a double arched one, we can also define the Reveal, which will make the window's connection to the wall more detailed.
Below is an example on which tools were used for which shape:
Finishing touches and remarks
We downloaded a few items from the 3D Warehouse - such as the lamps and statues. After setting up the right materials, pulling up a background image, and placing light sources, we used ARCHLine.XP's own rendering engine to create the photorealistic visuals you see in the beginning of the article.
When we work with a 3D software, it's always recommended to push the boundaries, and try to figure out ways to design challenging shapes. Not only is it great fun to remodel these buildings, but we can also learn a lot from such projects, and we may gain experience which will come handy during our everyday work.
Try your hands at ARCHLine.XP - get a free trial
Modeled by: Zoltan Toth, CADLine Ltd.
Rendered visuals by: Dorottya Peller, CADLine Ltd.
Credits:
Floorplan: http://zoldkalauz.hu/szentharomsag-ter
Elevation drawing: http://www.portaspeciosa.hu/2002/2002.htm
Information, facts, figures: http://www.fishermansbastion.com/