Professional articles | Blog | ARCHLine.XP
How to improve your render image in some easy steps in the 2016 version?
Photo-realistic images with ARCHLine.XP version 2016
Creating photo-realistic images has become much simpler in the ARCHLine.XP 2016 version. Following the next few steps you will be able to increase the render quality just in few minutes.
During the design process the key element of powerful communication is the presentation of excellent quality photo-realistic images.
The recommended work-flow for prime photo-realistic images is the following:
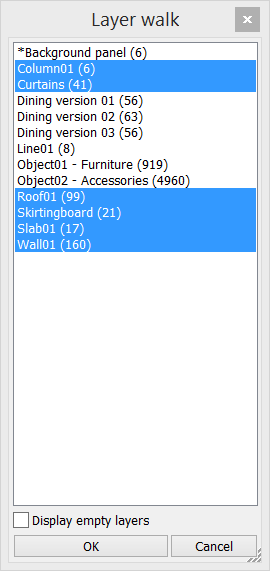
Filter the 3D model and set the perspective view
Tips: Before creating the first rendered image switch off layers of any furniture, lamps, plants and other element with numerous details. Our aim is at the first time to look at the conception of the architectural model.
Check your perspective. You will get the best result when your viewpoint and target elevation is the same height (e.g. 1200 mm or 1400 mm) and the perspective angle is 60 degree. When the view is adjusted, save the settings as a View Template in the Perspective Dialog. The View Templates facilitate to repeat the precise perspective view again and again.

North and Sun position check
Tip: If there is no lamps in the room, please set the time between 8am- 16pm.

Check the North direction. The incorrect orientation of the arrows is a common problem for the shading
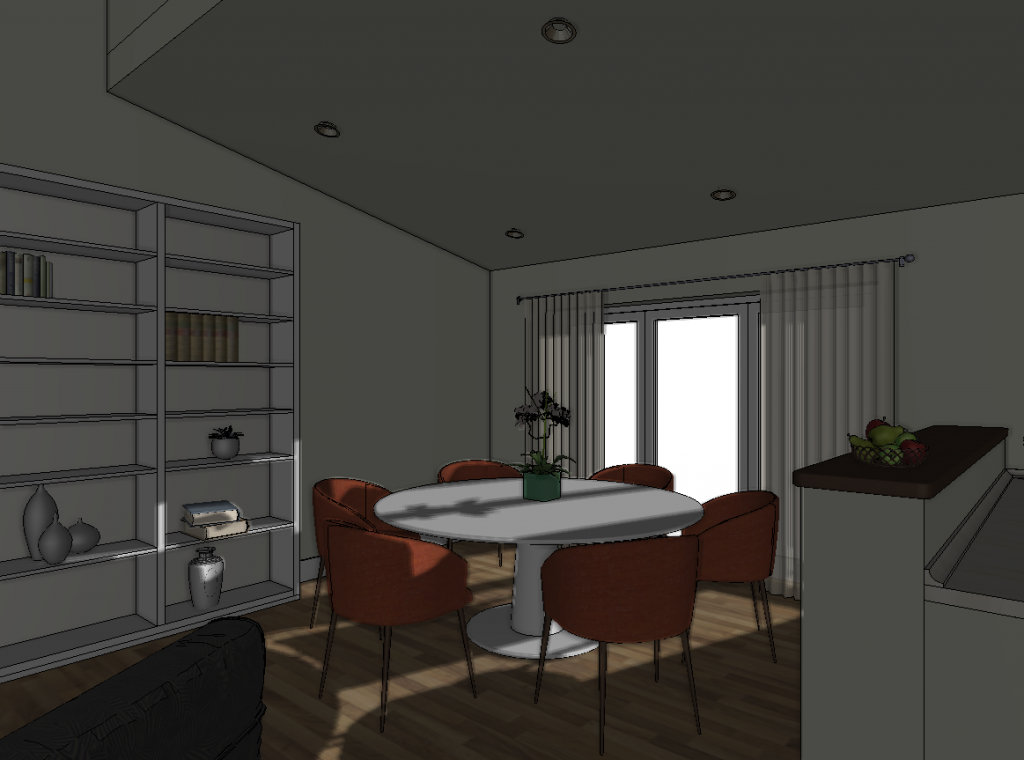
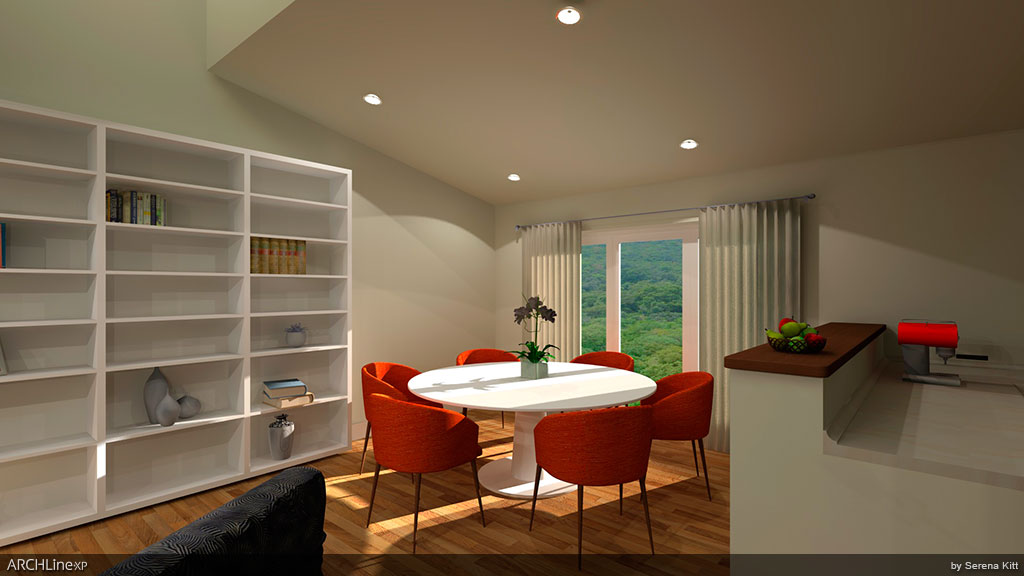
First renderings
Start the Render module first time with QUICK mode (it is the default). It takes about 2-4 minutes and you can estimate the visual quality of the room scene.
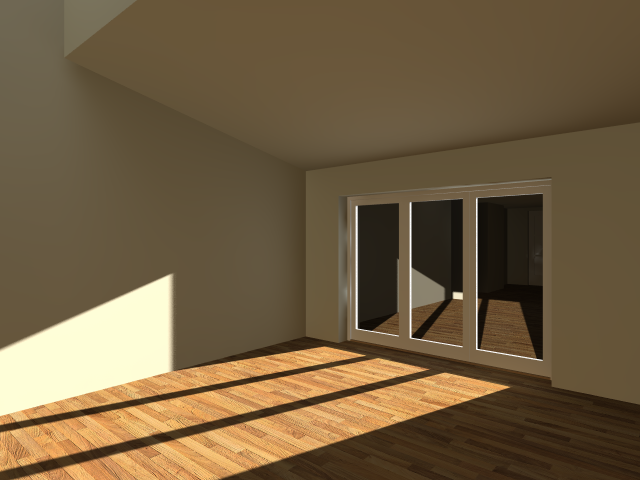
Lighting design
Tip: Add light sources to lamp objects
Without artificial lights the room scene will be obviously dark.
You can improve it if you assign Spot lights, or spherical light source or Area or Linear light source to the object you demonstrate as lighting.
You can make it visible the light effect with the command: Navibar – Lights on
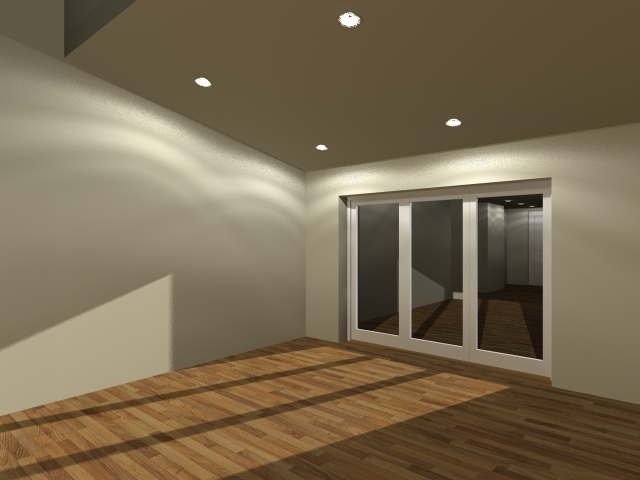
Checking material settings and visualize the furniture
Tip: Take care of the Mirrors, assign materials with Mirror properties.
Assign a material with Mirror Properties to the model. The reflection will appear in DirectX 11 mode in View window.
The preparation of model needs to be completed with the setting of the materials.
Check the settings of the assigned material and texture.
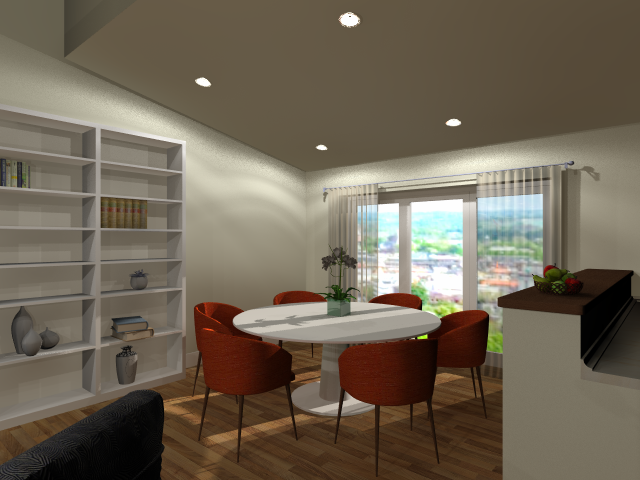
Final images (high quality setting and high resolution)
Tip: Render image with high quality render setting (Rendering time takes approx. 15-45 minutes)
The difference can be seen on presentation of surfaces.
Choosing fast mode the appearance was grainy but with the detailed rendering settings it cleared out. It takes its toll, the rendering time multiplies.
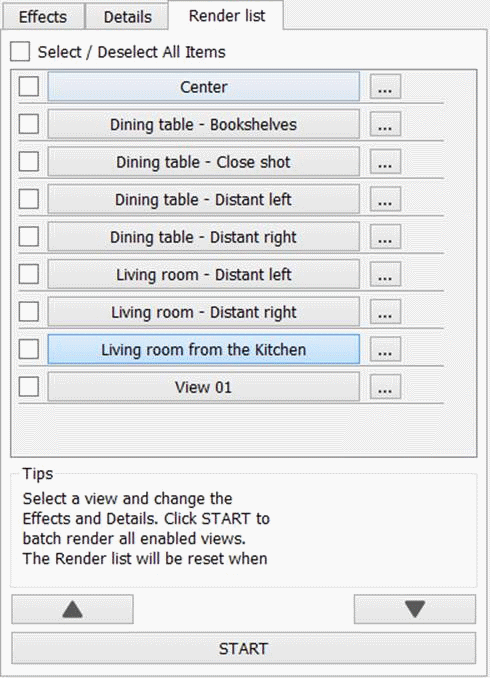
Render list
Tips: You can make more excellent quality renderings successively by using the Rendering List. The previously saved templates can be found here. Here you can choose the most liked views to be rendered.
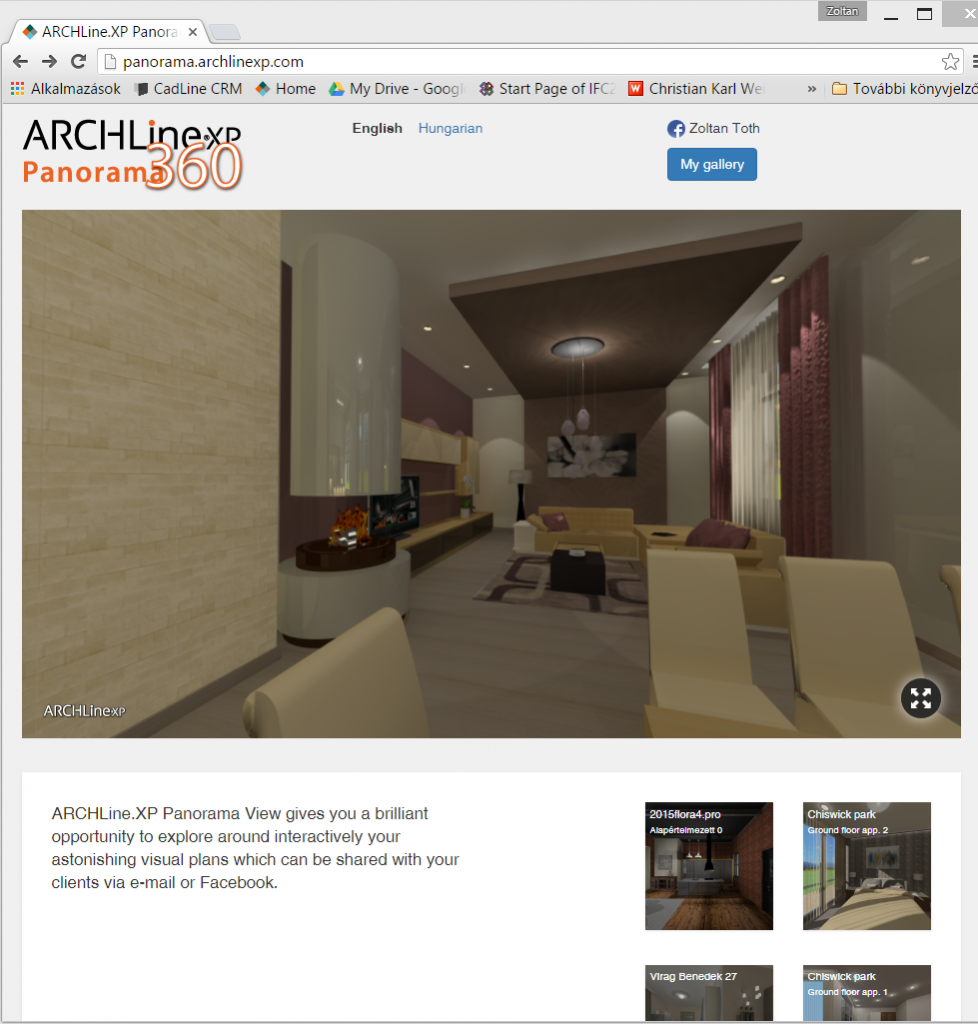
Panoramic view 360
Tips: Besides the still views it can create interactive panorama 360 scenes. The panorama 360 creates wall-views of the given room and uploads rendered images to ARCHLine.XP Panorama 360 app.
Here you can give an interactive presentation to your clients, walk and navigate through 360 degree the room and show every detail of it.
Before the command, set the 3D perspective view in the middle of the room. The panorama 360 will show the model around this viewpoint.
The time needed for making a photorealistic image is determined by the following important features:
- Capacity of calculation
- Rendering settings
- Complexity of materials
- The amount and the complexity of lights
- The size of the model
{KomentoDisable}