Professional articles | Blog | ARCHLine.XP
How to use Design Phases in ARCHLine.XP?
Using Design phases you can separate the building construction into a multi-phase plan.
Building renovation projects, or the project complexity often requires to separate the plan into multiple phases. Using these phases, you can quickly toggle between what you want to show on your model, or on your final plot layouts.
Design phase filters
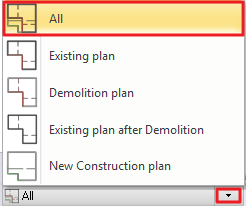
Everything starts with the design phase filters which are rules to help you to identify the status of the building elements, such as New, Existing, To be demolished. ARCHLine.XP 2019 has 5 such filters:
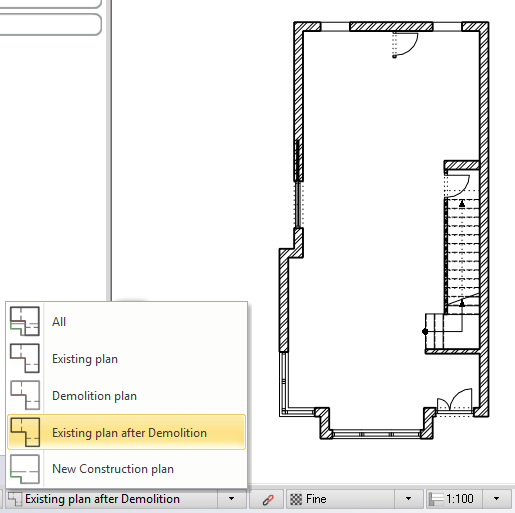
1. All phases
2. Existing
3. Demolishing plans
4. Existing after demolish
5. New construction plan
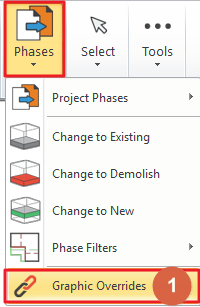
The commands of the design phases are available from the Ribbon bar / Edit tab / Phases group. The design phase filters are also available from the Status Bar at the bottom of the drawing area.
Let's take a look at how the design phase filters work.
All
In this phase you can see all plan phases of the project, namely the Demolition Plan, the New Construction plan with the newly created elements and the existing elements. Everything will be shown.
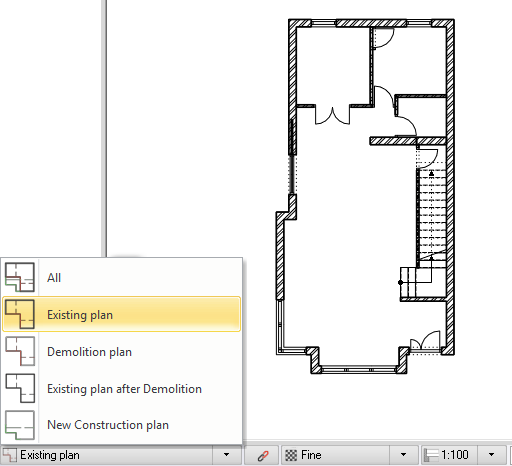
Existing plan
In the Existing plan view, we see the project that we have created during the building survey. This could also be any kind of built environment, which is already there, when we start working. This could otherwise be called the initial plan.
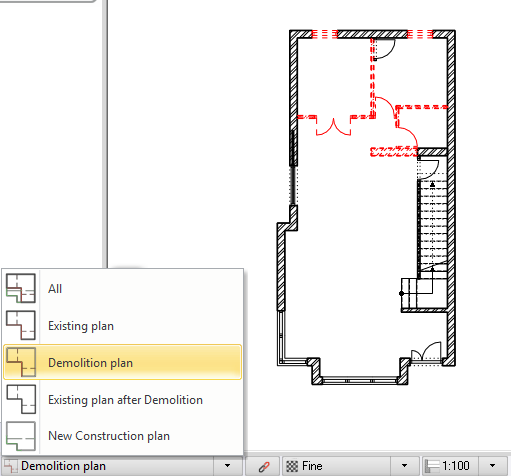
Demolition plan
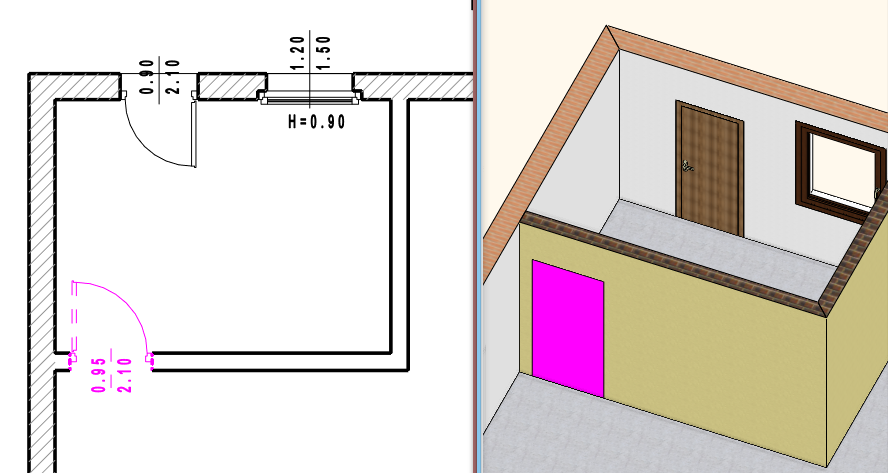
By using the Demolition plan phase, we can mark the items that will be demolished.
If we use All or Existing plan phase filters and select the items what we want to demolish, switching to this filter, the display of the demolished items is read by default on the floor plan and in the 3D view as well.
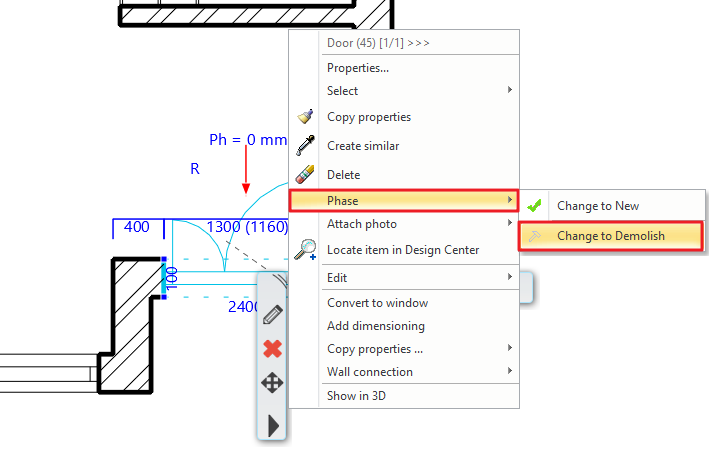
If we want to demolish an item, first select All or Existing Plan phase filter and then choose the „Change to demolish” command under the Ribbon bar / Edit / Phases group.
Here, among other things, we can determine for an element to be part of the original plan, or to be demolished, or display it as a completely new element.

After we start the command, the status of the selected elements will change to the new plan.
We can achieve the same result in another way, too: right-click on the selected item, then choose Phases from the pop-up menu and then change its status to the appropriate one for example: Demolish.
In the place of the demolished windows and doors, filling will appear. This is shown with the Graphic overrides colour in the 3D view, which is pink in our case.
Existing plan after Demolition
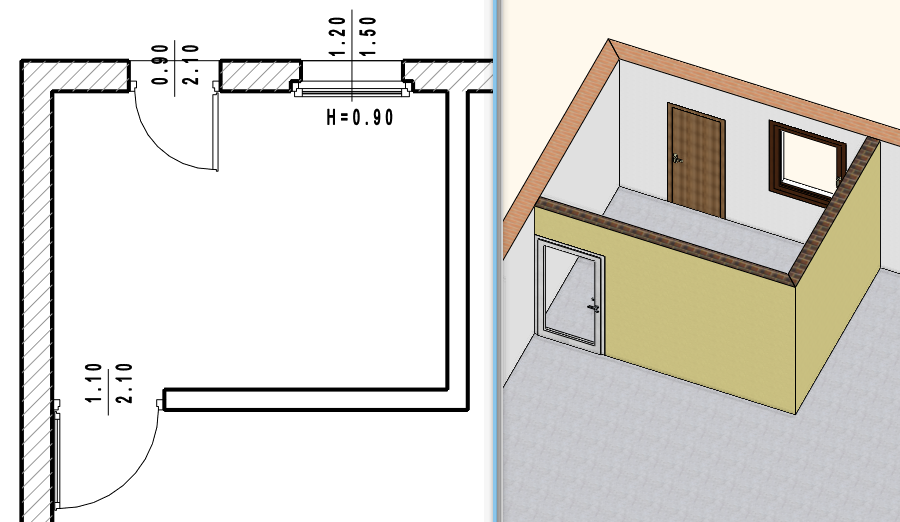
Anything that was marked in the demolition phase to be demolished will not appear in this phase.
The plan is more transparent now. Let’s start the next process of planning which is placing new elements on the plan.
In the place of the doors and windows, as long as we don’t place new doors and windows or create walls, there will be holes. This is visible on the floor plan and in the 3D view too.

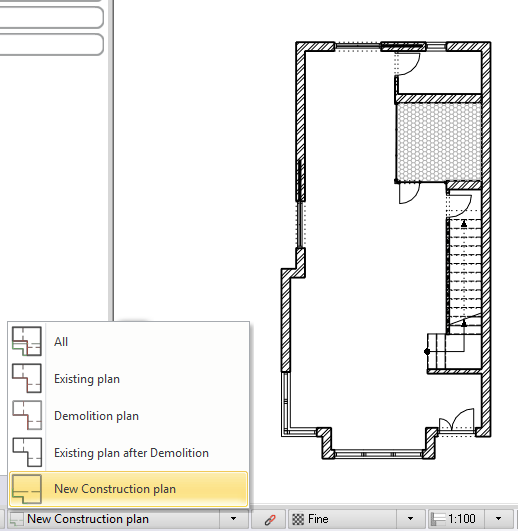
New Construction plan
The New Construction plan is the final plan. The walls to be demolished or the openings and other elements in the walls have disappeared. There are two ways to continue the work in this phase:
1. Place new elements or
2. If you are already done with this on the Existing plan, right-click on the selected item and select Phase from the local menu and select: Change to New.
To sum up: from the Existing plan, after the demolition, the new elements were placed on the New Construction plan that is the final plan.
It is important that when we want to demolish something or continue the work with drawing or placing new items, be cautious of which state we are in. It is worth to choose the All or the Existing plan from the phase filters.
Of course, it is possible to assign a different phase for an element afterwards.
Graphic Overrides
Graphic Overrides help us to understand the plan easily, as they regulate the display of new, demolished and existing elements when the different phase filters are activated.
We can choose the Override option to display New, Existing, and Demolished items or to retain the original graphic properties by category.
Let's take a look at an example. The demolition plan is currently displayed with red dashed lines. All of these can be customized.
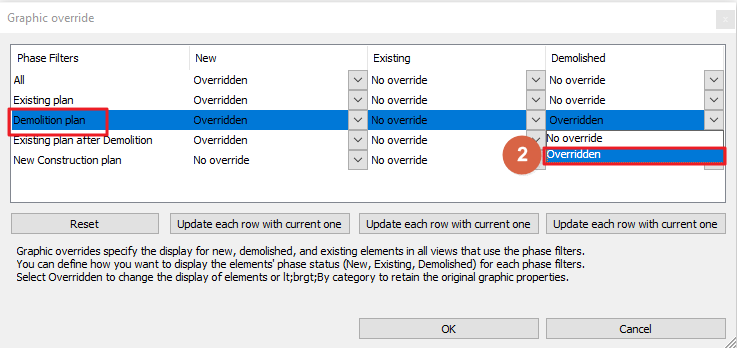
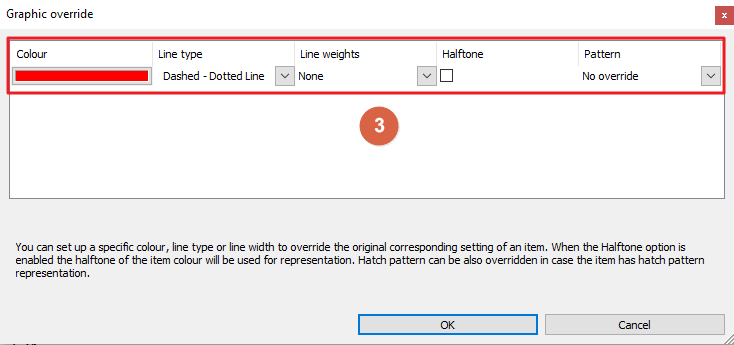
We can customize these settings for other phases as well.
Using these neat tricks, design phases can be a useful tool to boost your productivity.
If you are interested in more details watch our free video on the subject.