Professional articles | Blog | ARCHLine.XP
Tags
Tag are dynamic text fields, which track the changes in your design - another great documentation tool for ARCHLine.XP 2020.
1.1. Tags
A tag is a label or annotation, which helps you to identify elements on your drawing, by showing data, which has been assigned to that item.
Why you should use Tags?
-You can get data directly from any item and place on the floor plan, instead of placing separate and hardly controllable text notes.
-You can create custom Tags to filter the item properties you need to display. Customize your Tags' appearance, and edit the values they'll collect.
-Tags will always refresh, and track changes in your project. They always show up-to-date, real-time data. Tags can be edited and the change affects the project.
The workflow of Tag commands:
a. Creating a template for the element type, e.g. Wall.
b. Placing tags on the view automatically or manually one by one
c. Updating Tags
1.2. Creating a new Tag
Let’s create a new wall Tag.
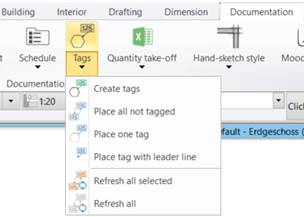
From the Ribbon Bar / Documentation tab / Tags group, choose the Create Tag tool.
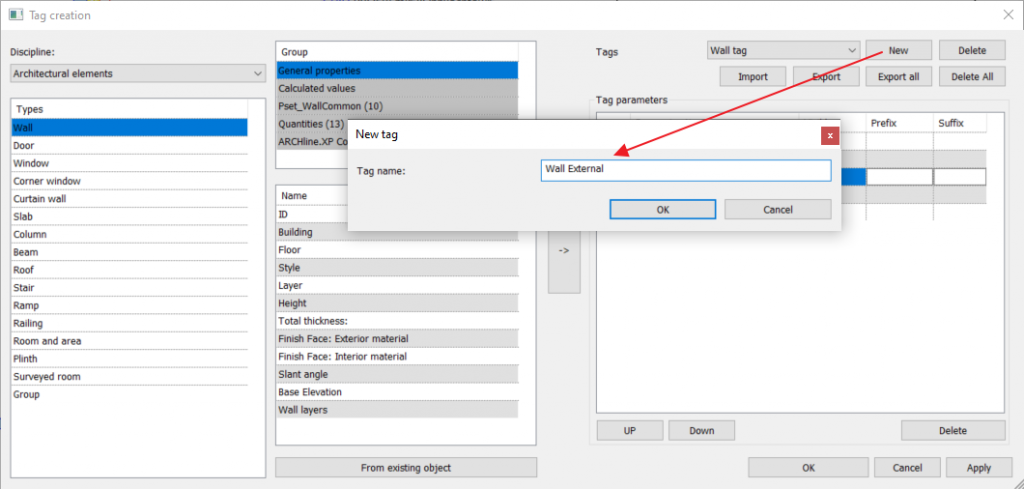
First, select the discipline in the dialog. This is how we determine that we want to create a tag from architectural, interior design, site or MEP elements.
Let’s select the Architectural Elements from the Discipline list then Wall from the Types.
The new Tag will include dimensions (width and height), the wall type, and external material.
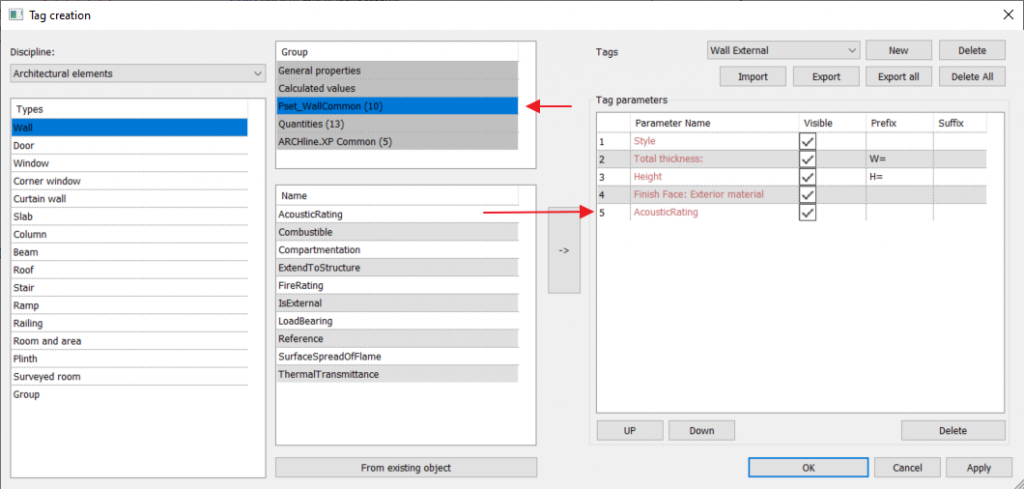
The program has a default template for each type that can be customized, our current schedule is now called Wall tag.
The current Tag parameters can be found in the middle of the dialog. These parameters are found in the program by default.
Press New and specify a new template with the name Wall external.
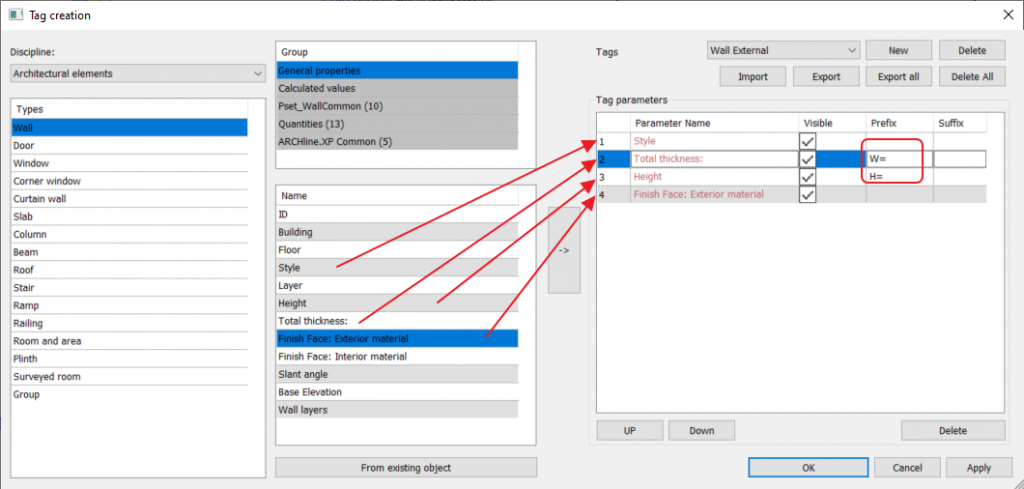
Now select Style and press -> button in the middle of the dialog. Do the same for Total thickness, Height and Finish Face: Exterior Material
Next, type W= and H= in the appropriate Prefix box.
1.2.1. Adding a BIM parameter
Next, let’s add a BIM parameter, Acoustic rating, in our case the wall has a BIM parameter, the sound transmission STC rating.
STC 50 means a very good noise control level – Loud speech is barely audible
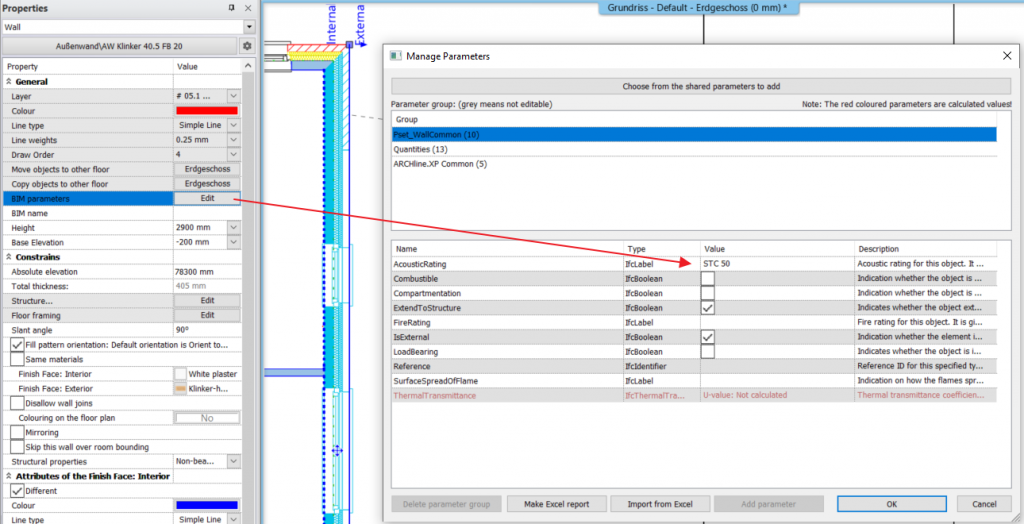
Click on Pset_WallCommon group and then click on AcousticRating and press -> button.
Press Ok to close the dialog. From now on the Wall External Tag is part of your project.
If you want to use it in other projects, press Export button and save it in an XML file and import in other project to be used as a standard.
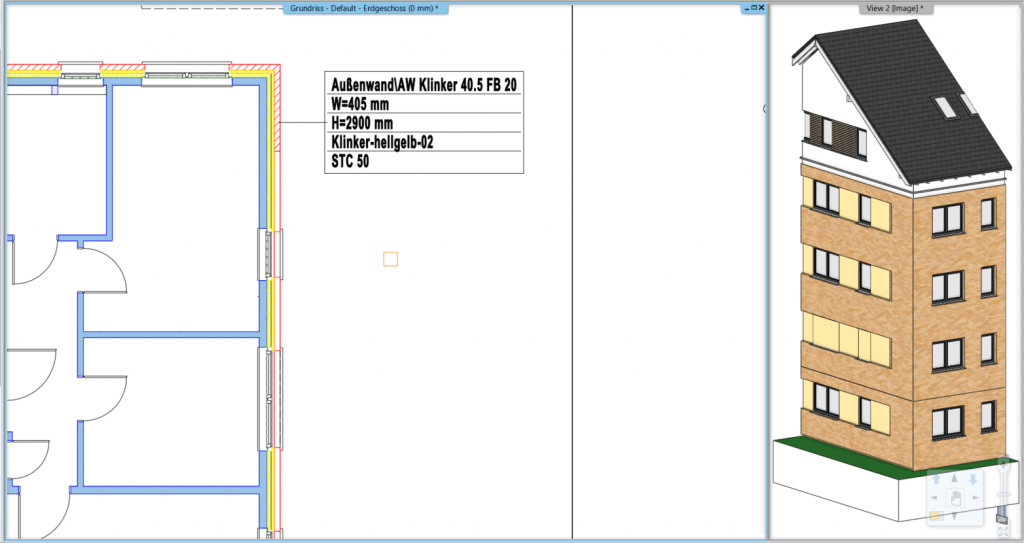
When you tag a wall in the project it will now use the new tag named Wall External.
1.3. Placing Tags
Decide on whether you wish for a Leader to be created for the new Tag.
Choose the Ribbon Bar / Documentation tab / Tags / Place Tag with leader line command.

Choose the Wall External template in the dialog and press Ok.

Select a wall to assign a Tag to.
Place the tag on the view:
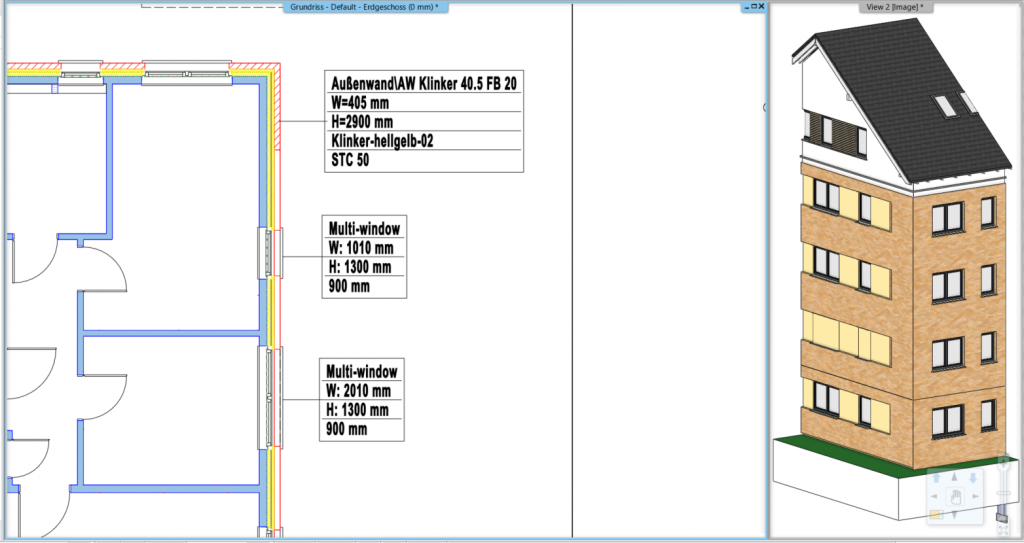
You can repeat the same workflow for windows, doors, etc.
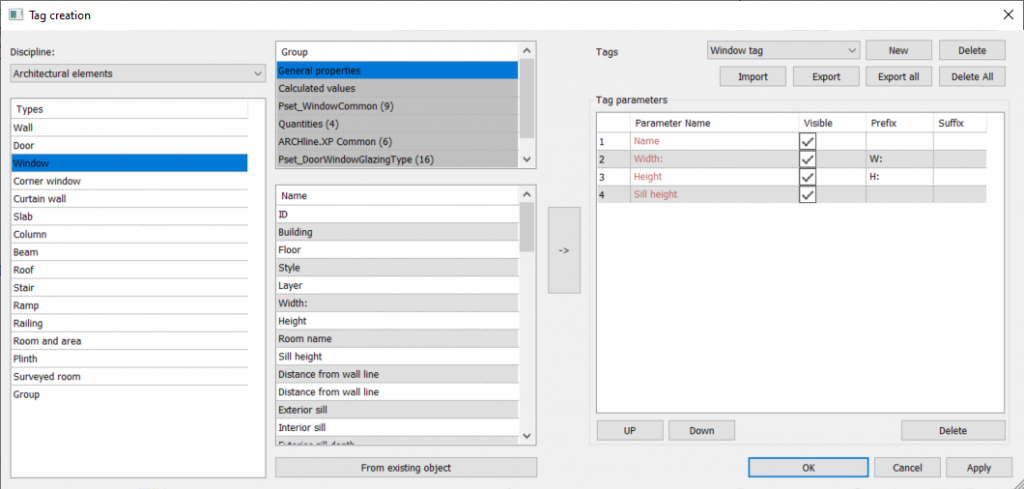
Place the window tag on the floor plan:
1.4. Editing Tags
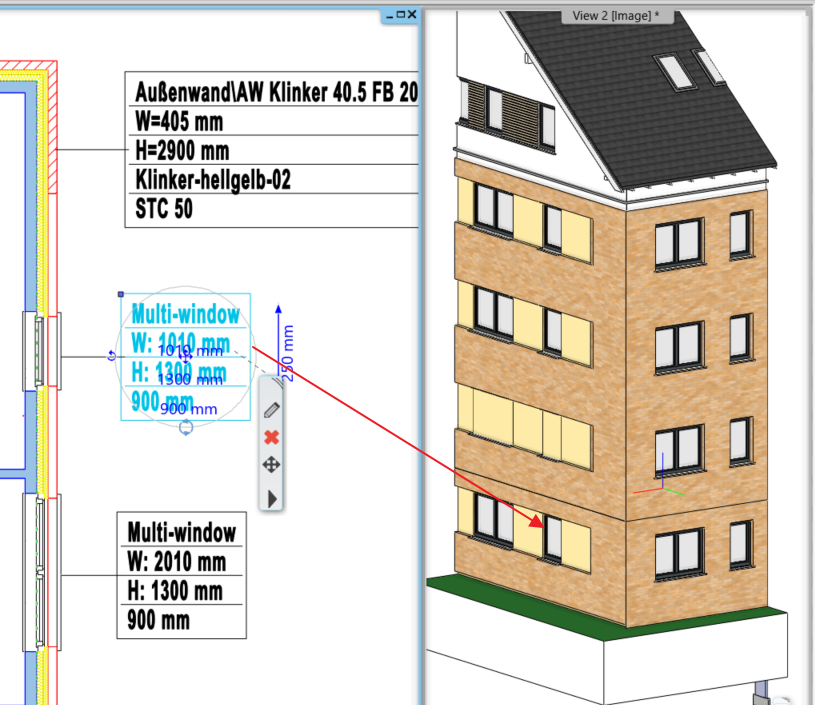
There are fields in the Tag that you can edit. Whether a field is editable or not depends on the type of the Tag. The editable parameter is indicated by blue text. Click on the Tag, then click on the blue text you want to modify. The editable field pops up and you can edit the content.
1.5. Tags reflect the changes in the model
Tags that we place are representations of the model information of the project. This means that the Tags always reflect the changes in the model.
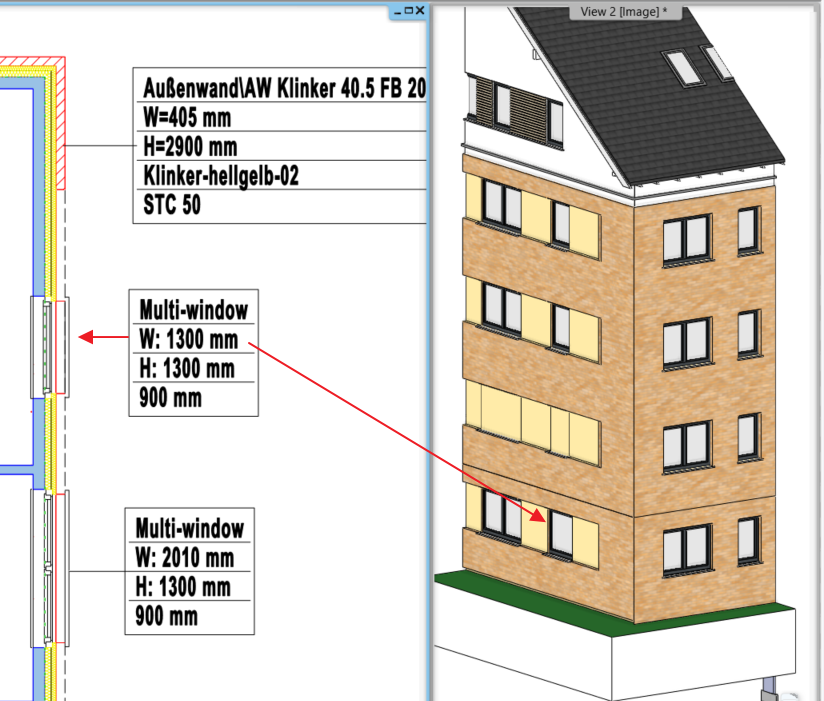
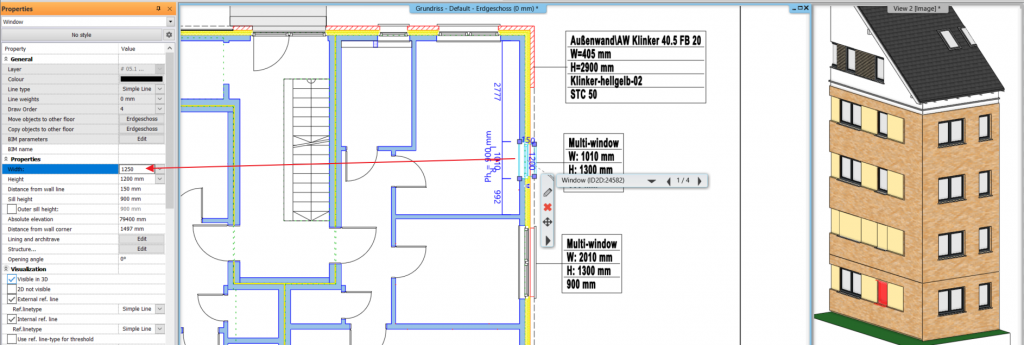
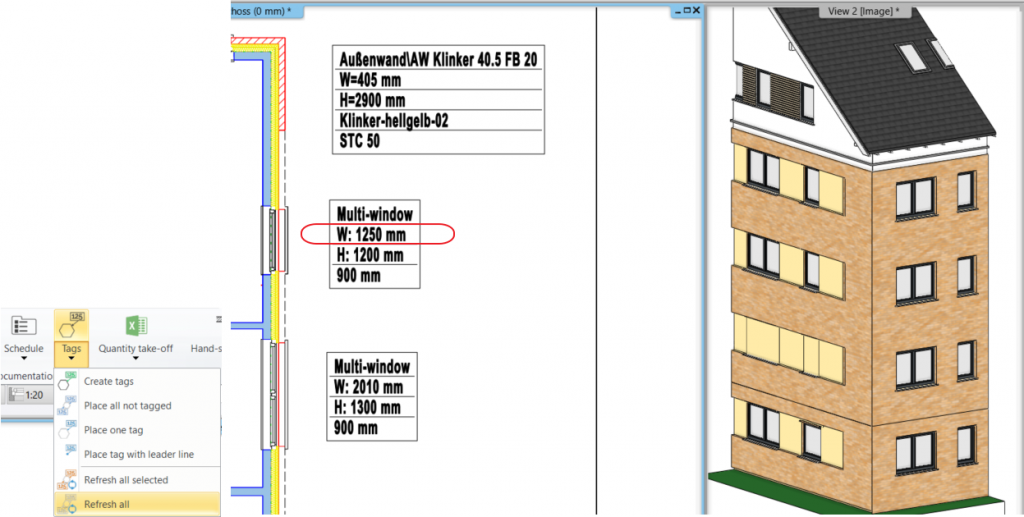
If you change for example the window width, then you only need to refresh the Tags, and they will show the new data.
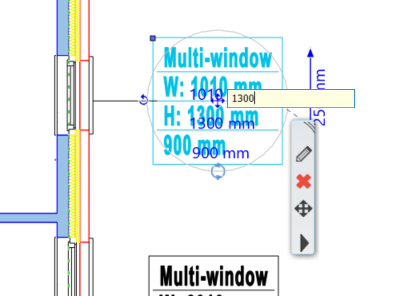
In this example, the window width new value is 1250 mm.
Select the window and type the new width in Properties panel.
Choose the Ribbon Bar / Documentation tab / Tags / Refresh all.
I hope you will enjoy the power and usefulness of ARCHLine.XP new Tag features. More details will be discussed in our regular webinars.