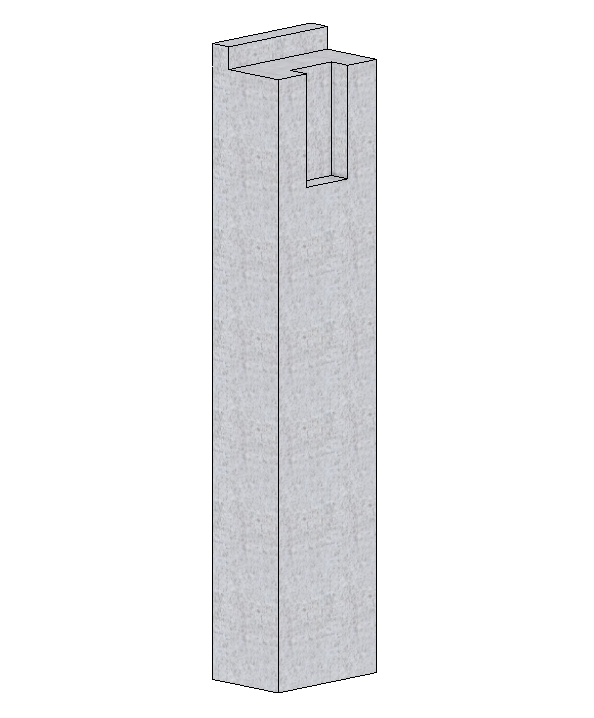
How to create custom-designed columns and beams that are used in the construction of hall buildings and other special structures?
We show how to adjust the special shape of the columns and beams through the creation of a custom column. Creating the right shape is a complex process, you need to pay attention to every step to make the end result right.
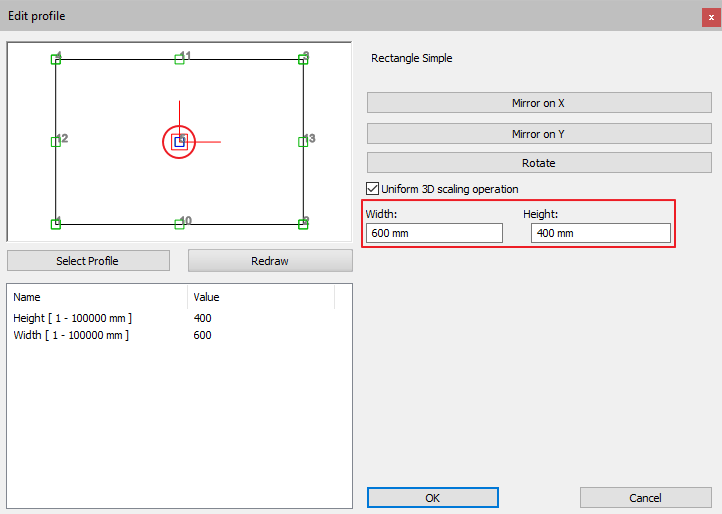
1, Enter the Ribbon bar / Building / Properties / Structure / Column option and set its height, profile, reference point and material. When these are ready, enter the Cutouts - Recess - Attachment option to create the right shape.
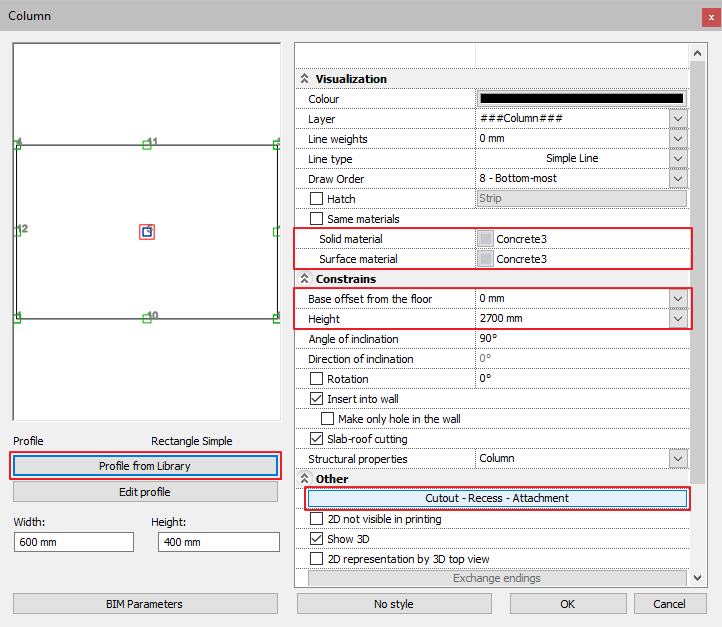
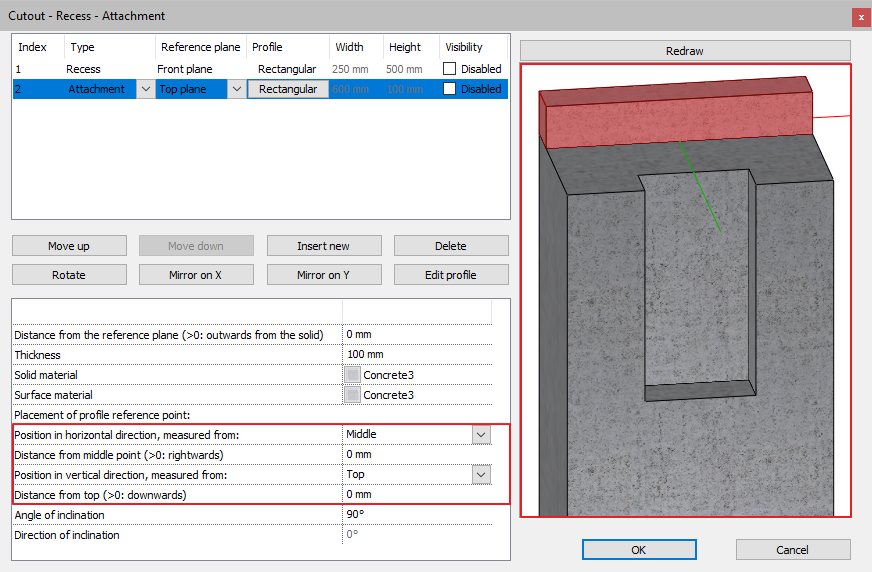
2, In the pop-up window click on the Insert new button, and a cutout appears on the bottom of the column. The place of the cutting plane depends on the reference point, the reference plane and its placement on the column. For the prefect end result, you need to synchronize these settings.
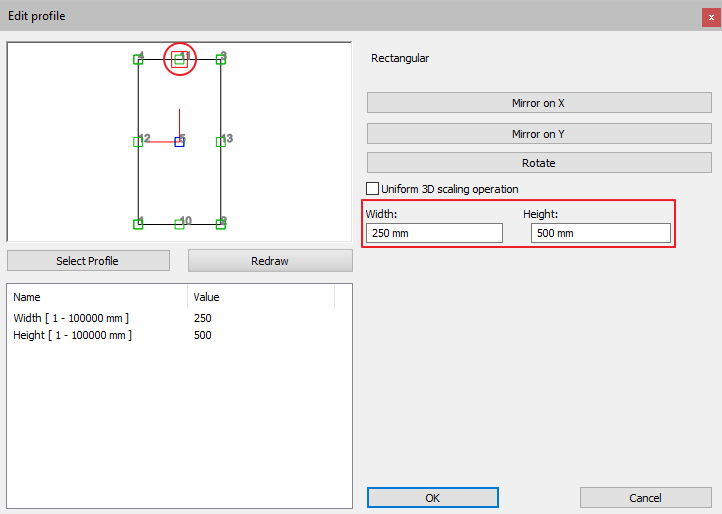
- Set the parameters of the added shape: change the type to Recess, set the reference plane to Front plane, then change the profile to Rectangular with the required size. In the 3D preview on the front side of the column a green and a red axis line appears, the former indicating the direction of the profile height and the latter the direction of its width. In the settings of the profile a key step is to set its reference point right, this will affect its placement on the column.
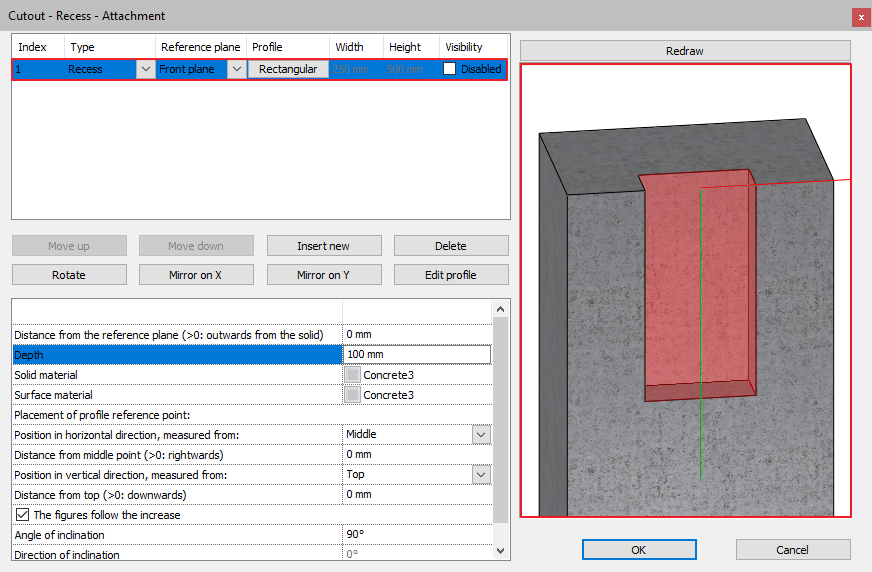
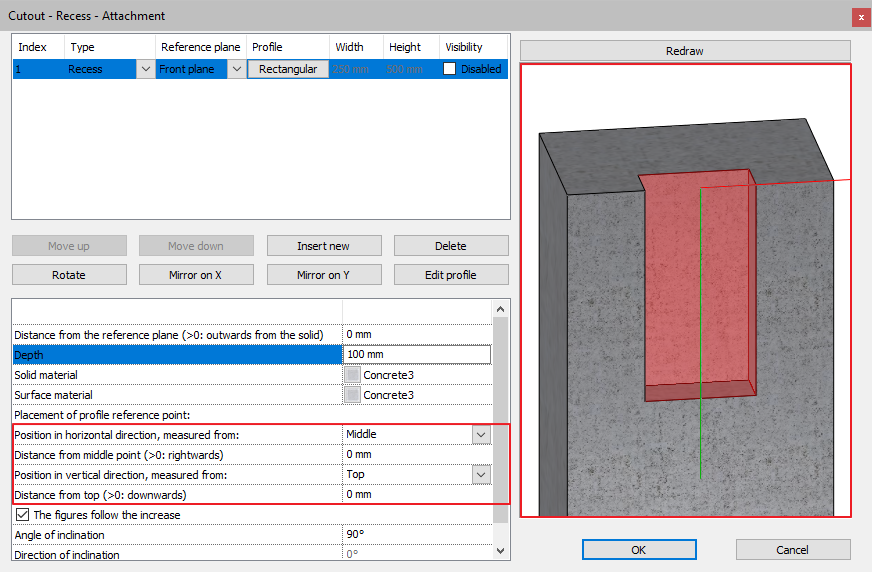
- Now set the place of the profile on the column: change its depth, and link it to the top and the middle of the column. Now the recess will always appear on the top of the column, even if you change the height of the column.
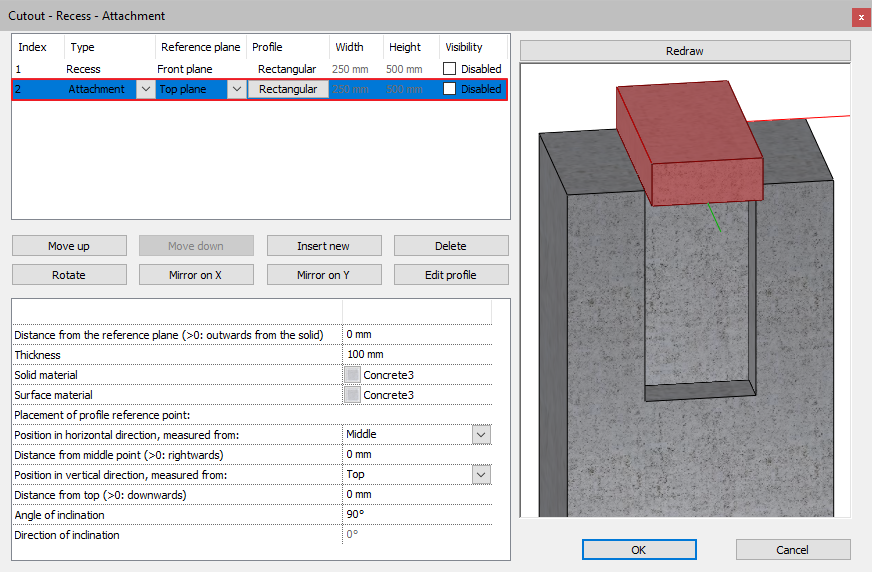
- Insert a new row, now you copied the recess. Change it to Attachment and adjust it to the Top plane. The attachment now is on the top of the column, this is indicated by the green and red axis lines.
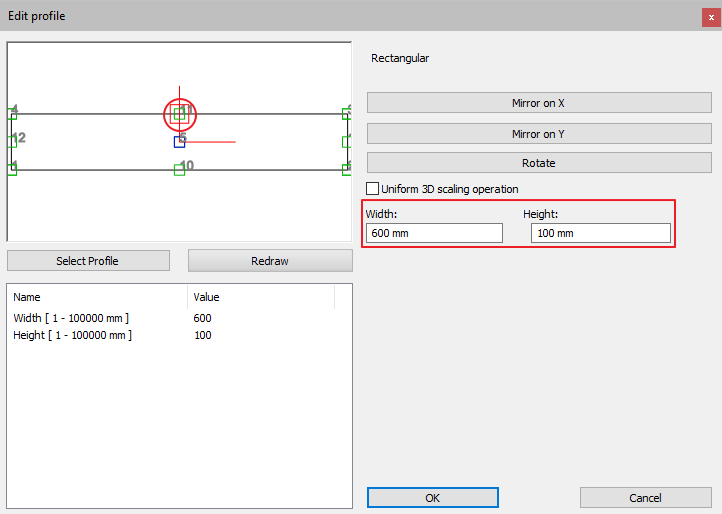
- Set the size of the rectangle according to the axis lines.
3, By clicking on the OK button, you accept the changes, then save this column to the library. If needed, switch on the 2D representation by 3D top view option.