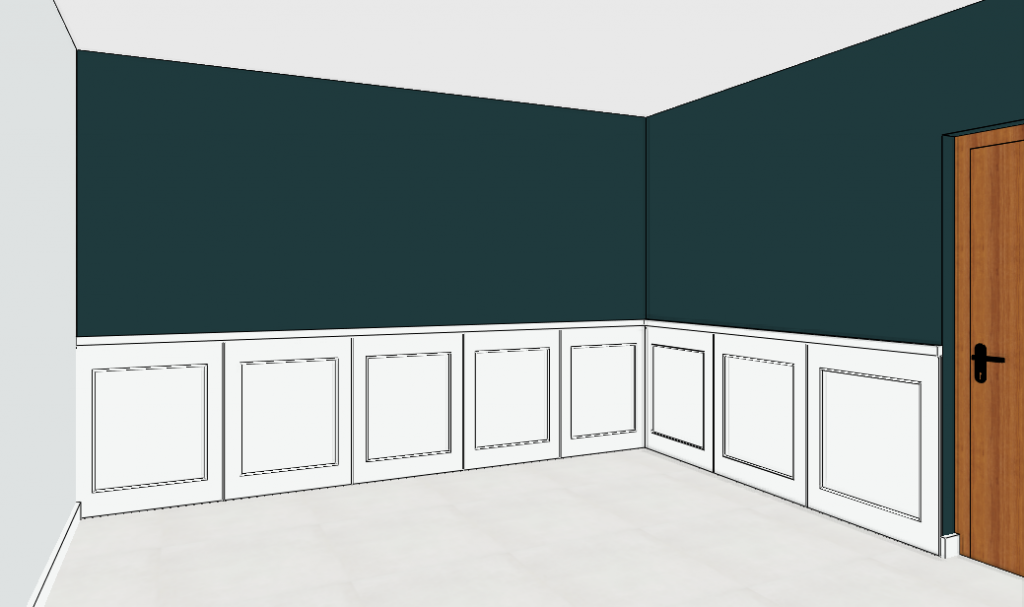
There are several ways to create wall paneling in ARCHLine.XP.
Creating wall paneling is a multi-stage process, at the end of which a completely customized design can be created. The wall paneling is created from a prefabricated object.
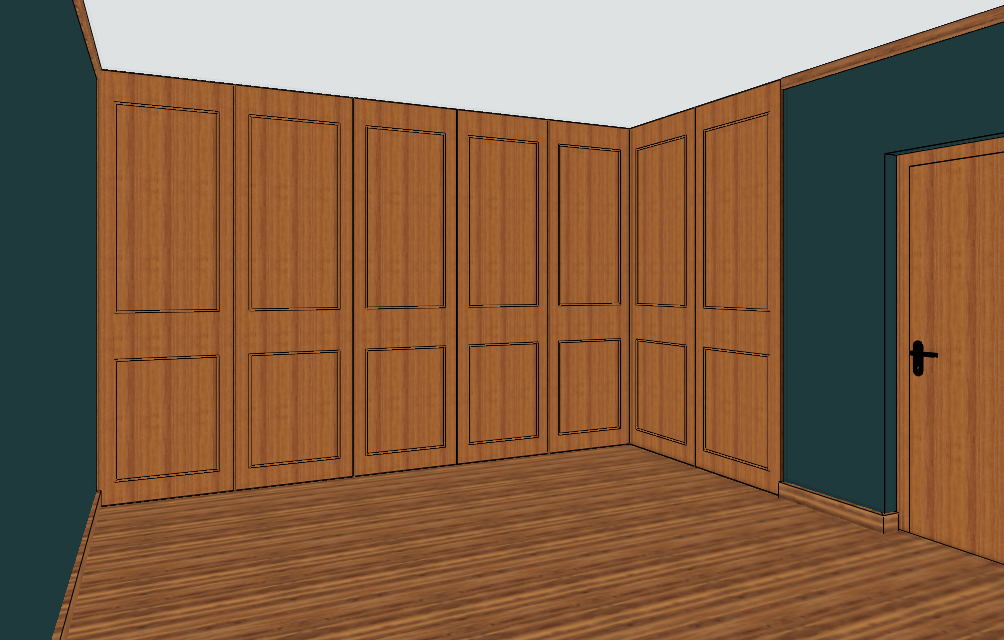
Wall paneling from separate pieces
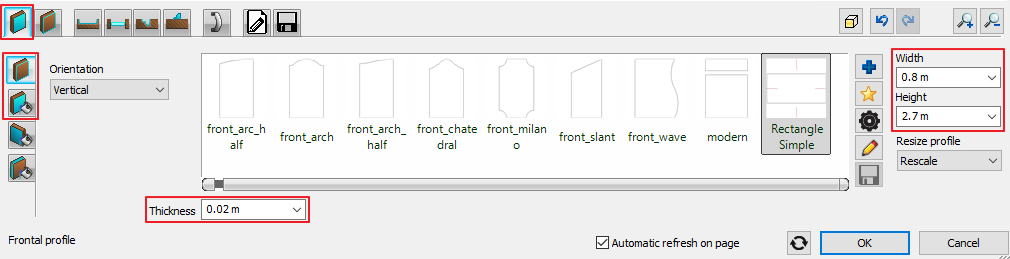
1, We are going to create the panel in the Ribbon bar / Interior / KBB / Cabinet door option. In the pop-up window set the desired values:
- Frontal profile: you can set the shape of the panel.
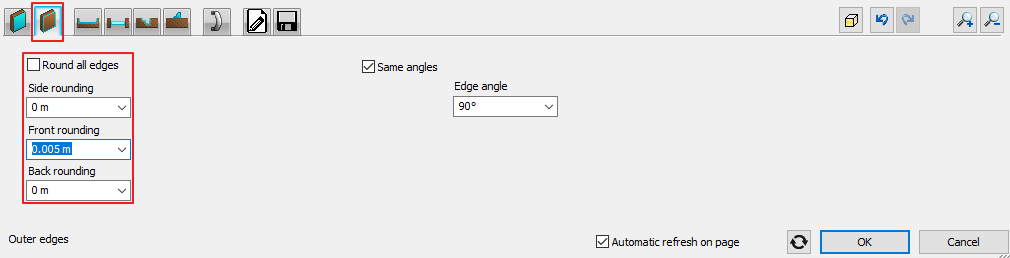
- Outer edges: you can round the edges of the panel.
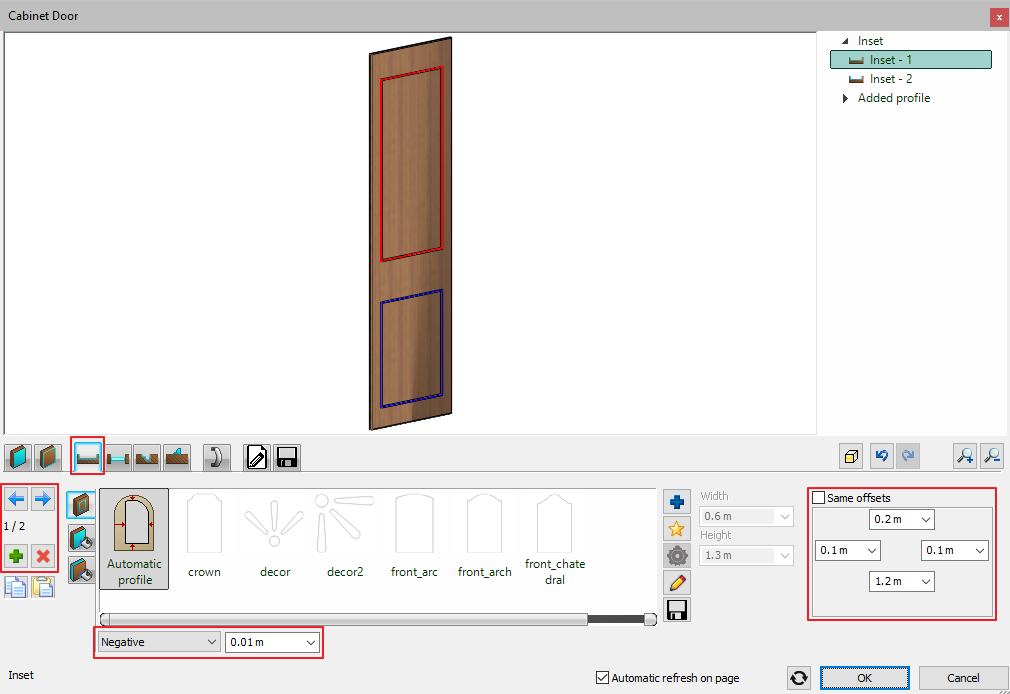
- Inset: you can specify the shape, location and size of the panel recesses or protrusions on this tab. You can add new ones with the + button independently of each other.
- Hole: you can create a hole in the panel. You can add new ones with the + button independently of each other.
- Subtract profile: you can cut shapes into the profile along a polyline. You can add new ones with the + button independently of each other.
- Add profile: you can add protrusions along a polyline. You can add new ones with the + button independently of each other.
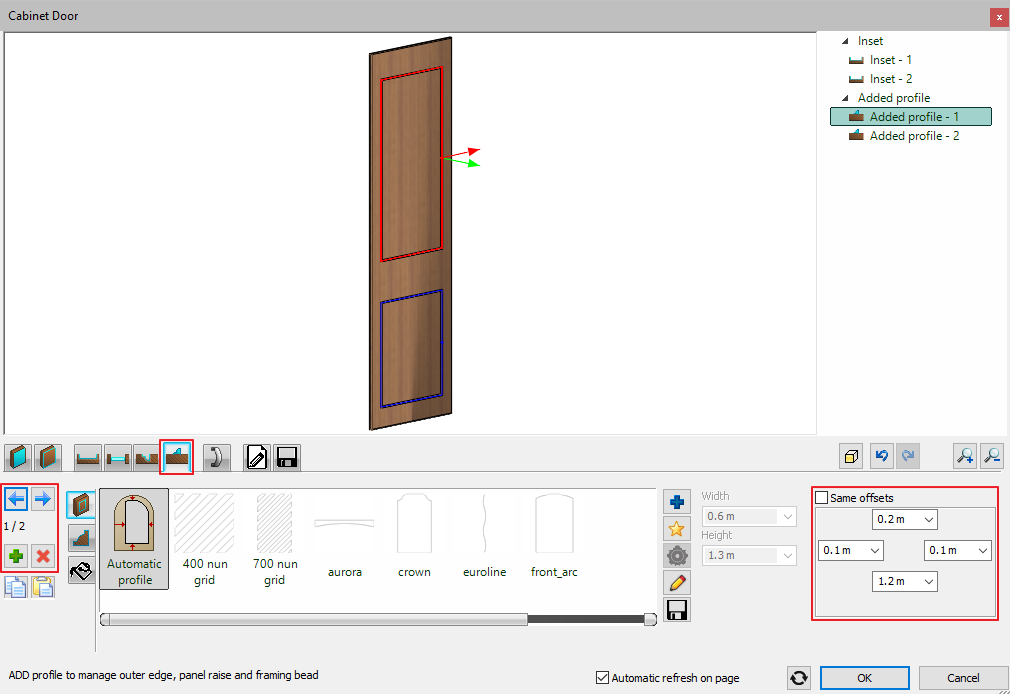
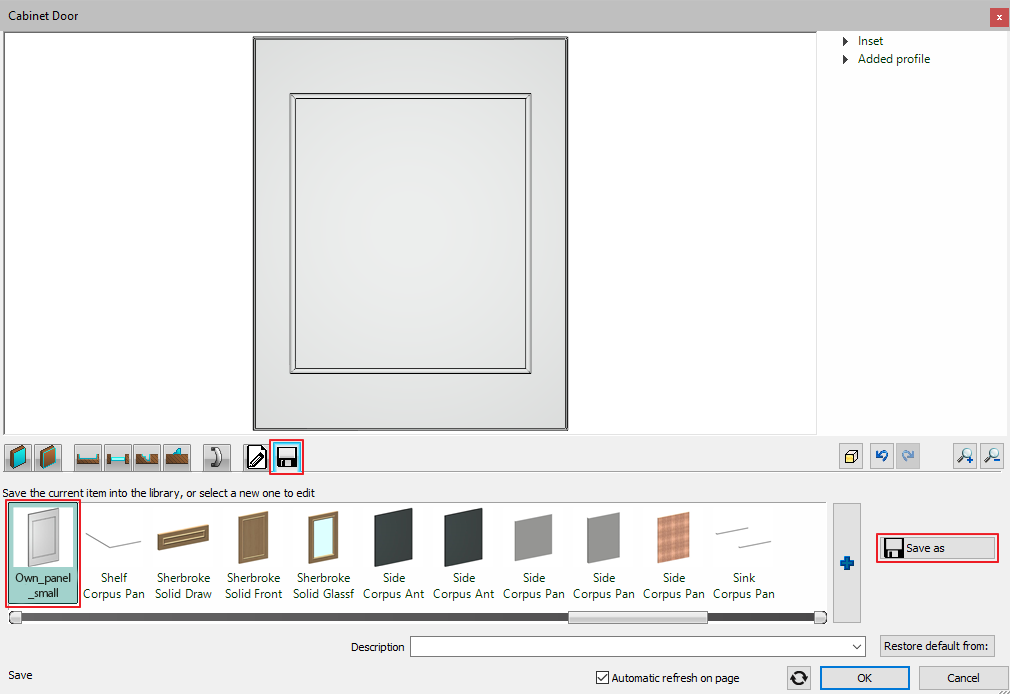
- Save: with the save as button you can save the created object in any folder of the Design Center.
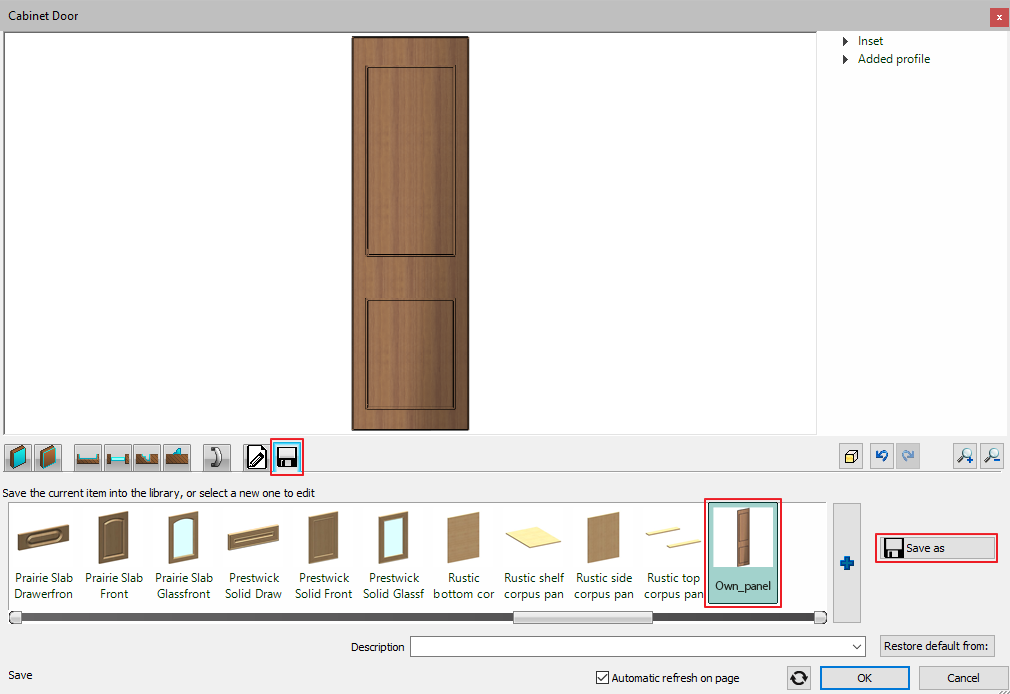
2, Save the finished panel in the adequate folder, then find it in the Design Center.
3, Drag and drop the panel on the floor plan on the side of the wall. Multiply it to cover the whole wall. (You can also place it with the Railing option, see the next section below.)
Wall paneling with Railing
This method is similar to the previous one, however after you created the panels, you have to set the railing to the right values to get the best result. With this option you can create the top piece of the paneling as well.
1, Similarly to the previous method, create the panel you want to place on the plan.
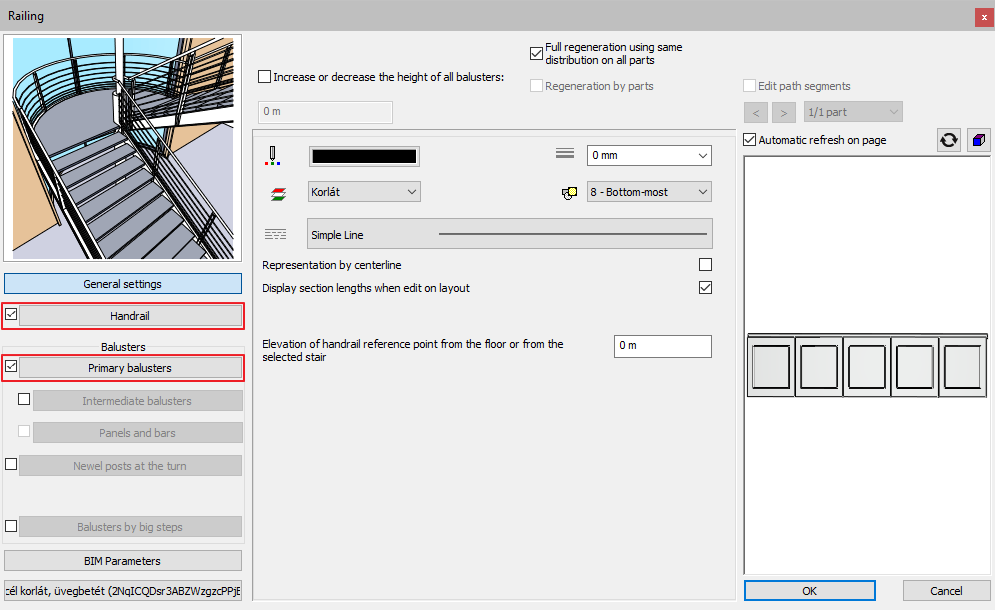
2, You can set the properties of the paneling in the Building / Properties / Stair, Ramp, Railing / Railing option. In the properties of the railing enable the Handrail and the Primary balusters option, switch off everything else.
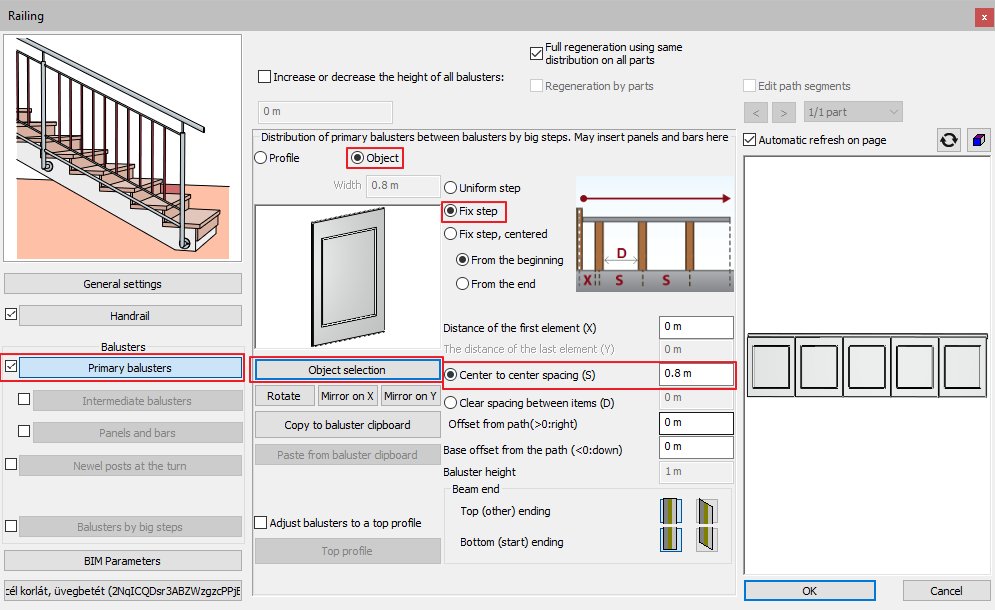
3, First set the Primary balusters. Click on the Object selection button and select the panel in the library, then set the distance to Fix step and the value to the panel's width.
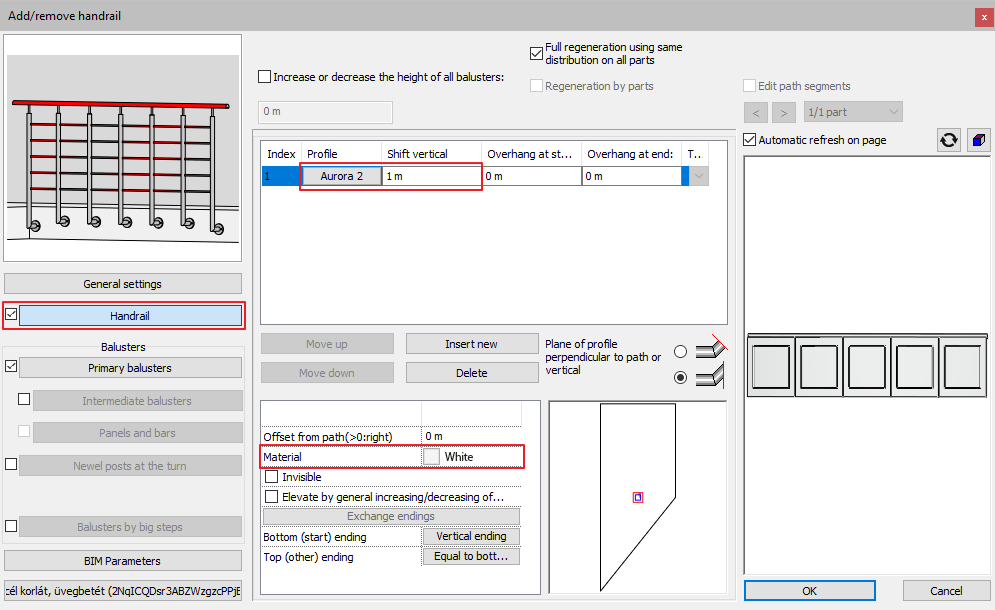
4, On the Handrail tab set the top piece of the paneling. You can set its material, shape and place too. Adjust it to the panel's height.
5, You can place the paneling on the floor plan with the Ribbon bar / Building / Railing option.