Adjusting the layer order of roofs and its structure to display properly is a complex task.
It is important to know, that even though the layers and the structure of the roof (e.g. rafter, batten) are logically connected, the have to be set separately.
1, Enter the roof's properties (Ribbon Bar / Building / Properties / Structure / Roof) or place a roof on the floor plan and the program will automatically open its properties.
2, In the properties, first set the layers of the roof, because later we will connect the structural pieces to the layers. To do this, select the Layers and geometry tab and with the + sign add new layers, move them with the arrows or delete them with the X.
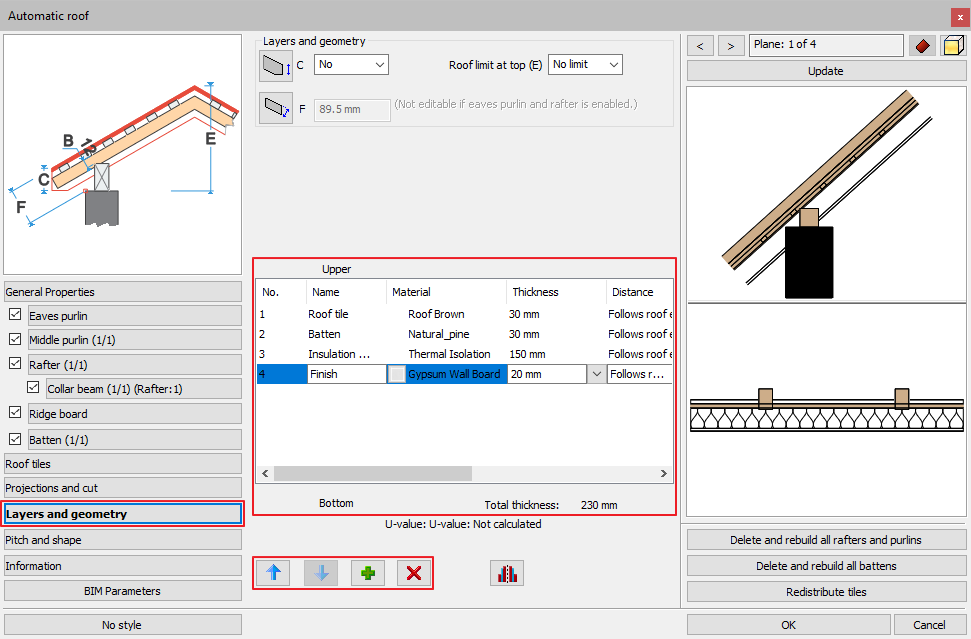
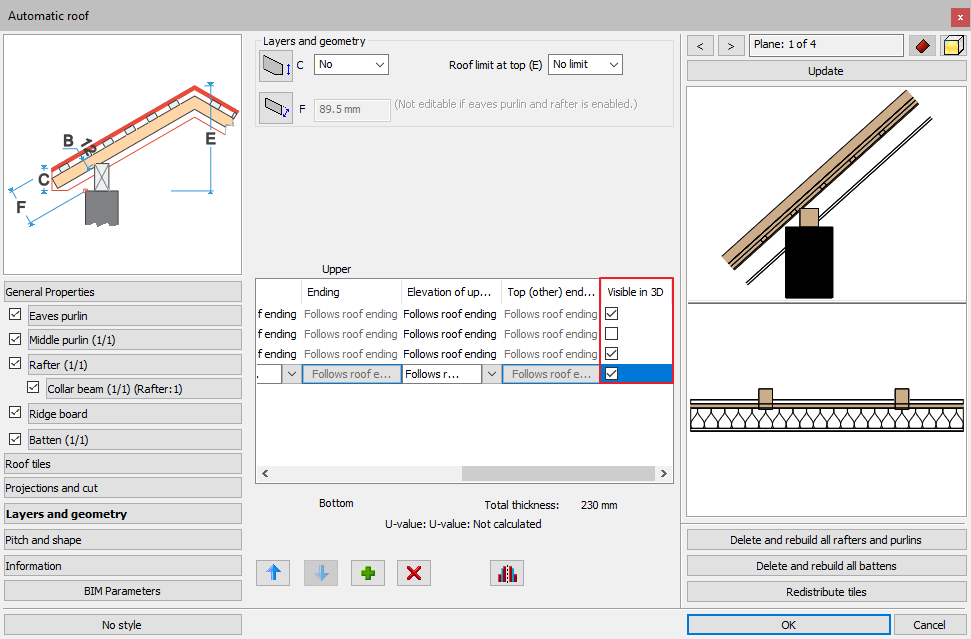
3, If you want to create a layer for a structural piece, that you don't want to cover up with the layer, at the end of the row deactivate the layer. This way the layer won't be visible in the 3D view. This is also useful in case you want to create a layer of air.
4, You can set the geometry of the roof with the buttons shown below. Click on the icons to set the shape of the edges, and you can type the values in the boxes next to them. To delete the parameters click on the drop-down menu and select the No options.
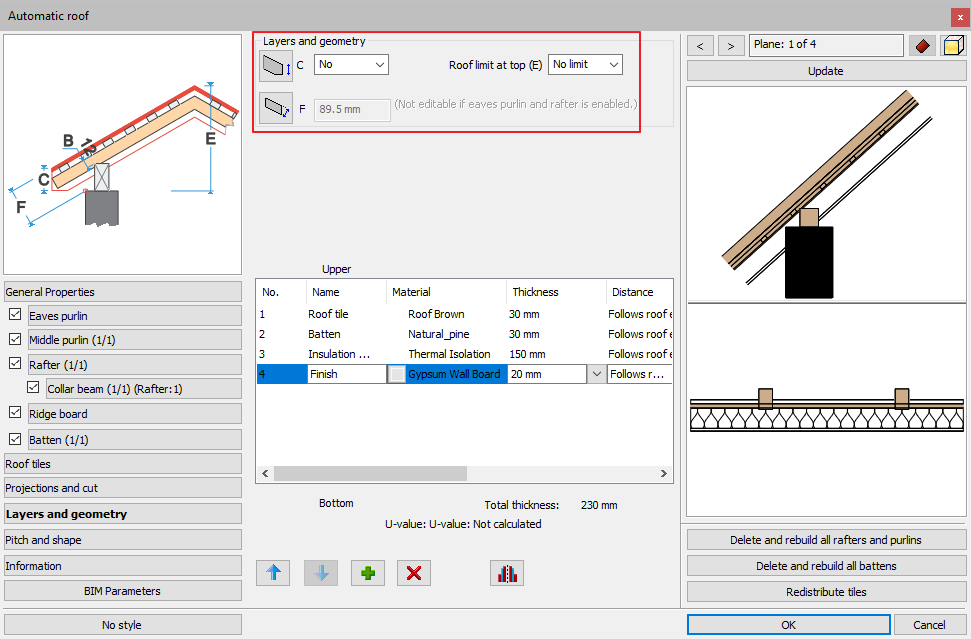
5, You can set individually for each layer the distance from the edges of the roof. (This setting is also available on the floor plan view with the Edit layers option.)

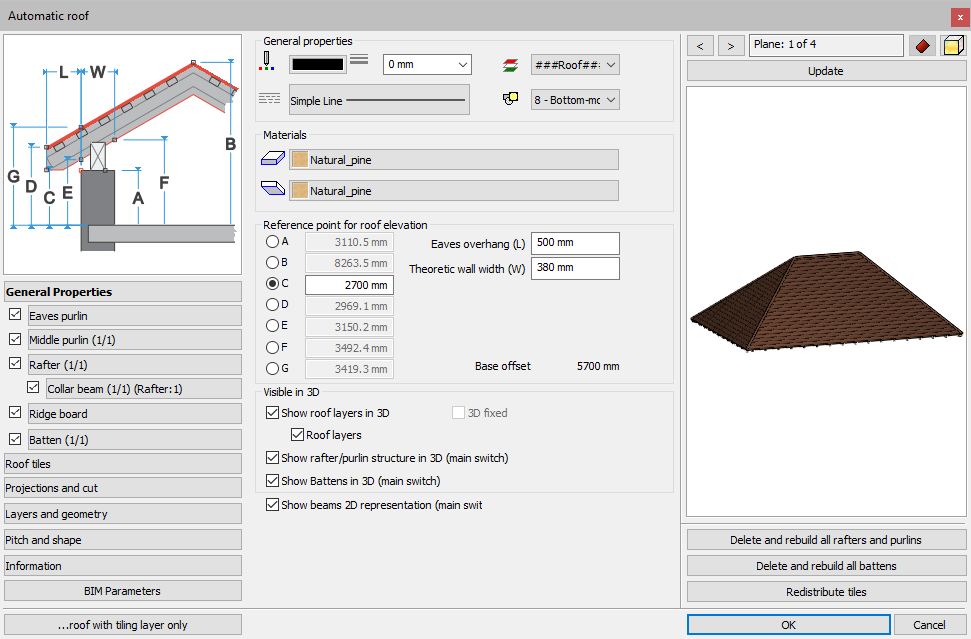
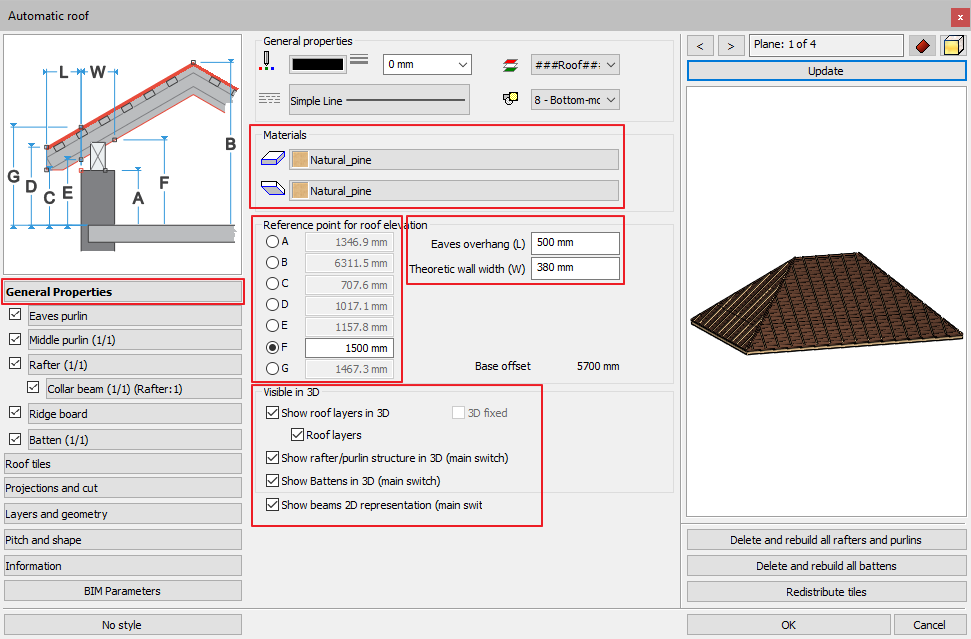
6, On the General Properties tab you can set the following parameters:
- The side and bottom material.
- The eaves overhang.
- The theoretic wall width (this will be important when setting the place of the rafter).
- The reference point of the roof (A-G points) and its height.
- The pieces that are visible in the 3D view (here you can set the visibility of the structural pieces independently of the layers).
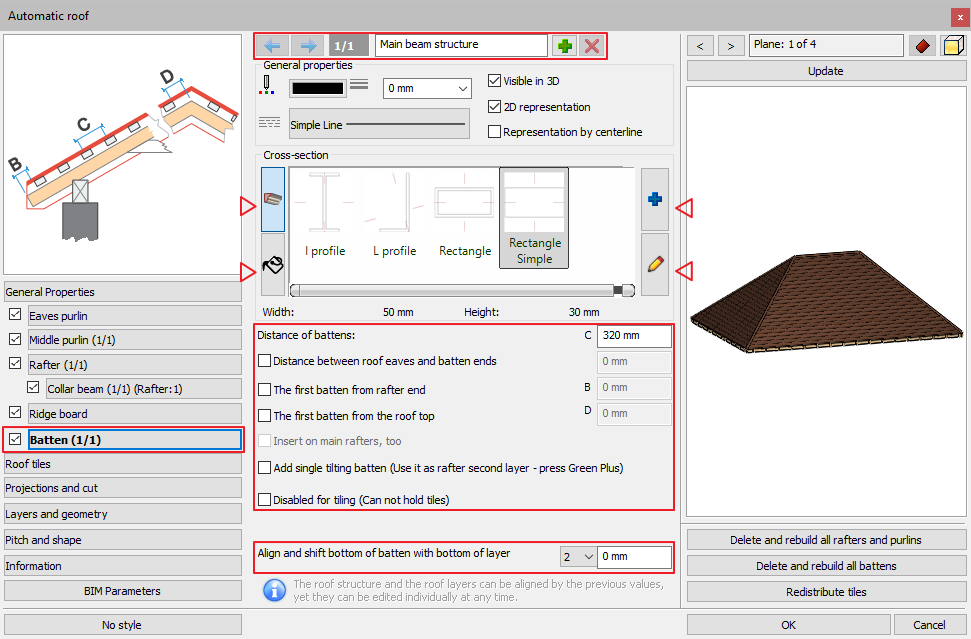
7, There are two main types of structural pieces: the first type is not connected to the layers of the roof (Eaves purlin, Middle purlin, Collar beam, Ridge board), the other type is connected to the layers, its position is based on the layers (Rafter, Batten). You can add more than one of some pieces by clicking on the green + icon on the top of the window.
- Structural pieces that are not connected to the layers of the roof: you can select from the preset profiles or you can create your own, you can set the size and material of the piece too. You can adjust the location of each item with exact values as explained in the explanatory diagram for each item. You can determine the angle of the endings for each structural piece.
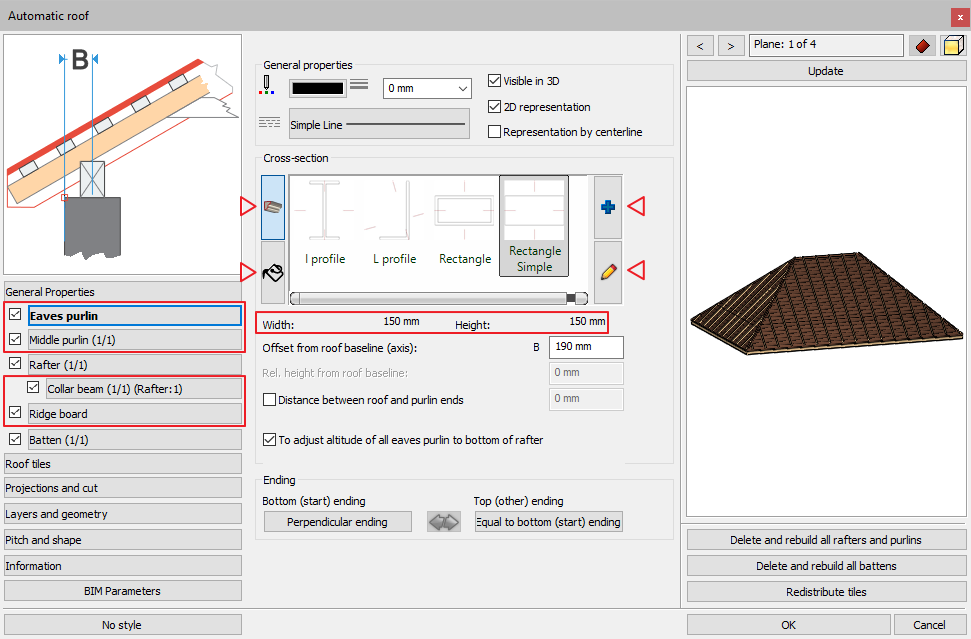
- Structural pieces that are connected to the layers of the roof:
Rafter: in addition to the above, the adjustment of the axis distance of the beams, the adjustment of the connection between the rafter and the eaves purlin, and which layer it is connected to are displayed. You can also set the perpendicular offset relative to the layer.

Batten: you can set the axis distance of the laths, its place and the layer it is connected to. You can also set the perpendicular offset relative to the layers.
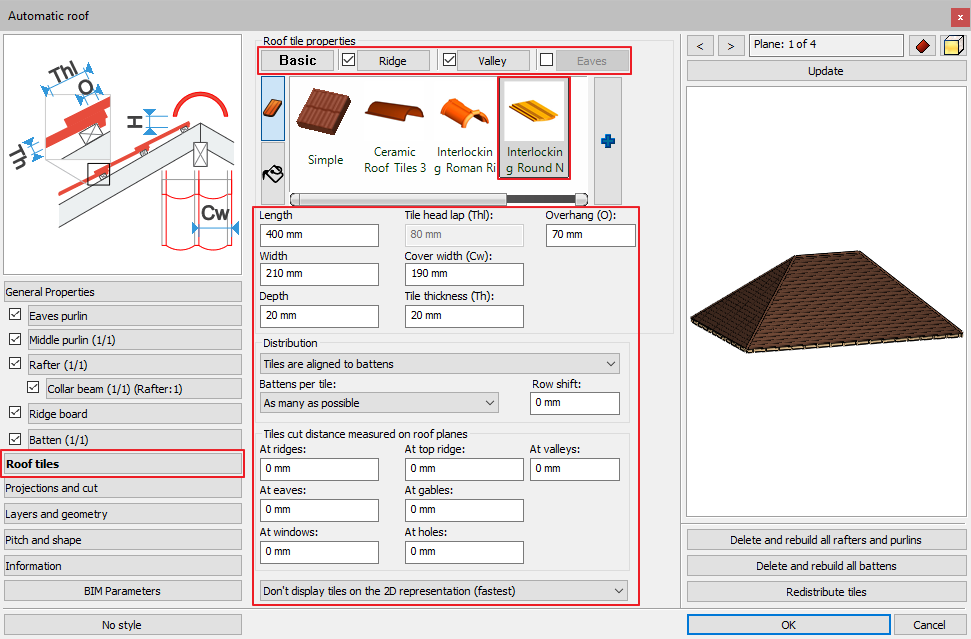
8, On the Roof tiles tab you can select unique tiles with more settings. You can set this way their size and place too. You can activate or deactivate the Ridge, Valley and Eaves on this tab as well. The tiles are displayed in simplified mode by default, see section 12 for how to change them.
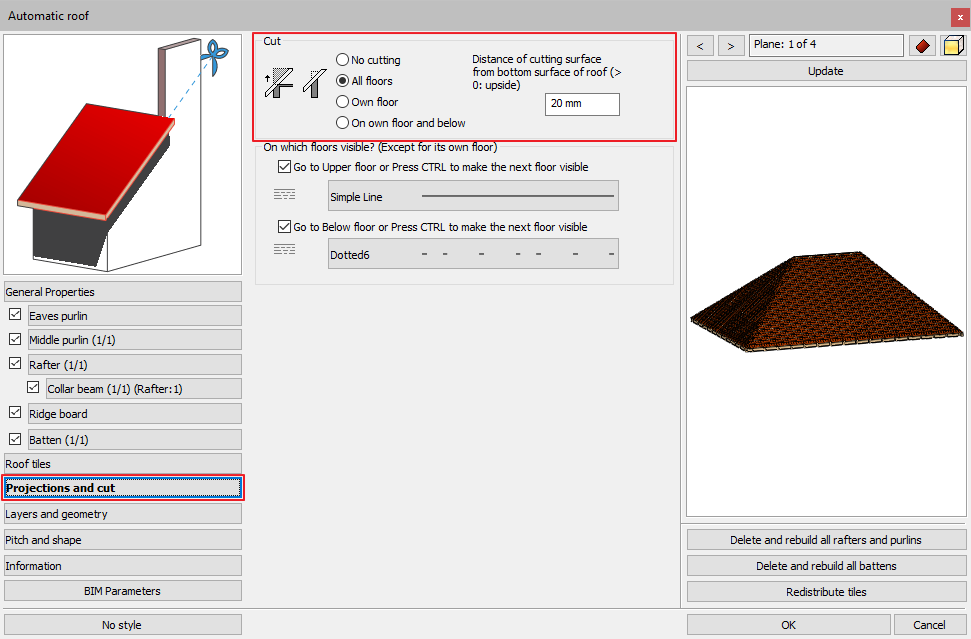
9, On the Projections and cut tab you can set which leves the roof cuts walls and what distance from the bottom line of the roof (this is useful if some layers don't reach the edge of the roof).
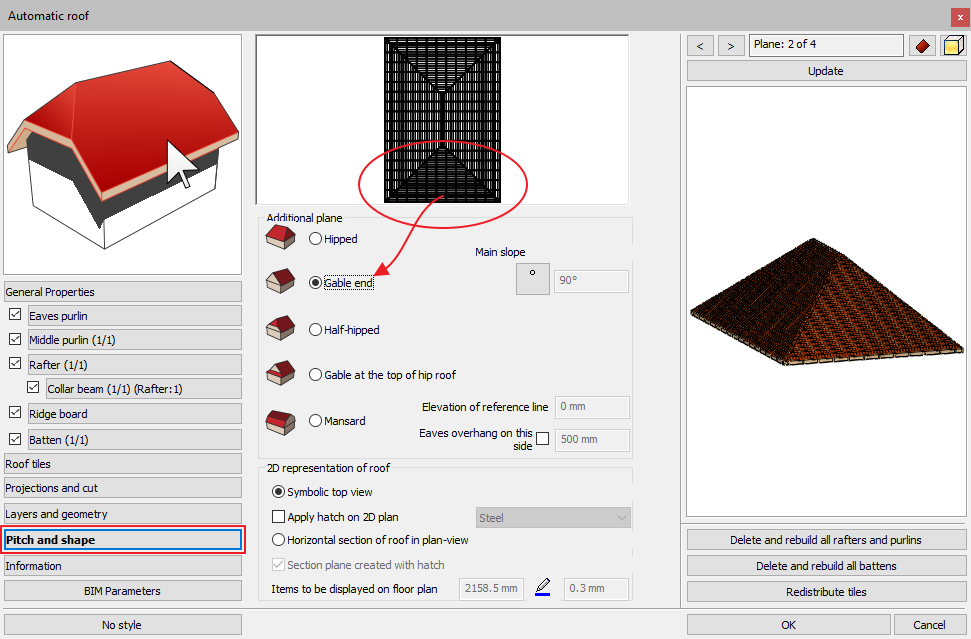
10, On the Pitch and shape tab you can set for each individual roof plane their shape and slope.
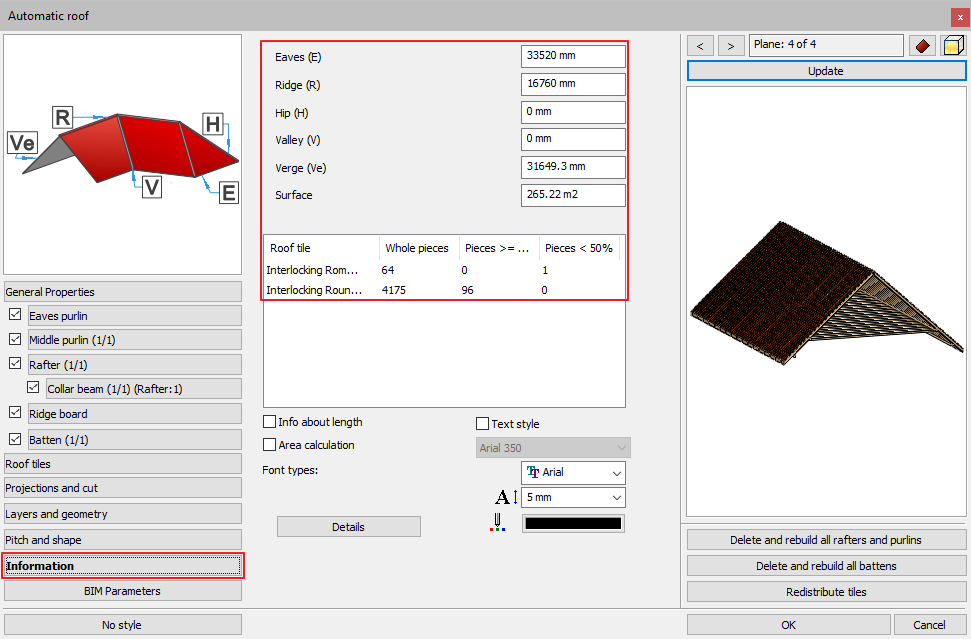
11, On the Information tab the general properties of the roof are displayed. Also, if you set custom tiles for the roof, the program automatically calculates the quantity needed for the whole roof.
12, By default, the roof is displayed in a simplified mode in the 3D view. Change it in the Muild 3D model option: select the Display full roof tiles option from the drop-down menu.
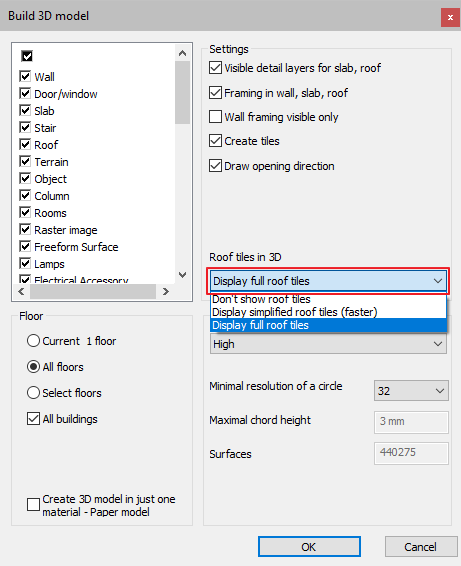
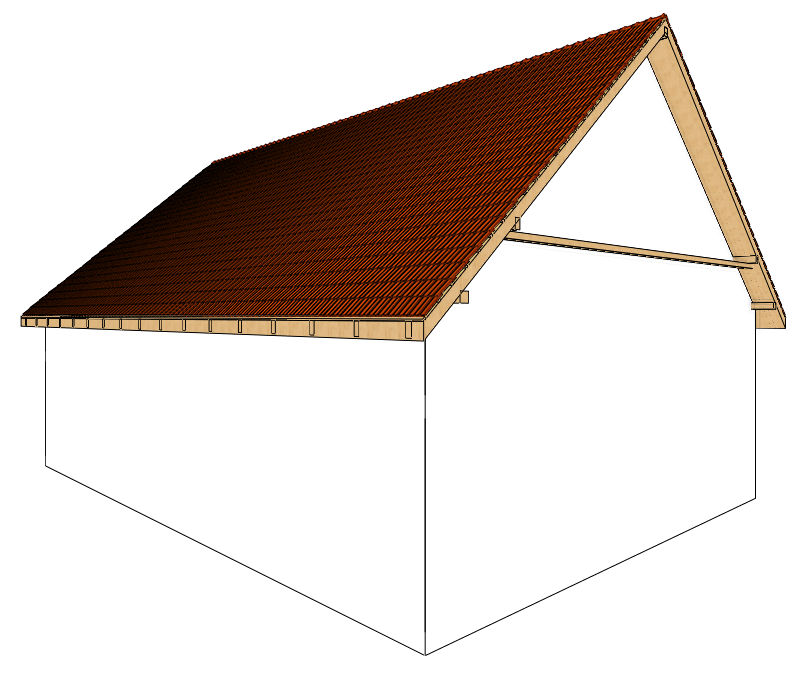
13, By clicking on the OK button, the program will automatically rebuild the 3D model.