With the drawing tools you can create countless 2D shapes, which can be handled in groups, described in details in this article.
With groups, you can create various 2D elements that you can save to the library and access in any of your projects. The different functions of the groups are presented through the creation of a plot stamp.
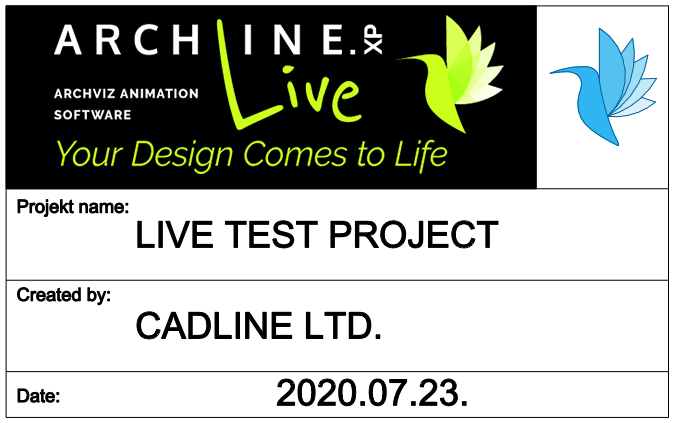
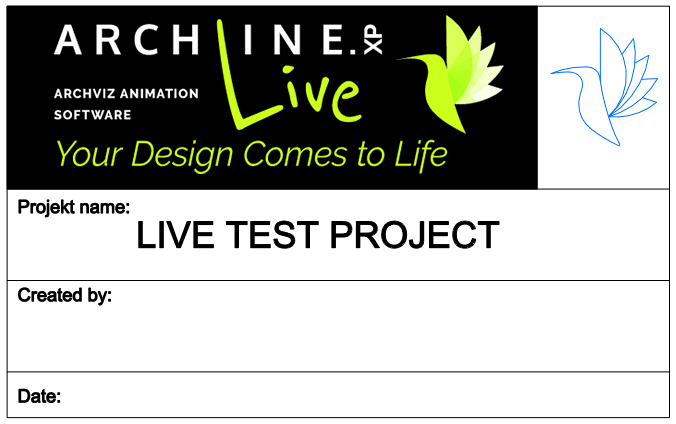
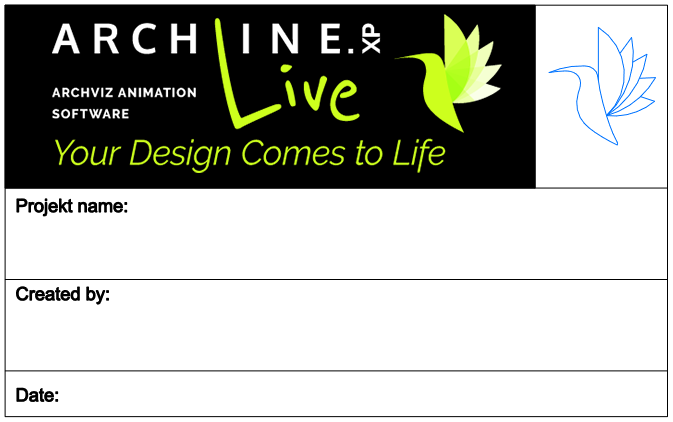
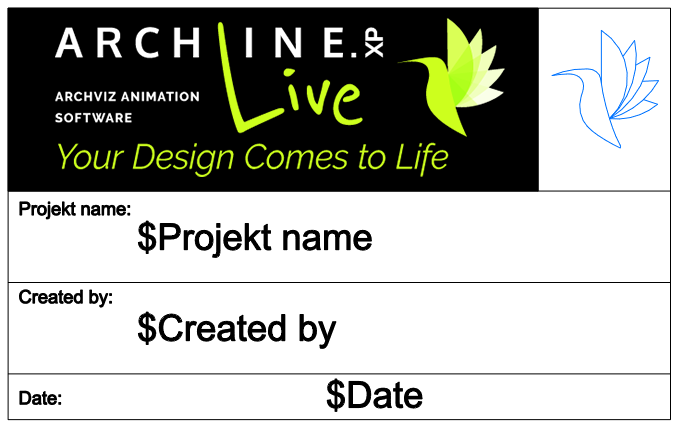
1, Drawing the group: with the functions of the Drafting tab you can draw the required elements, fill the closed areas with hatches, then place any image (ARCHLine.XP LIVE) and other 2D groups (blue hummingbird) on the plot stamp.
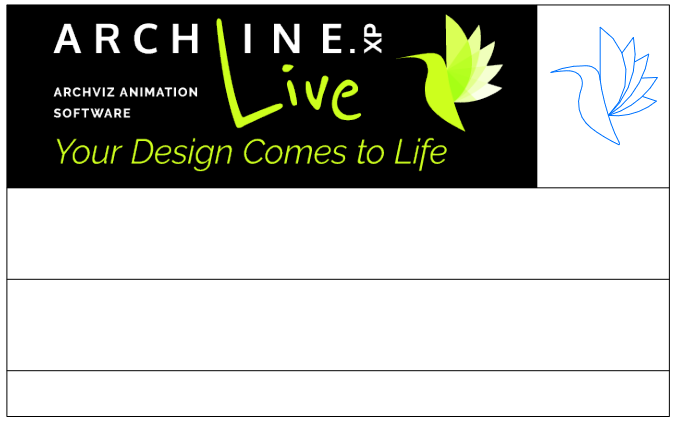
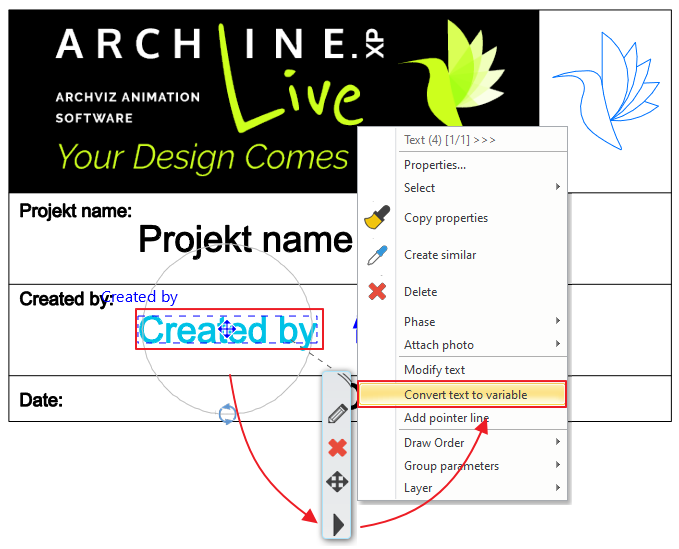
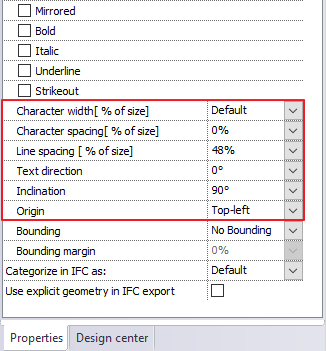
2, Placing texts: with the Drafting / Text function place some texts on the plot stamp. These texts can be converted to variables, because of which you will be able to edit them without editing the group. Also, their values can be found in the plot layout's parameters. Create the titles and the variables. Selecting a text you can change in the properties its appearance and arrangement (left-center-right alignment).
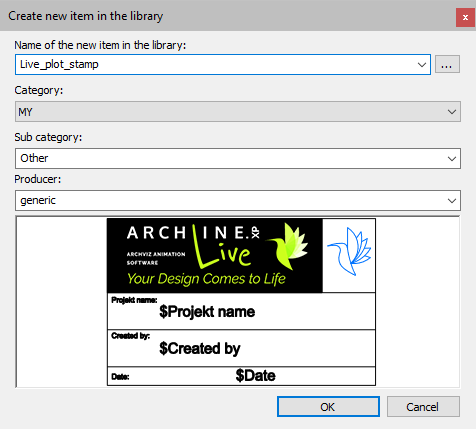
3, Creating groups: select all the elements, that you want to transform into a group, then click on the Drafting / Group / Create group in library and set the reference points. Accept it by pressing Enter, then in the pop-up window set the name and the place of the group in the library.
4, Visible and invisible variables: variables appear on the screen automatically if they contain any text, however they are invisible when not. In the Drafting / Group / Group parameters option you can change it:
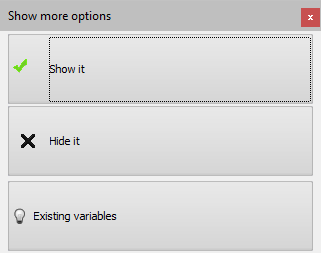
- Show it: it shows all the variables, that contain any text.
- Hide it: it hides all variables independently of their content.
- Existing variables: it shows all of the variables, their content is hidden.
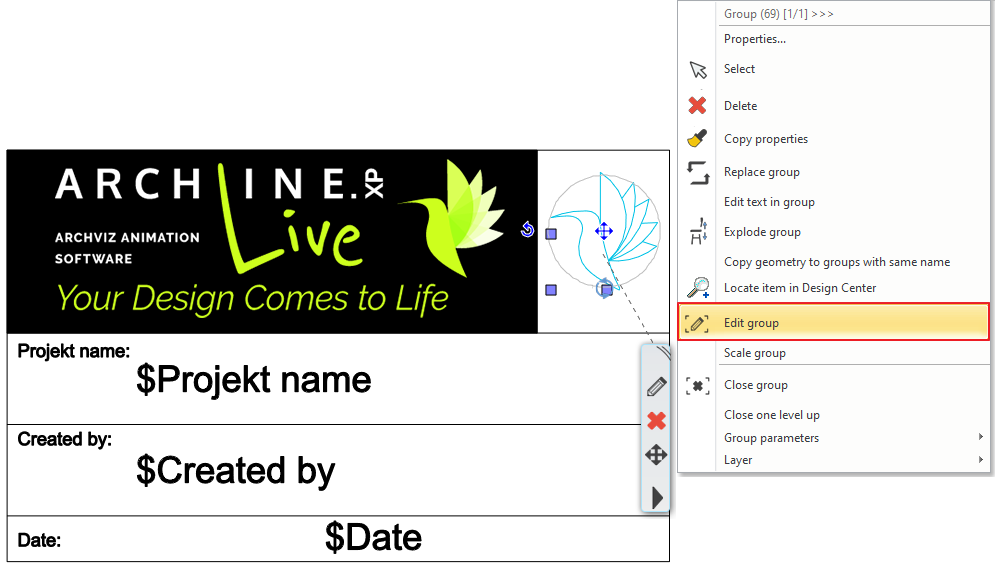
5, Editing the group: this group consists of two layers, let's edit the blue hummingbird. The blue hummingbird is a group within the plot stamp's group, so if we want to edit it, we need to enter the plot stamp and then the blue hummingbird's group as well. You can always get back to the previous level by right clicking on any part of the group and selecting the Close one level up option or exit all of the levels by selecting the Close group option.

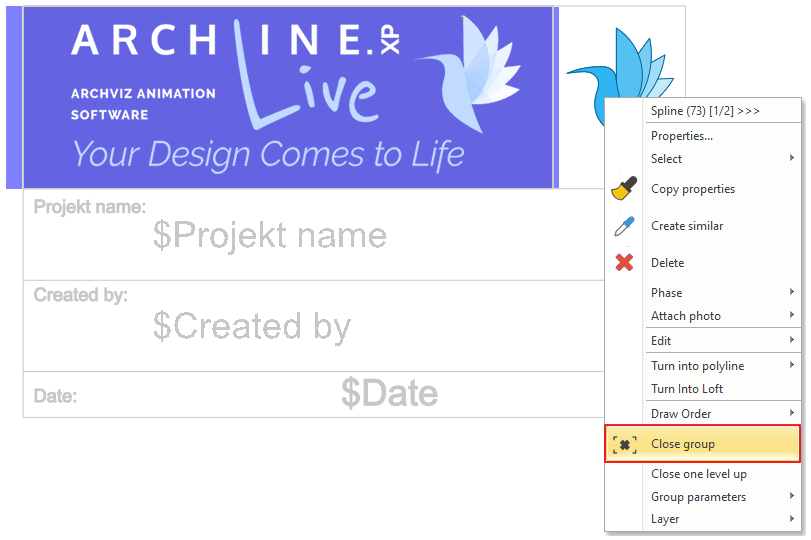
6, Save the edited group: if you save the group into the library as is, the program will add a new level to it automatically. This is why first we need to click on the Explode group option, then select all elements and save it as described in the 3rd point with a new name.